Setup Metrics Collection
Memory Metrics in OneLens allows you to monitor memory usage across your AWS accounts. While the feature is enabled by default in your OneLens tenant, you’ll need to perform a one-time setup in each AWS account where you want to start collecting memory metrics.
Steps to Connect an AWS Account
Log in to OneLens UI.
Navigate to Integrations from the left sidebar.
Under Cloud Integration, select AWS and click View Details.
Switch to the Memory Metrics tab.
You'll see a list of AWS accounts along with their current connection status.

Click Connect next to the account you want to set up.
A dialog box appears with two setup ways:
Use this when you want another team member to complete the setup.
You’ll be prompted to enter the user's email address and optionally add a comment (e.g., “Please complete memory metrics setup for this account”).
OneLens will send the setup instructions to the specified email.
Use this when you want to perform the setup directly.
You’ll be guided through the exact setup steps based on your AWS environment.
Setup Options Based on Your AWS Environment
Depending on your AWS environment, you will need to follow one of the setup paths outlined below:
1. Master–Child Setup (AWS Organizations)
Use this method when you want to track memory metrics across an entire AWS Organization with one configuration step on the master account.
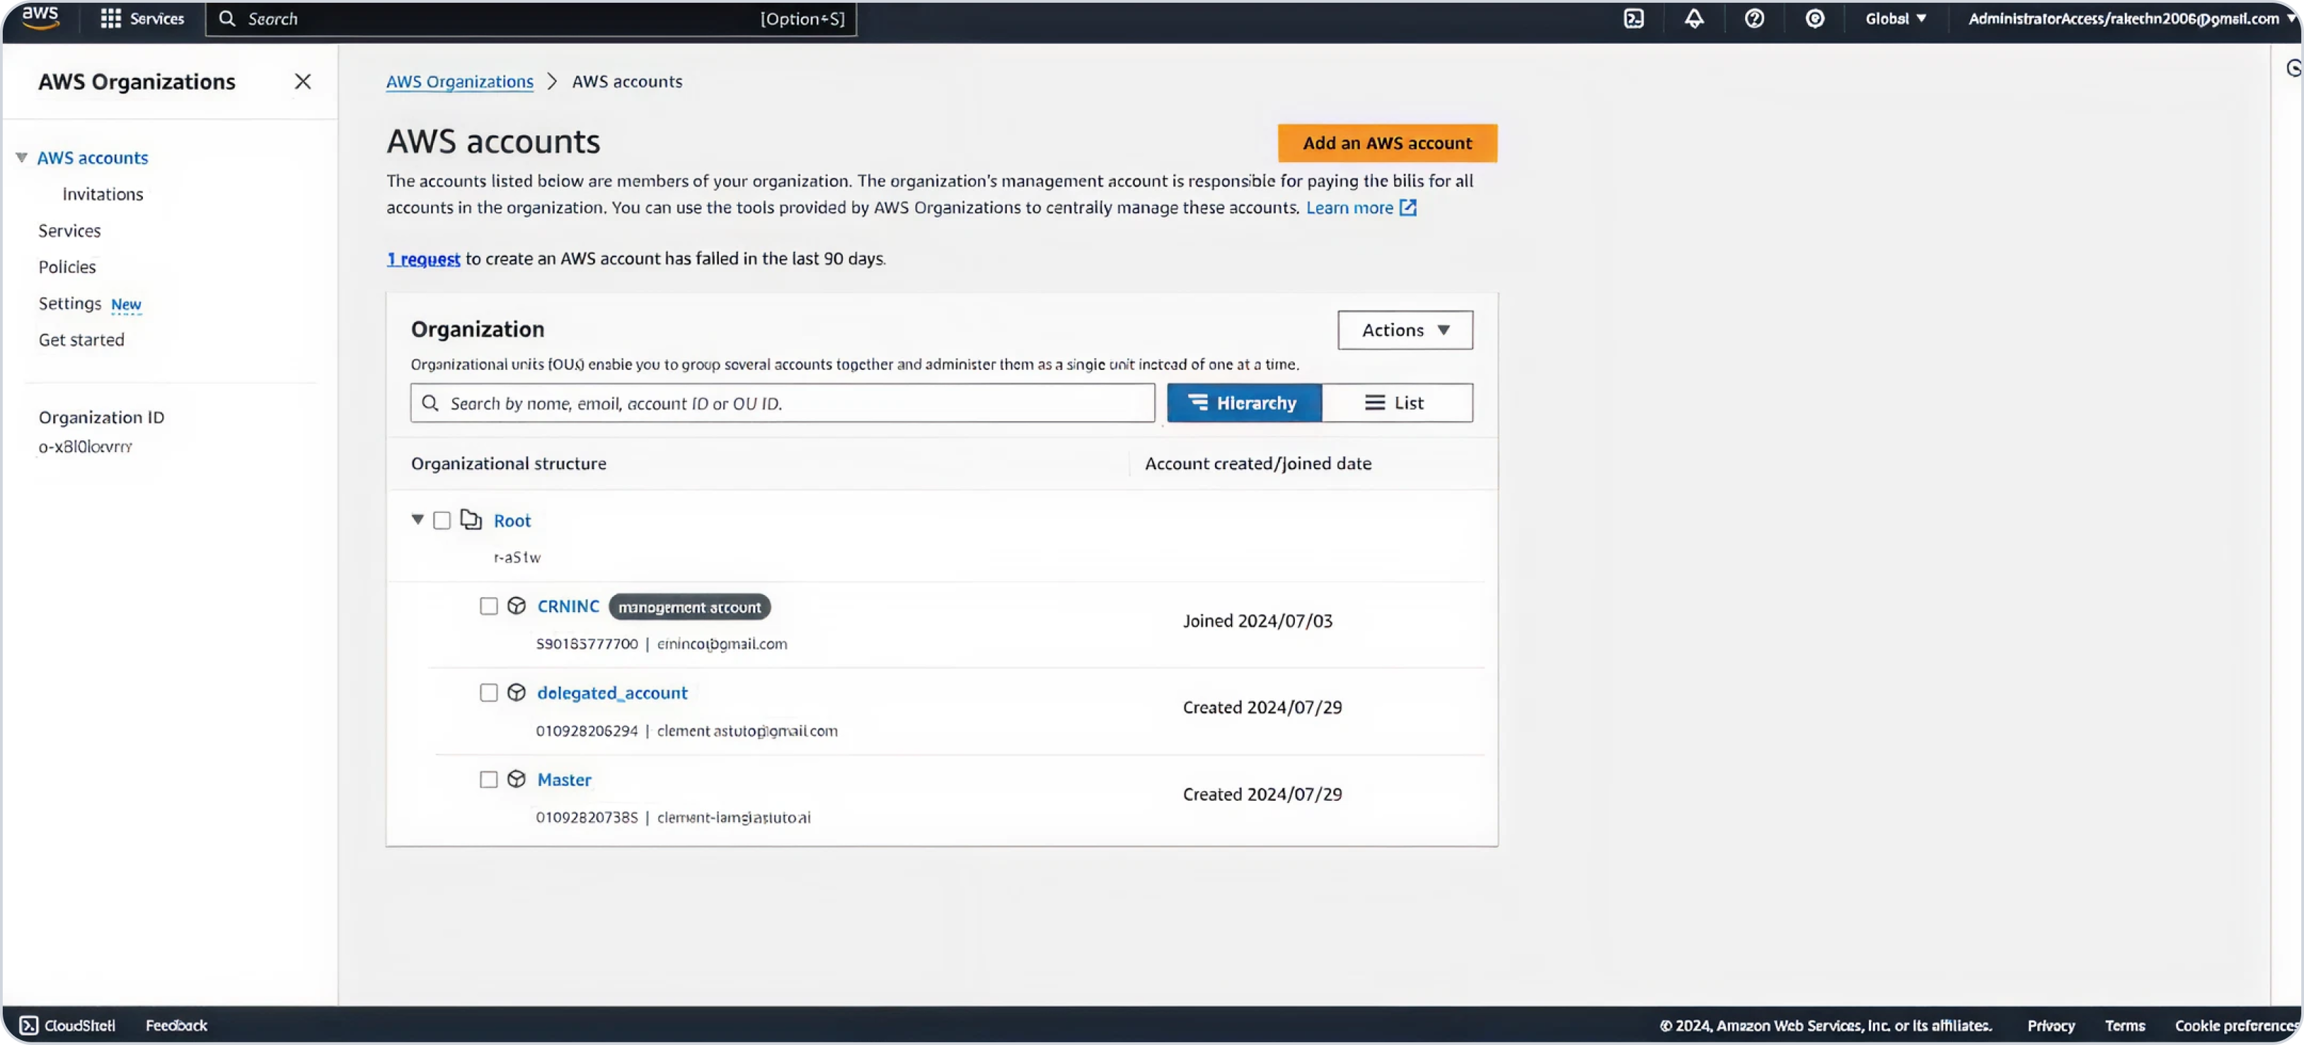
Within your AWS Organization, assign a delegate account that will manage deployments across all child accounts using AWS Systems Manager and StackSets.
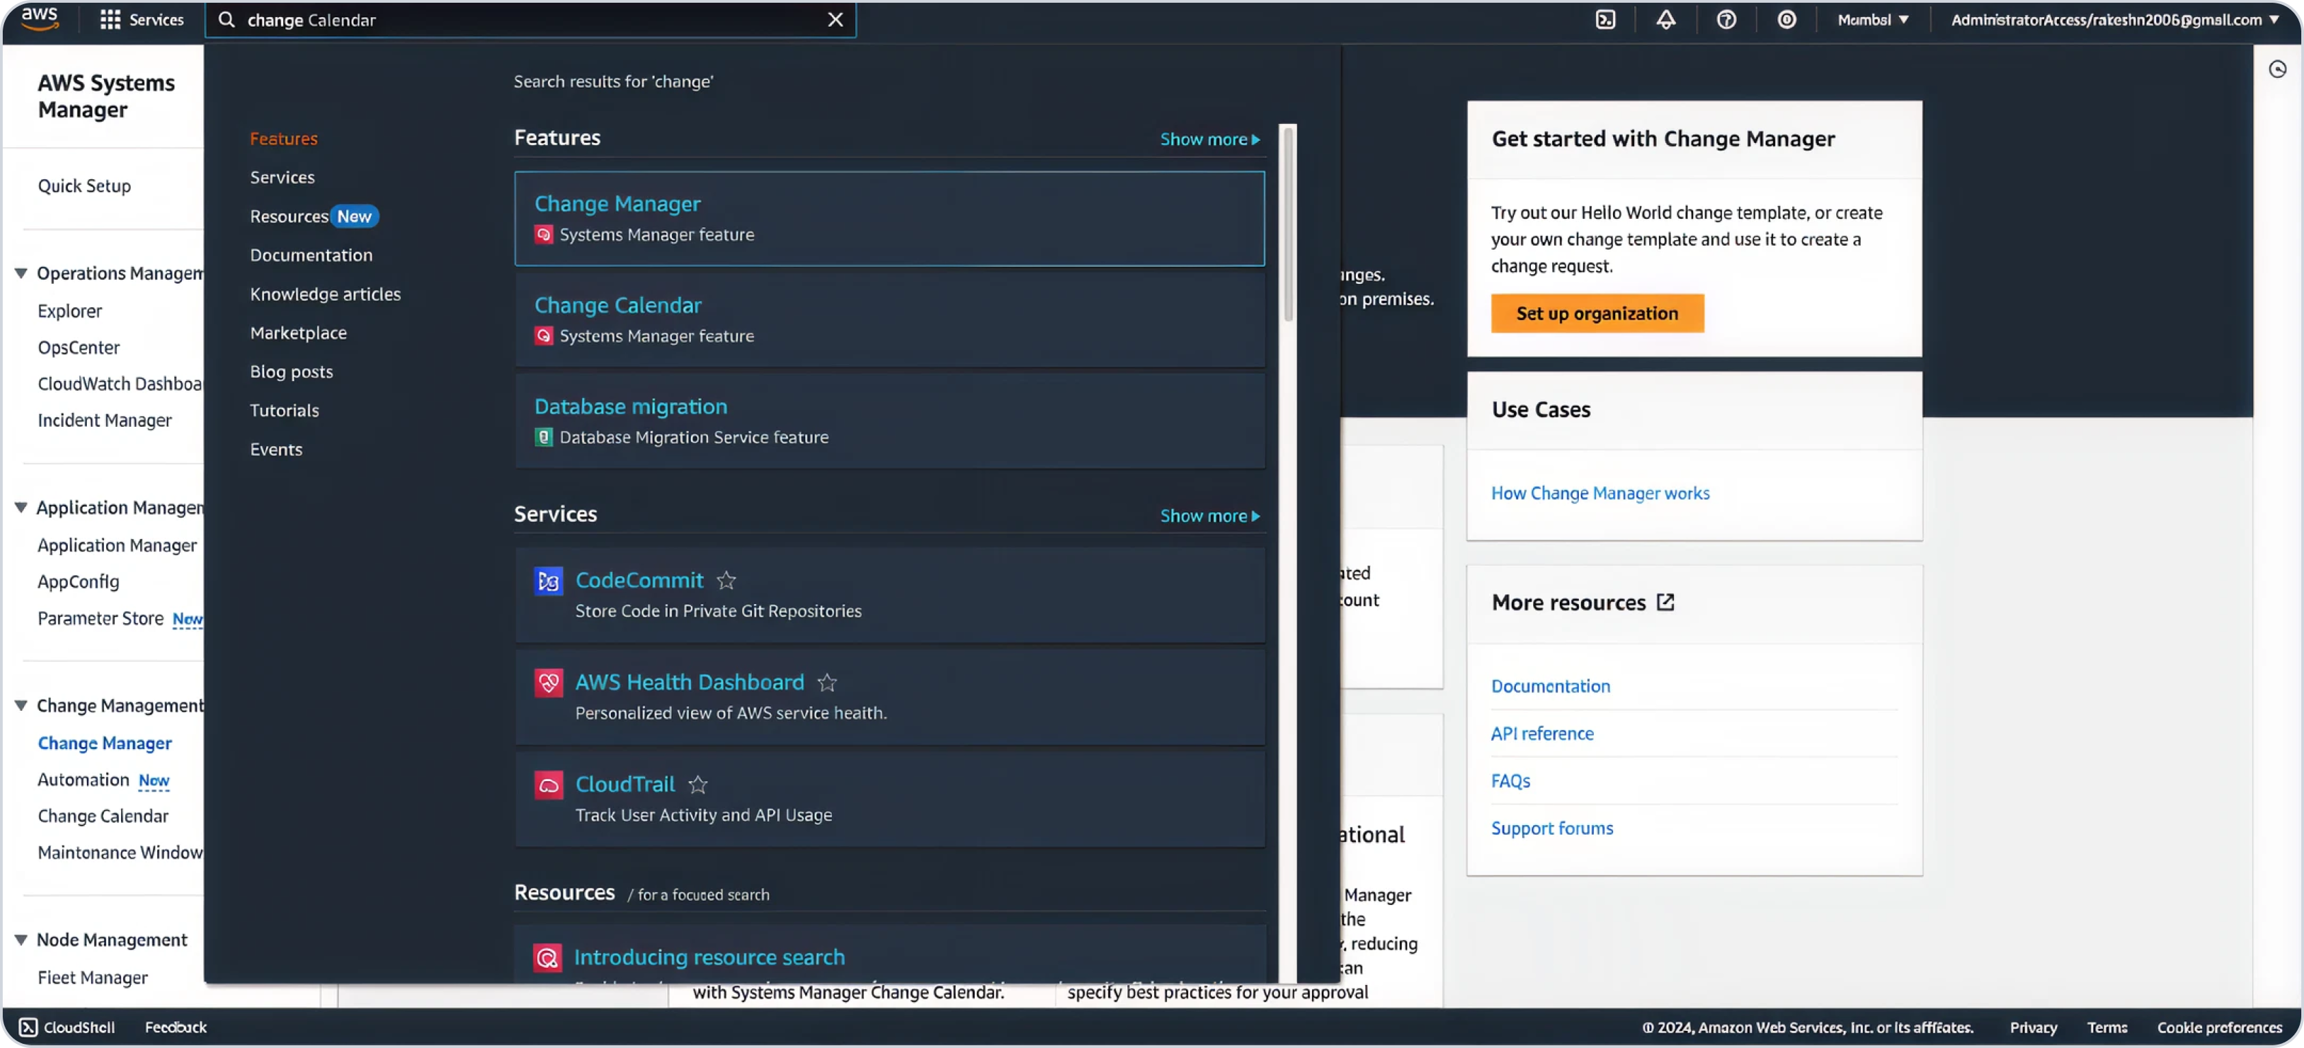
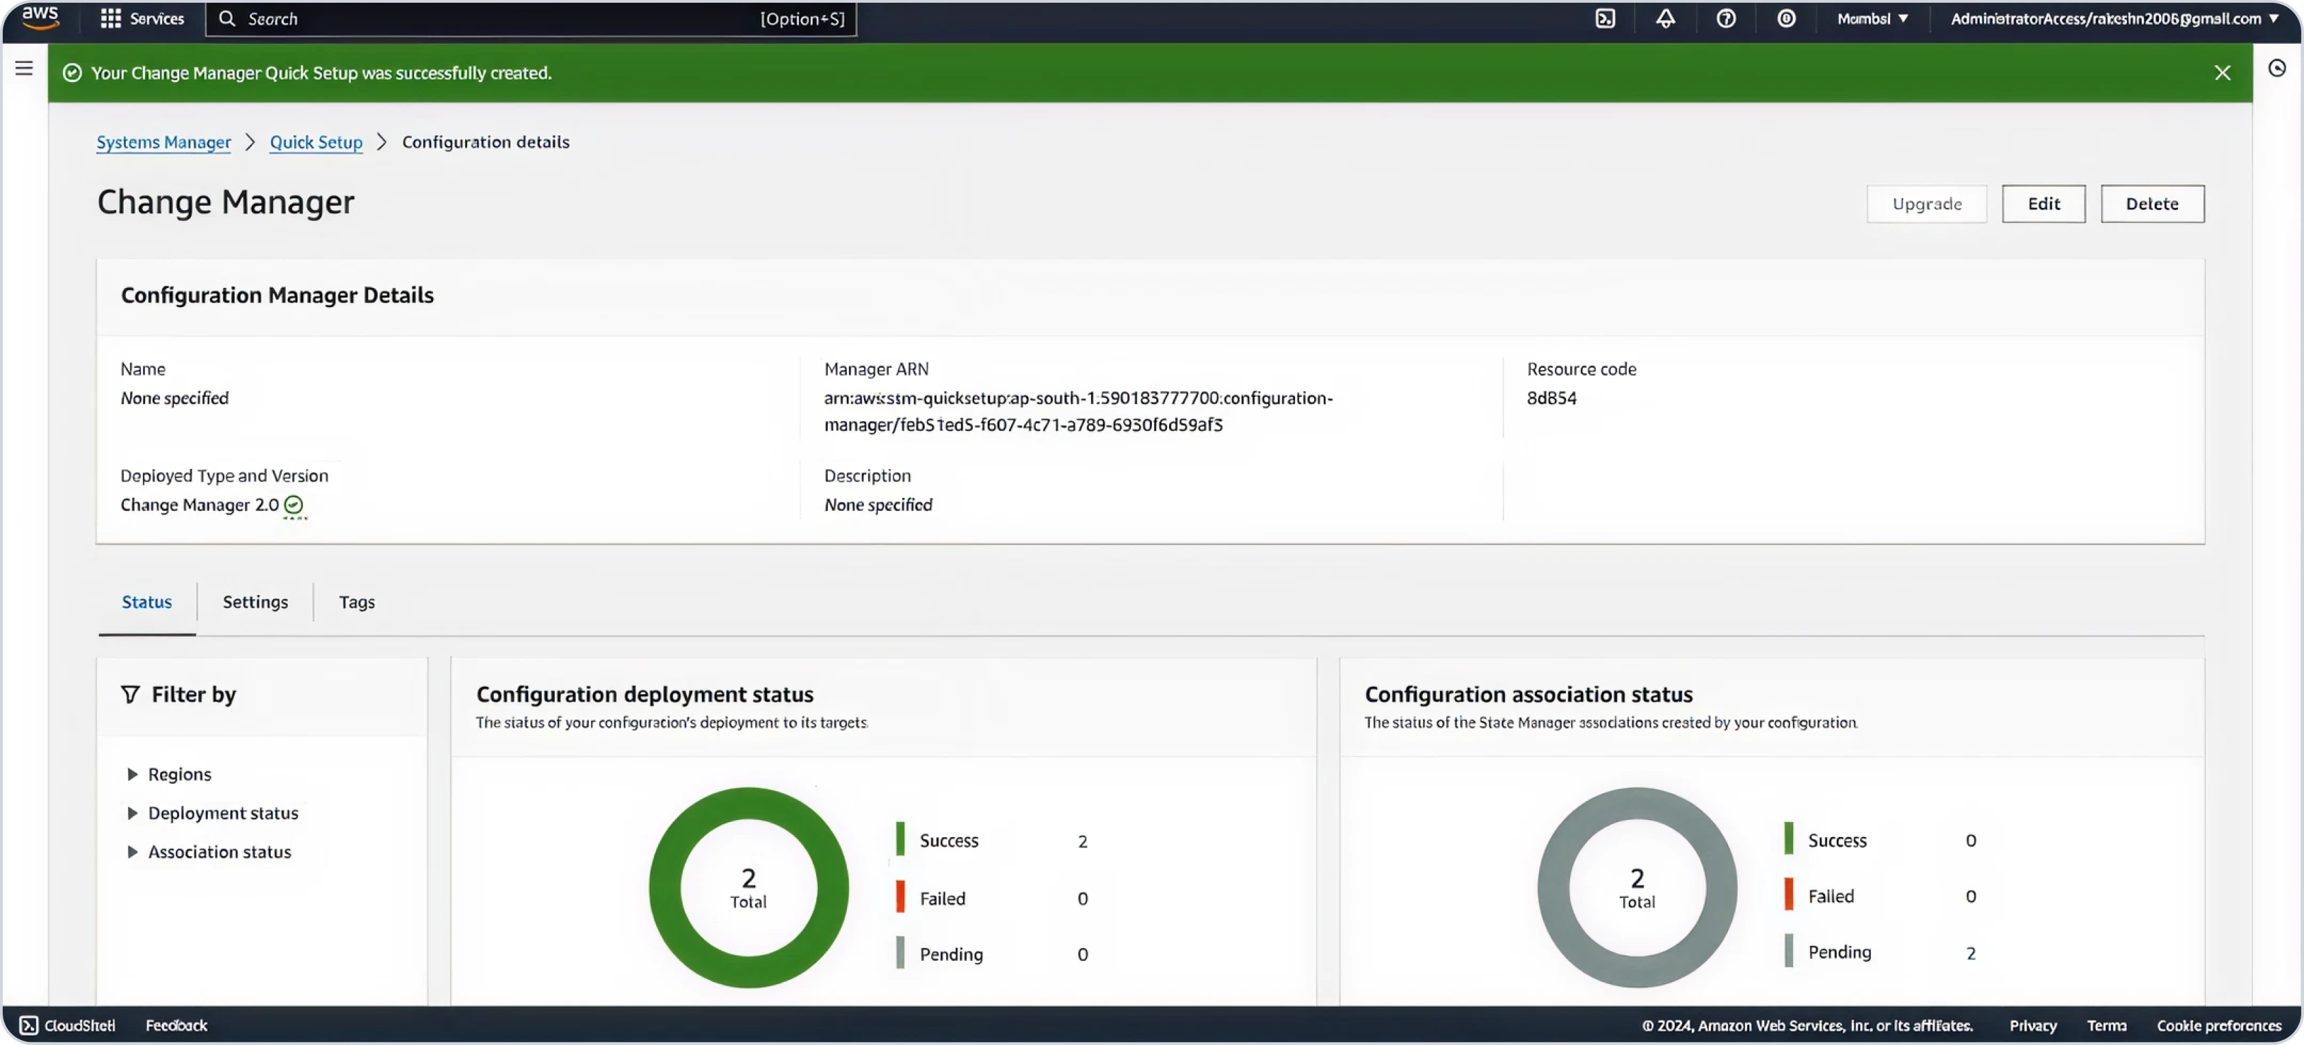
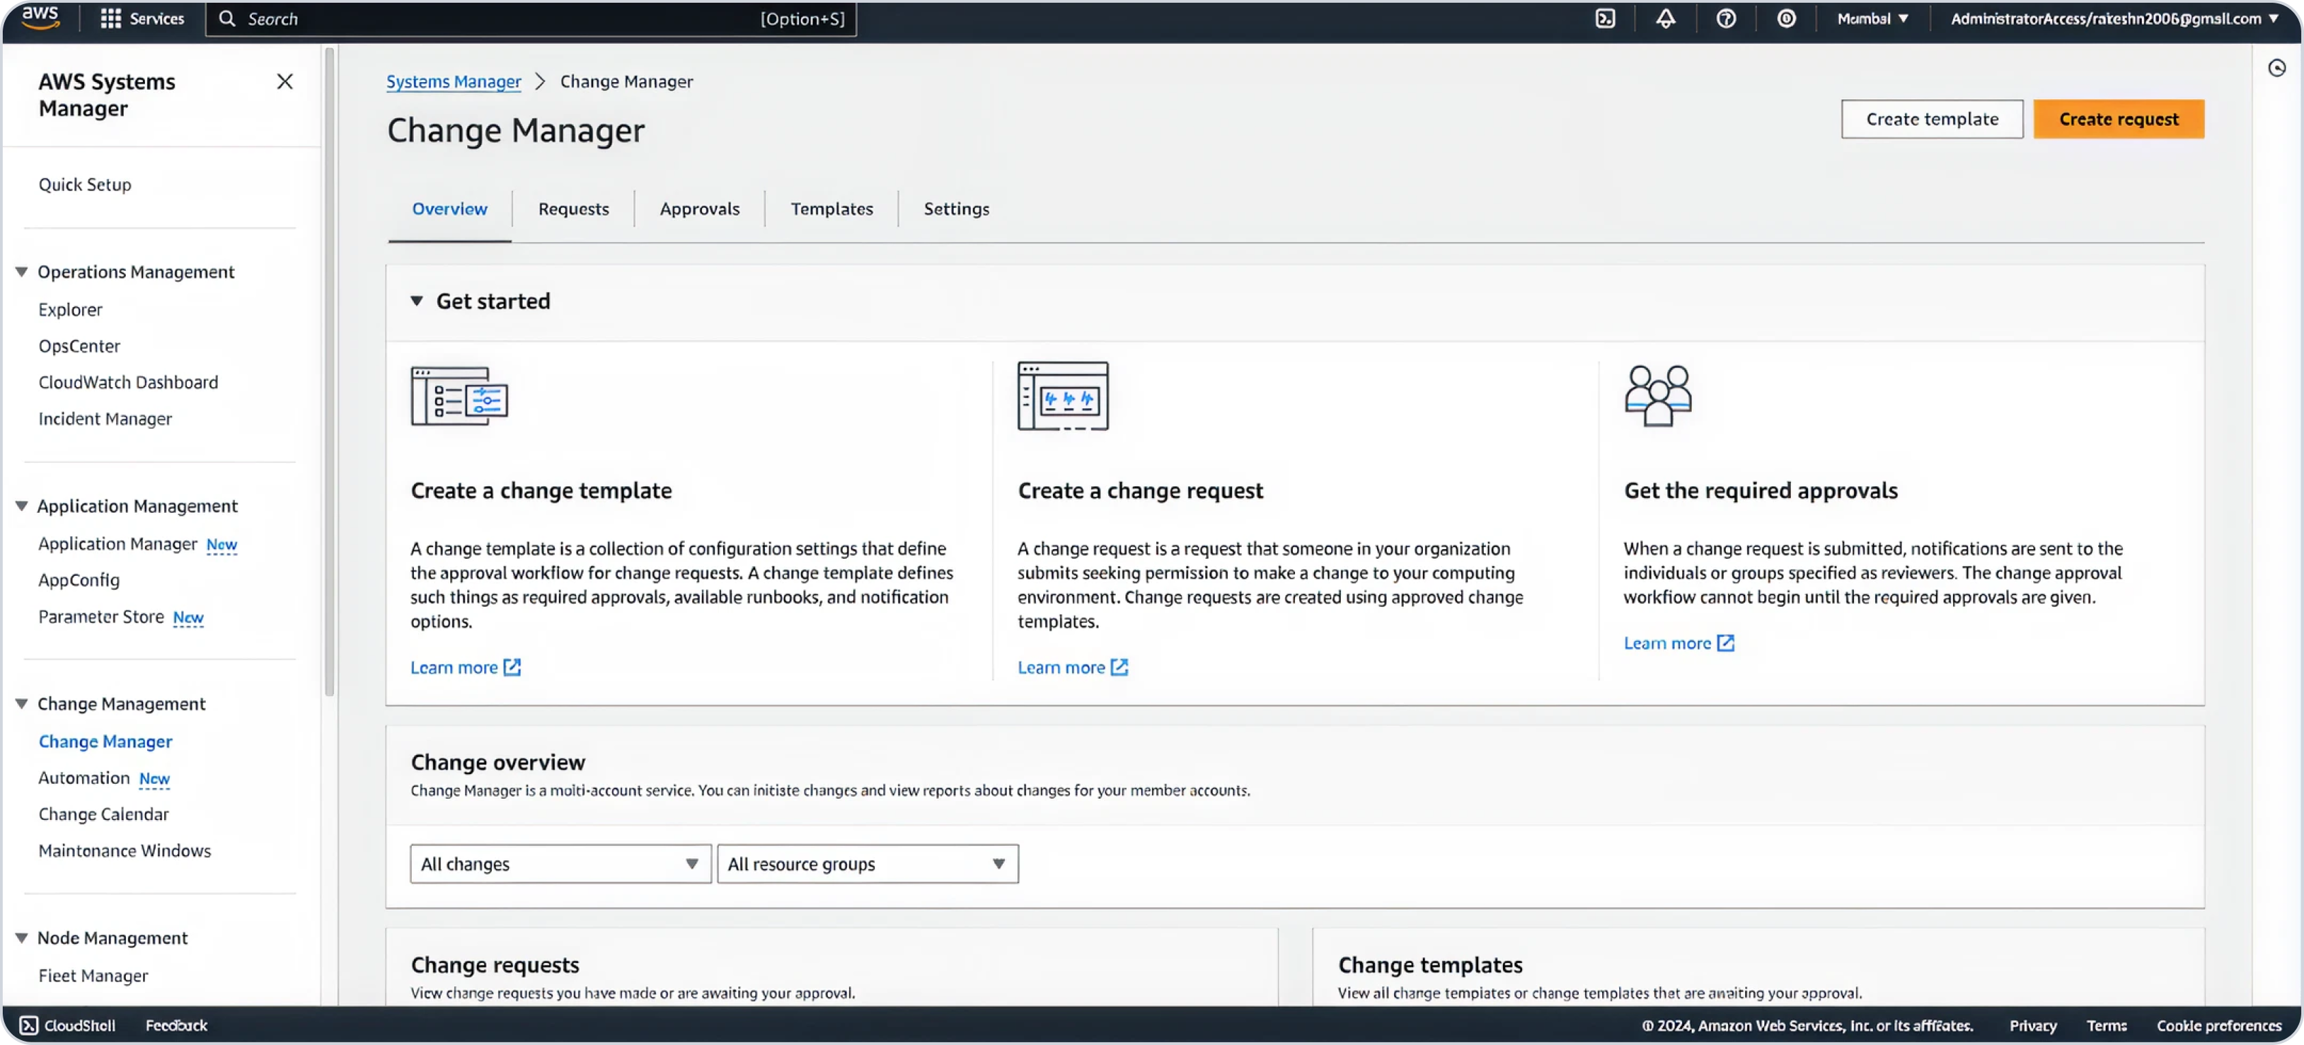
In the delegate account, activate AWS Change Manager to allow auditable and secure execution of automated deployments.
Deploy CloudFormation Template as a StackSet for Child Accounts
Use StackSets to roll out the same configuration to all child accounts (including master account).
Child CFT Link:
Deploy CloudFormation Template as a Stack
Deploy the provided CloudFormation Template (CFT) in the delegate account to configure required IAM roles and data collection setup.
Master CFT Link:
Output of CFT Installation
IAM roles required for SSM automation and data collection are created.
Check Permissions Required
Runbooks for enabling/disabling memory metrics are registered in AWS Change Manager.
OneLens is now set to manage memory metrics automatically.
2. Individual Account Setup
Use this if you prefer to configure memory metrics on a per-account basis or do not use AWS Organizations.
Enable AWS Change Manager within the selected account to safely manage and track CloudFormation deployments.
Deploy CloudFormation Template as a Stack
Deploy the provided master CloudFormation Template (CFT) to configure the account for memory metrics collection.
Master CFT Link:
Repeat these steps for each account you want to track independently.
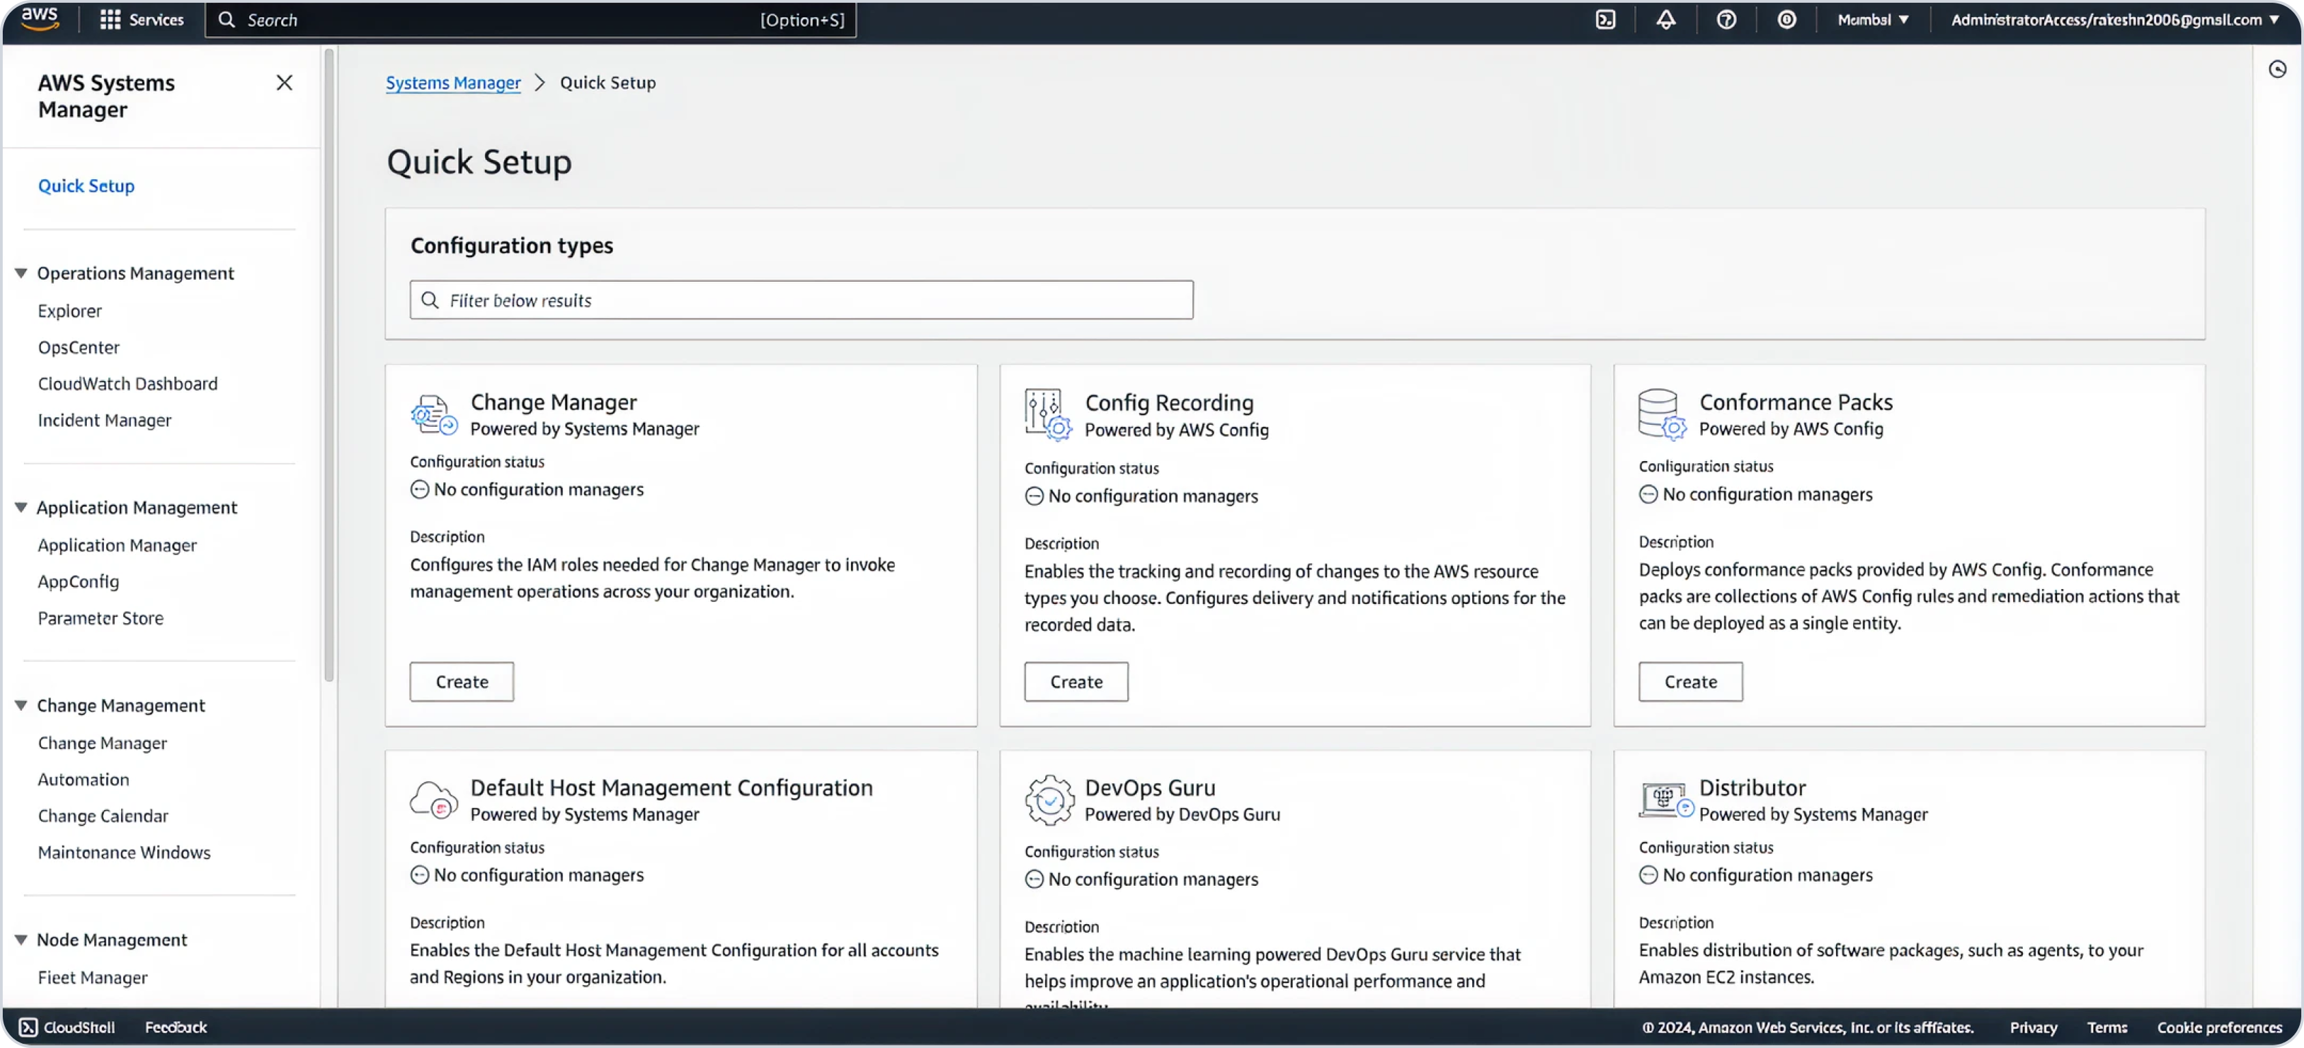
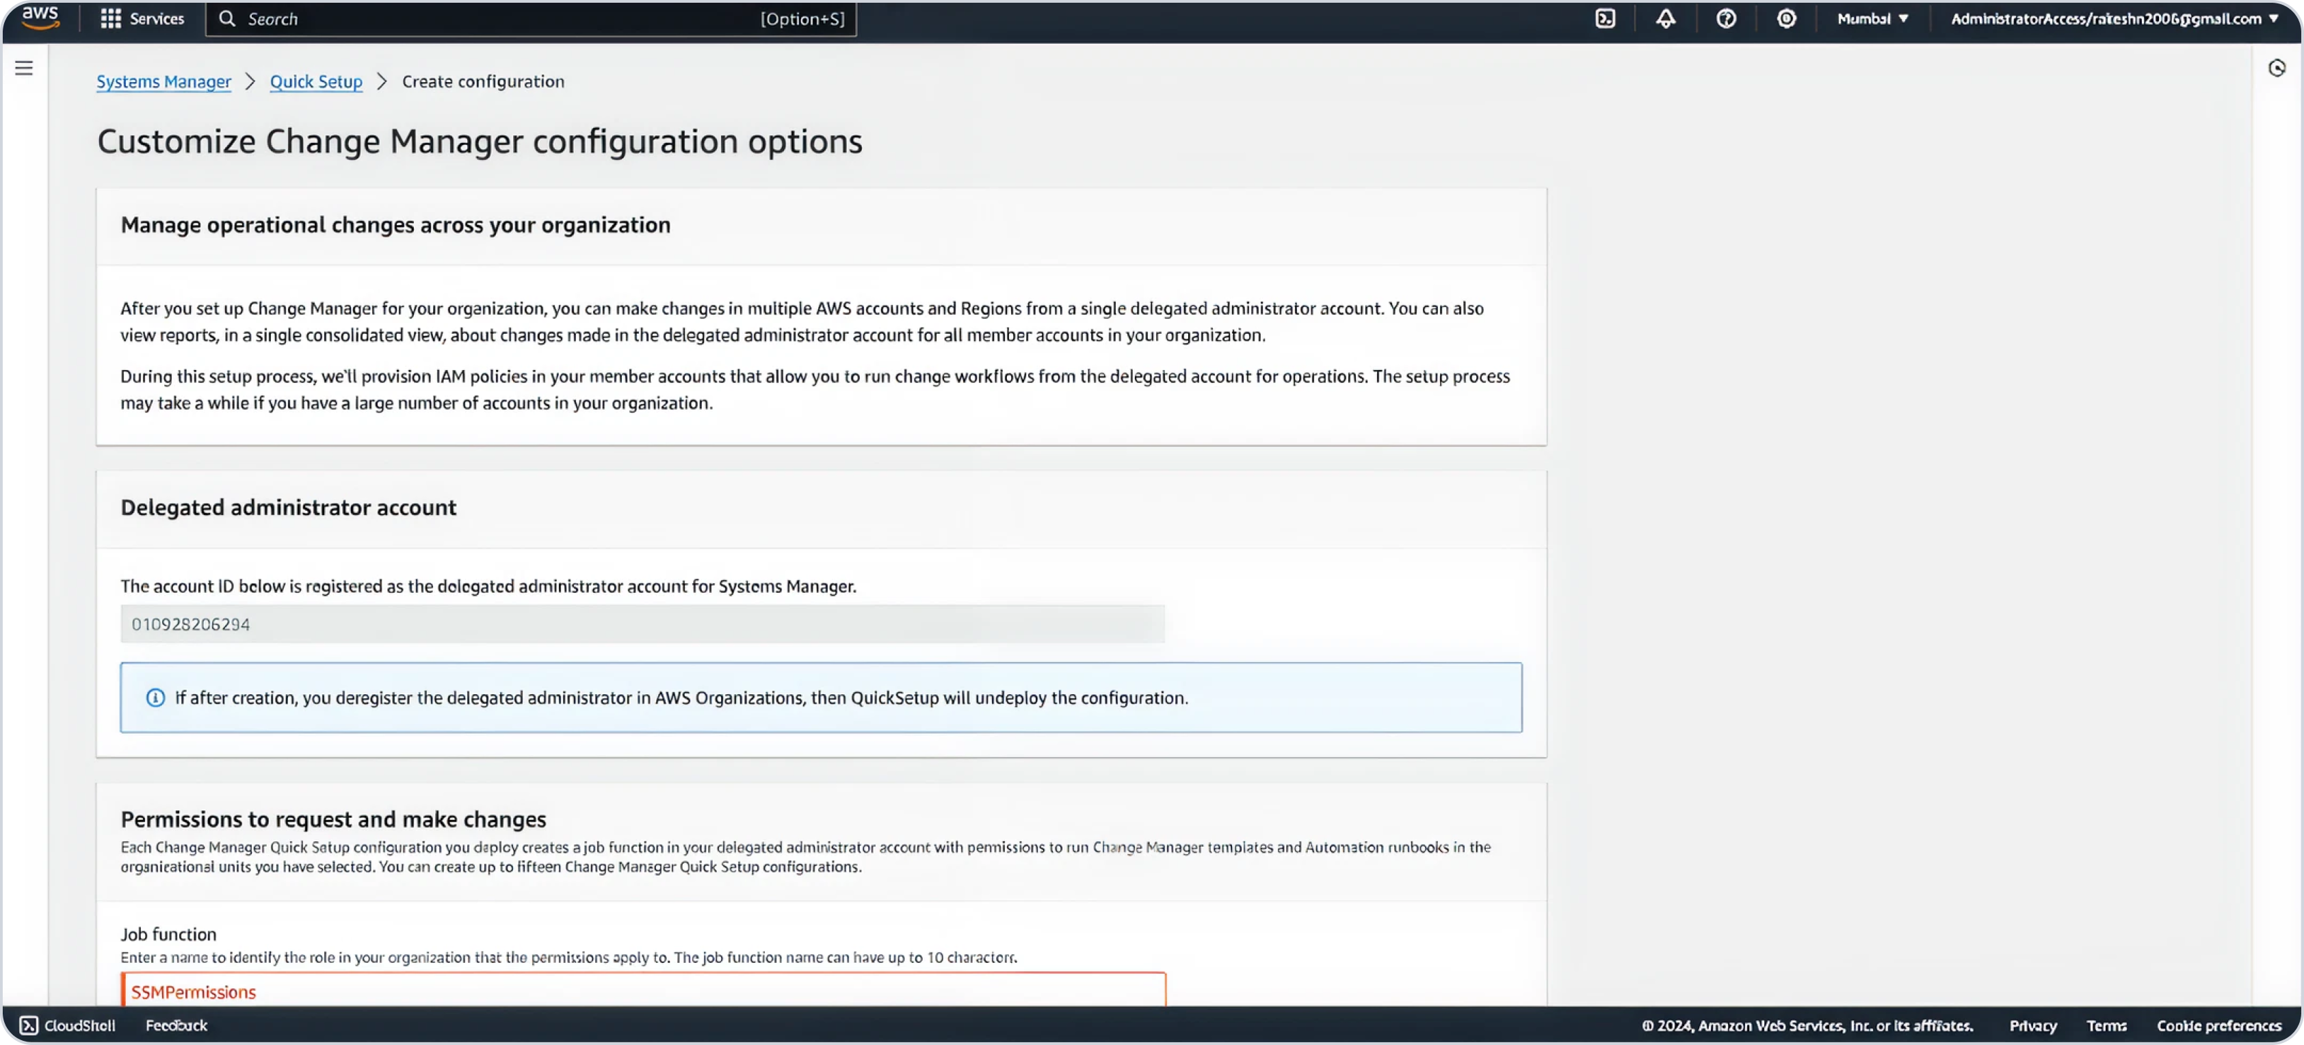
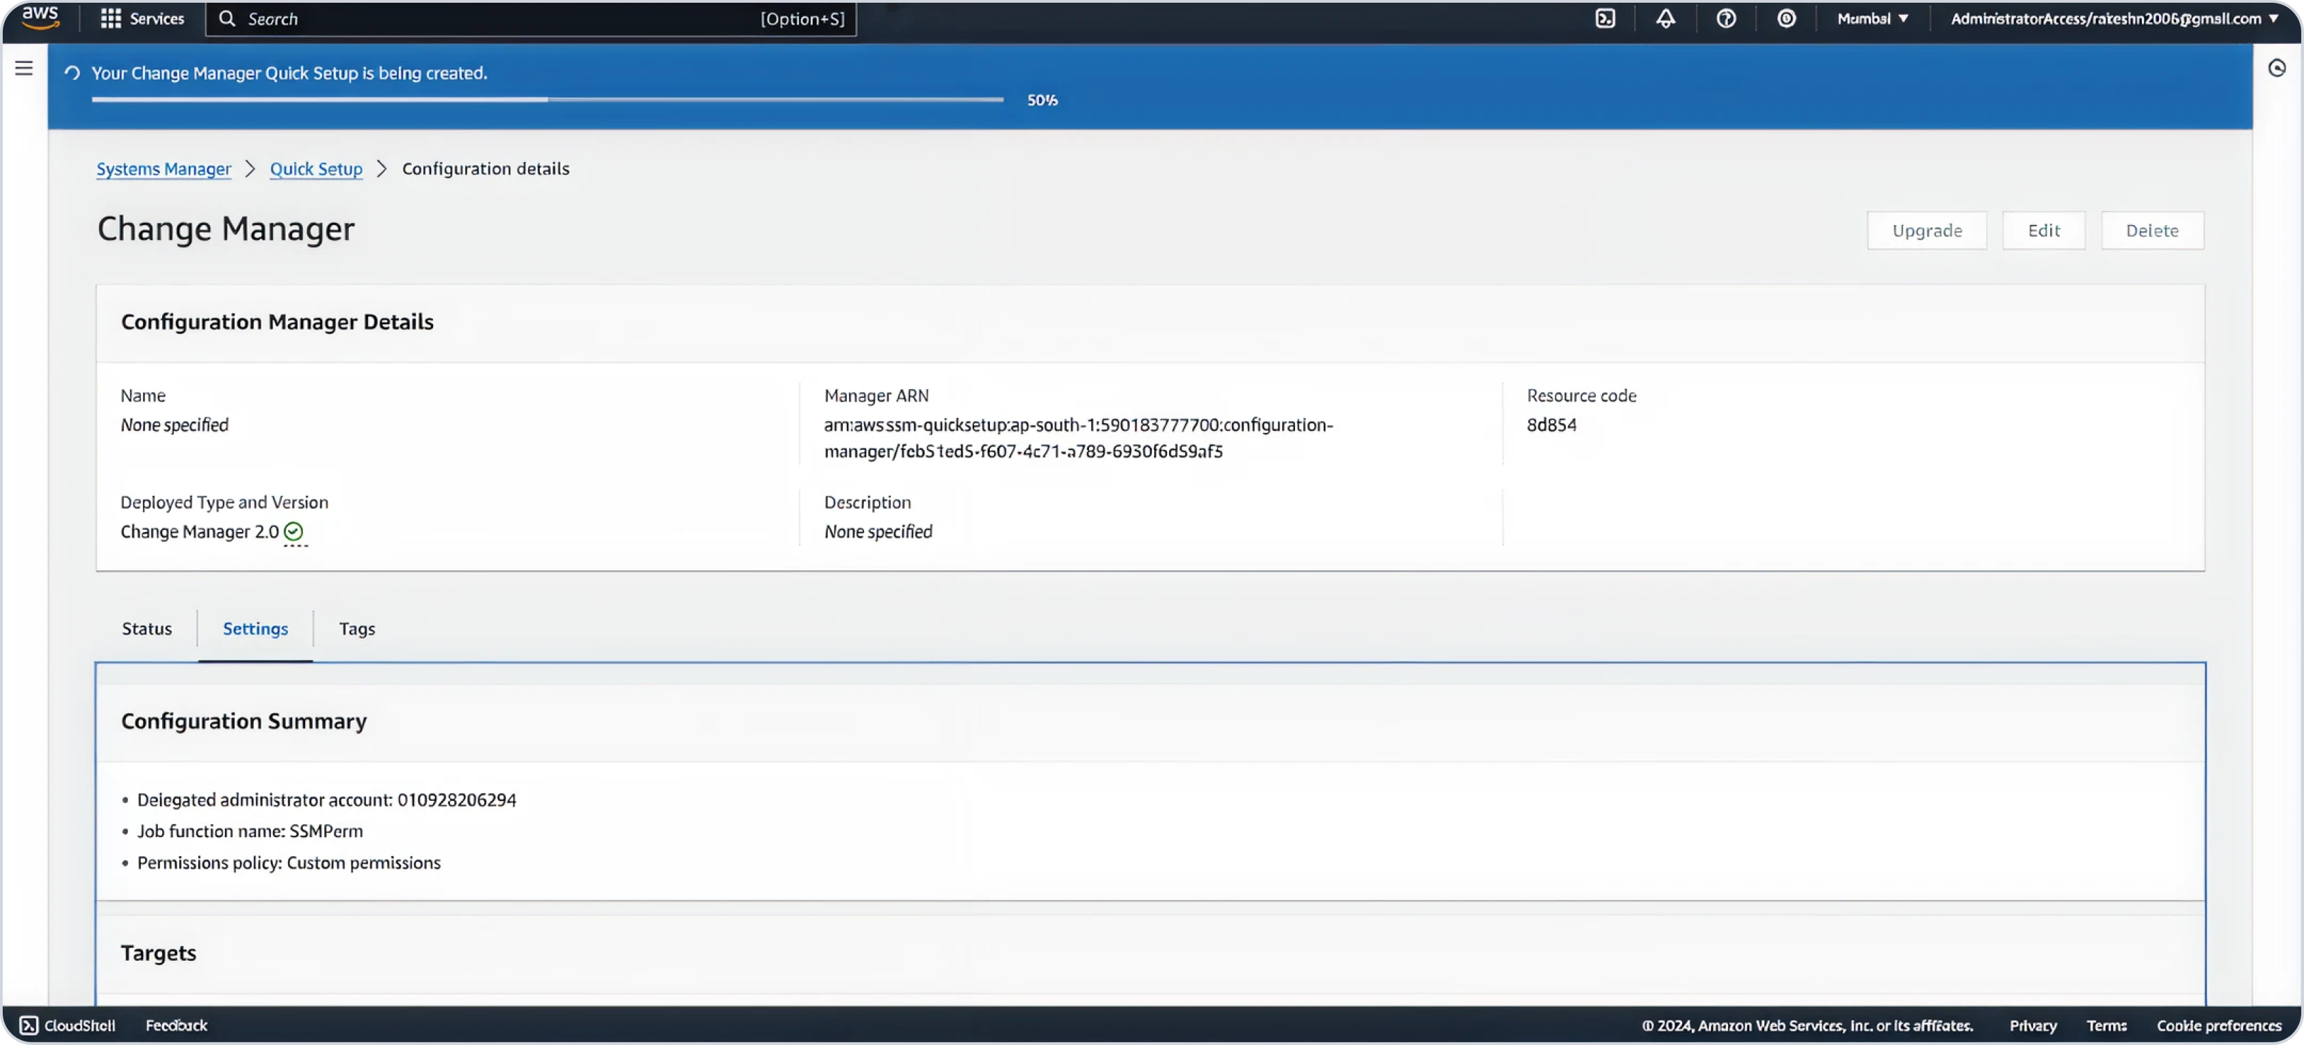
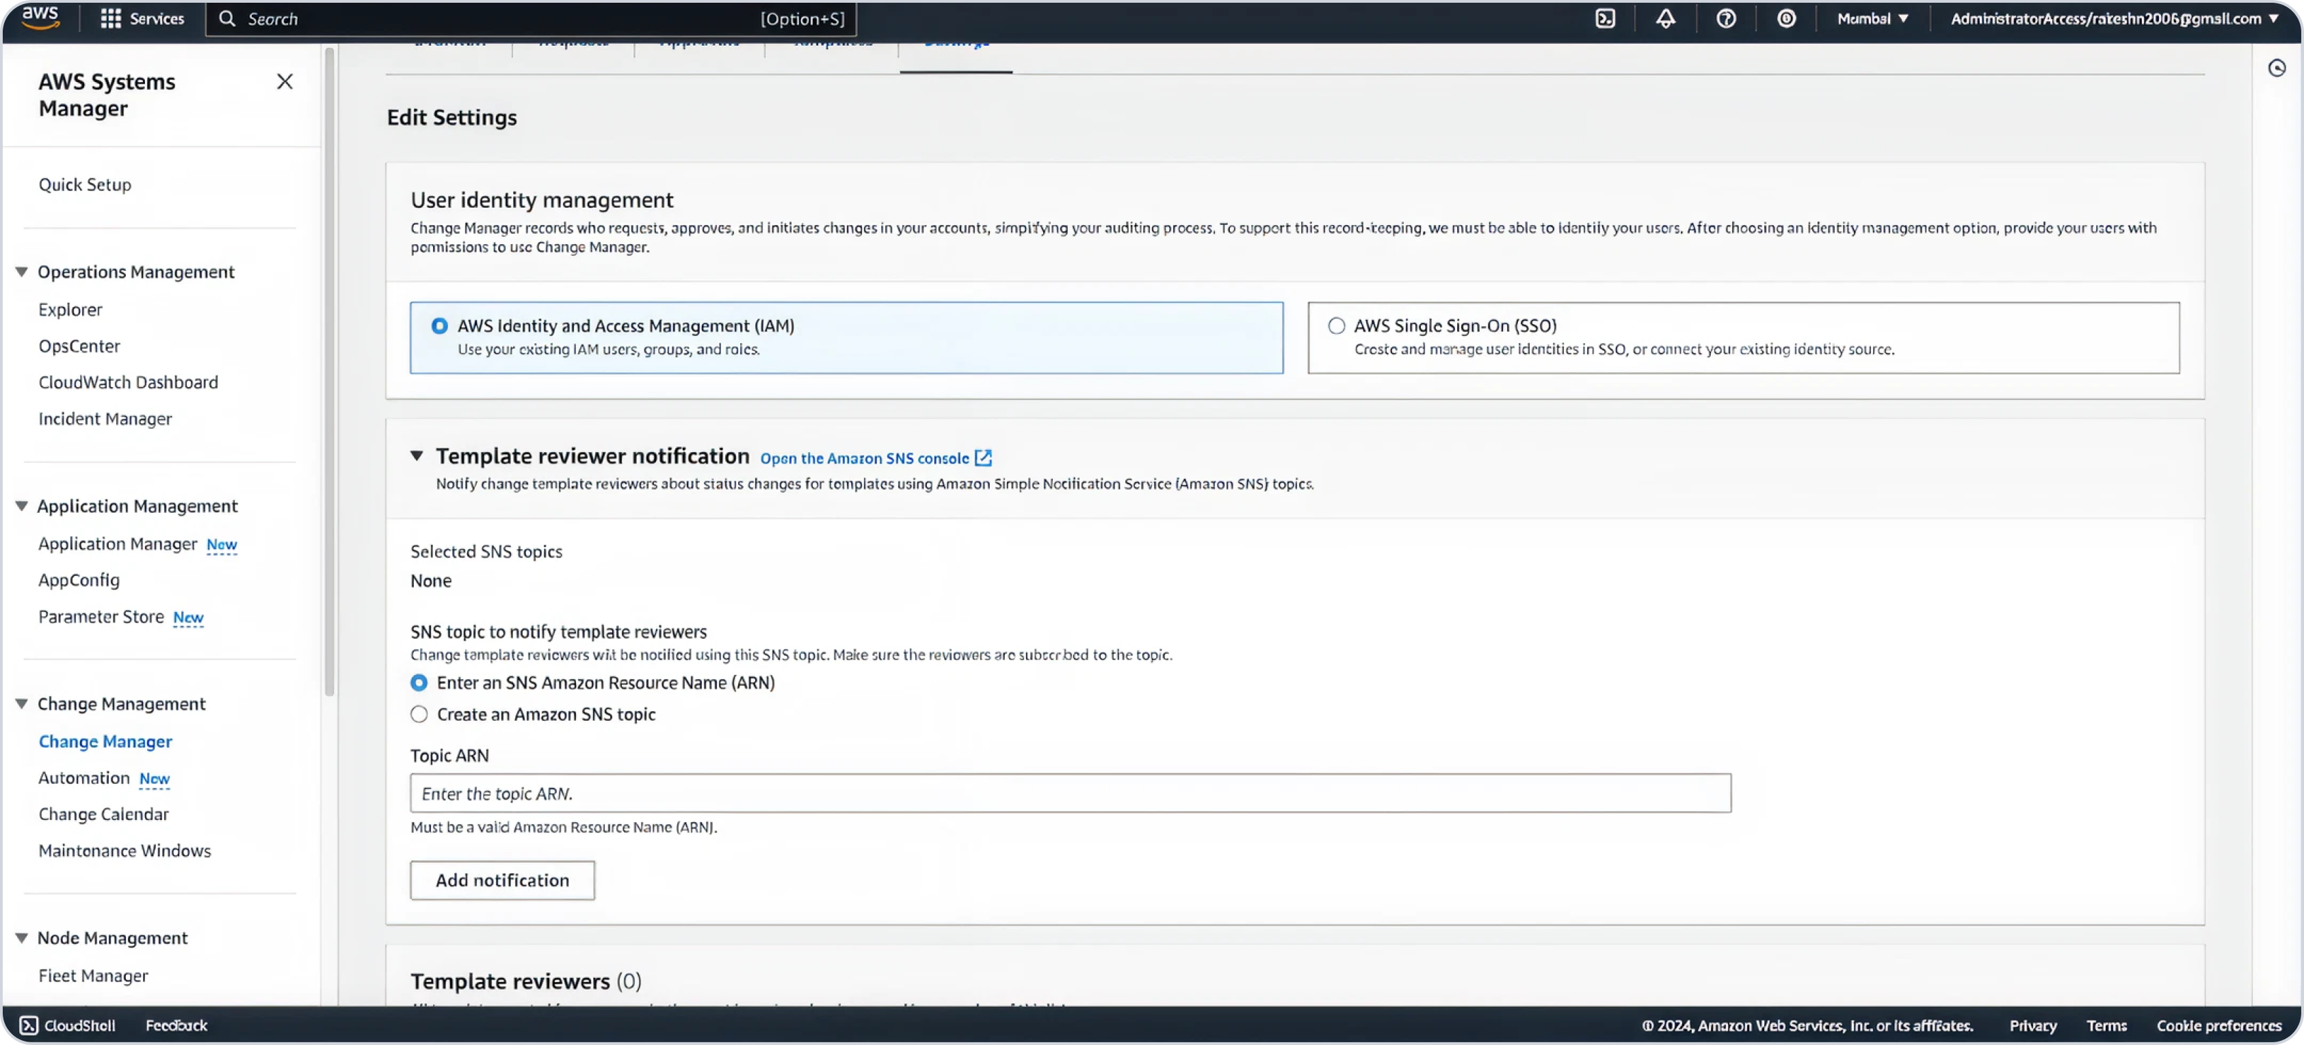
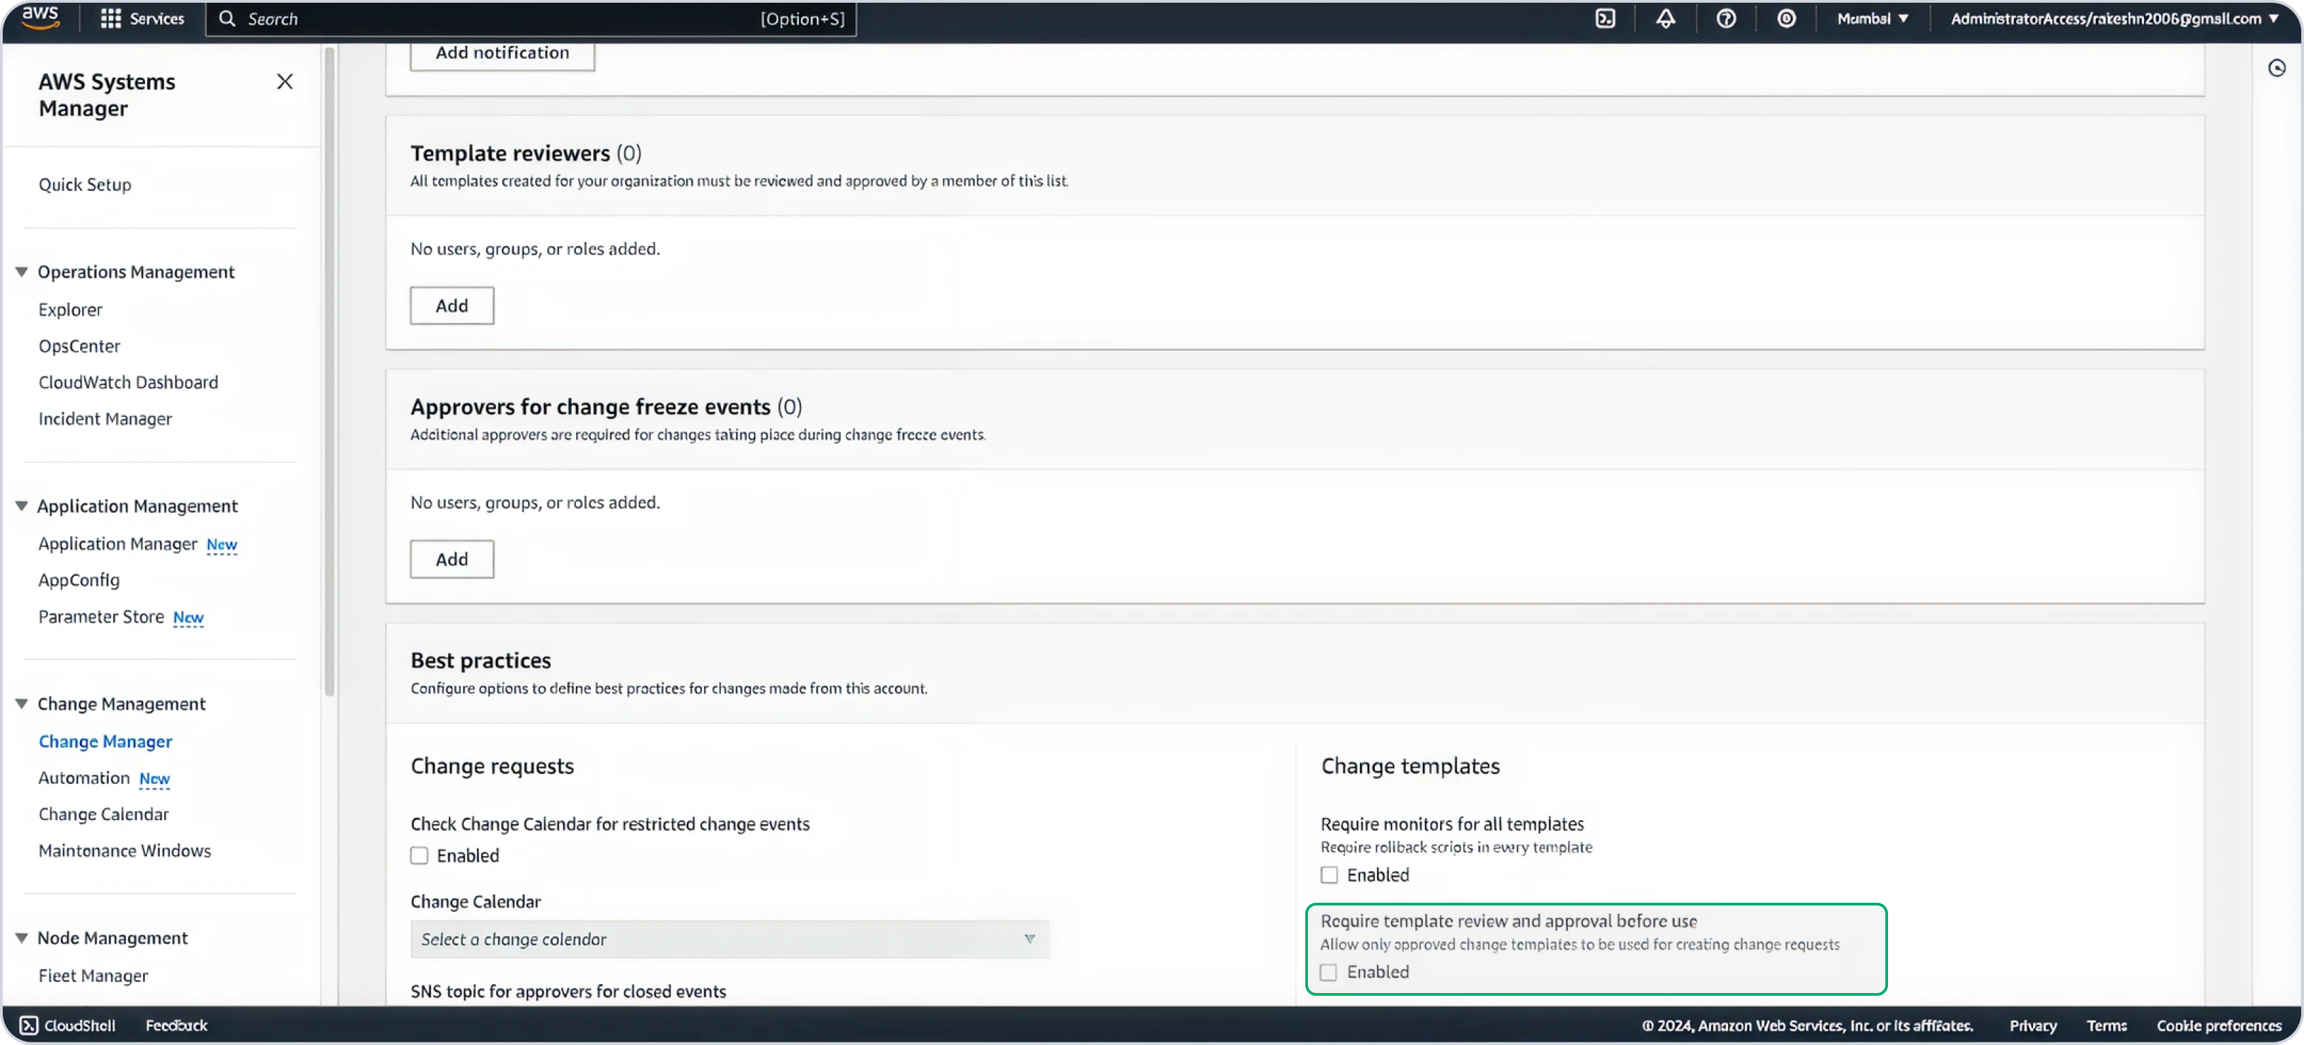
Set Up Delegated Account & Enable Change Manager
Configure Permissions
In the Permissions to request and make changes section, create a temporary permission set:
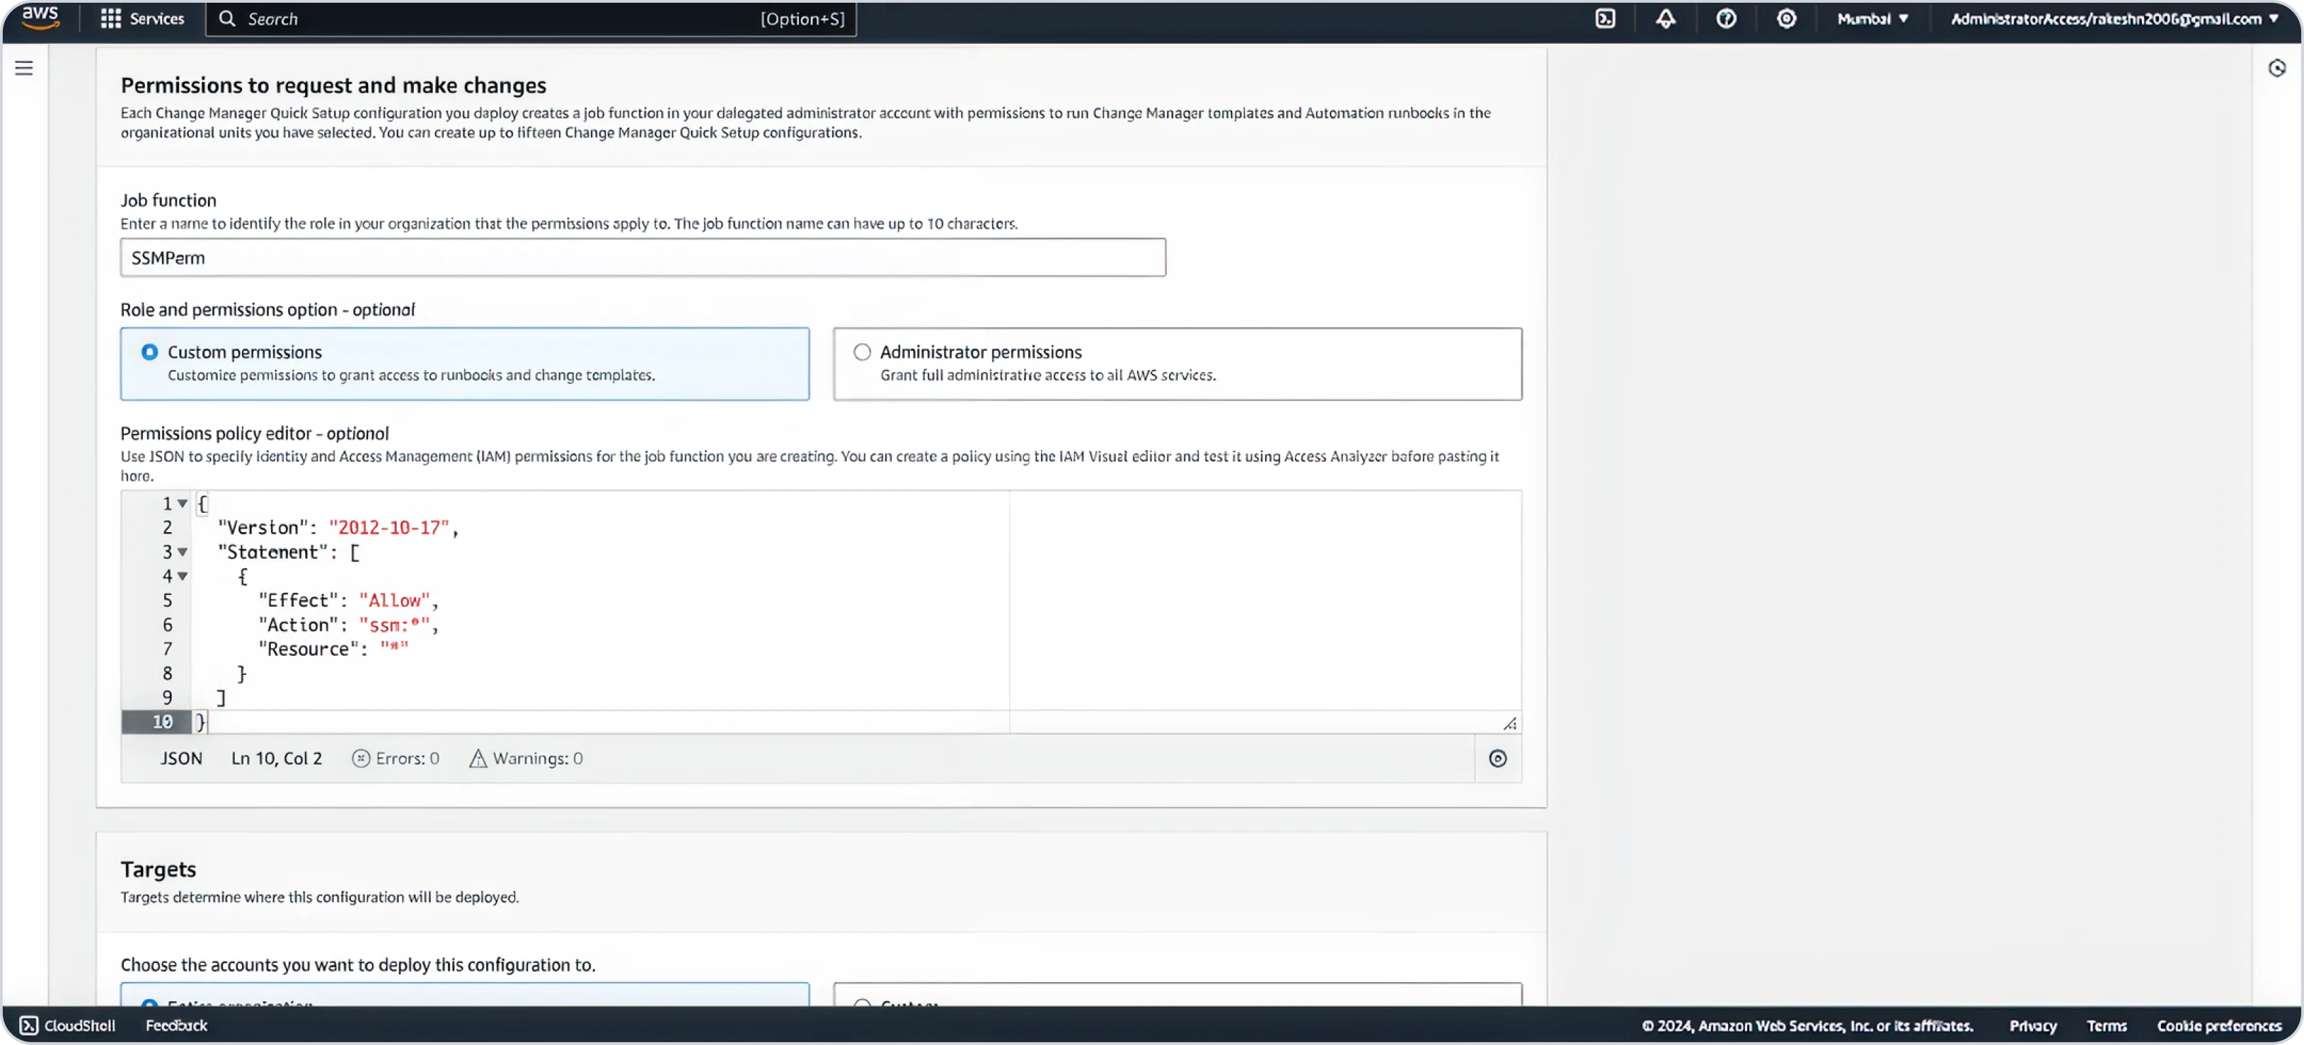
Paste the following JSON Code in the editor.
Now locate CloudShell on the bottom left of the screen.
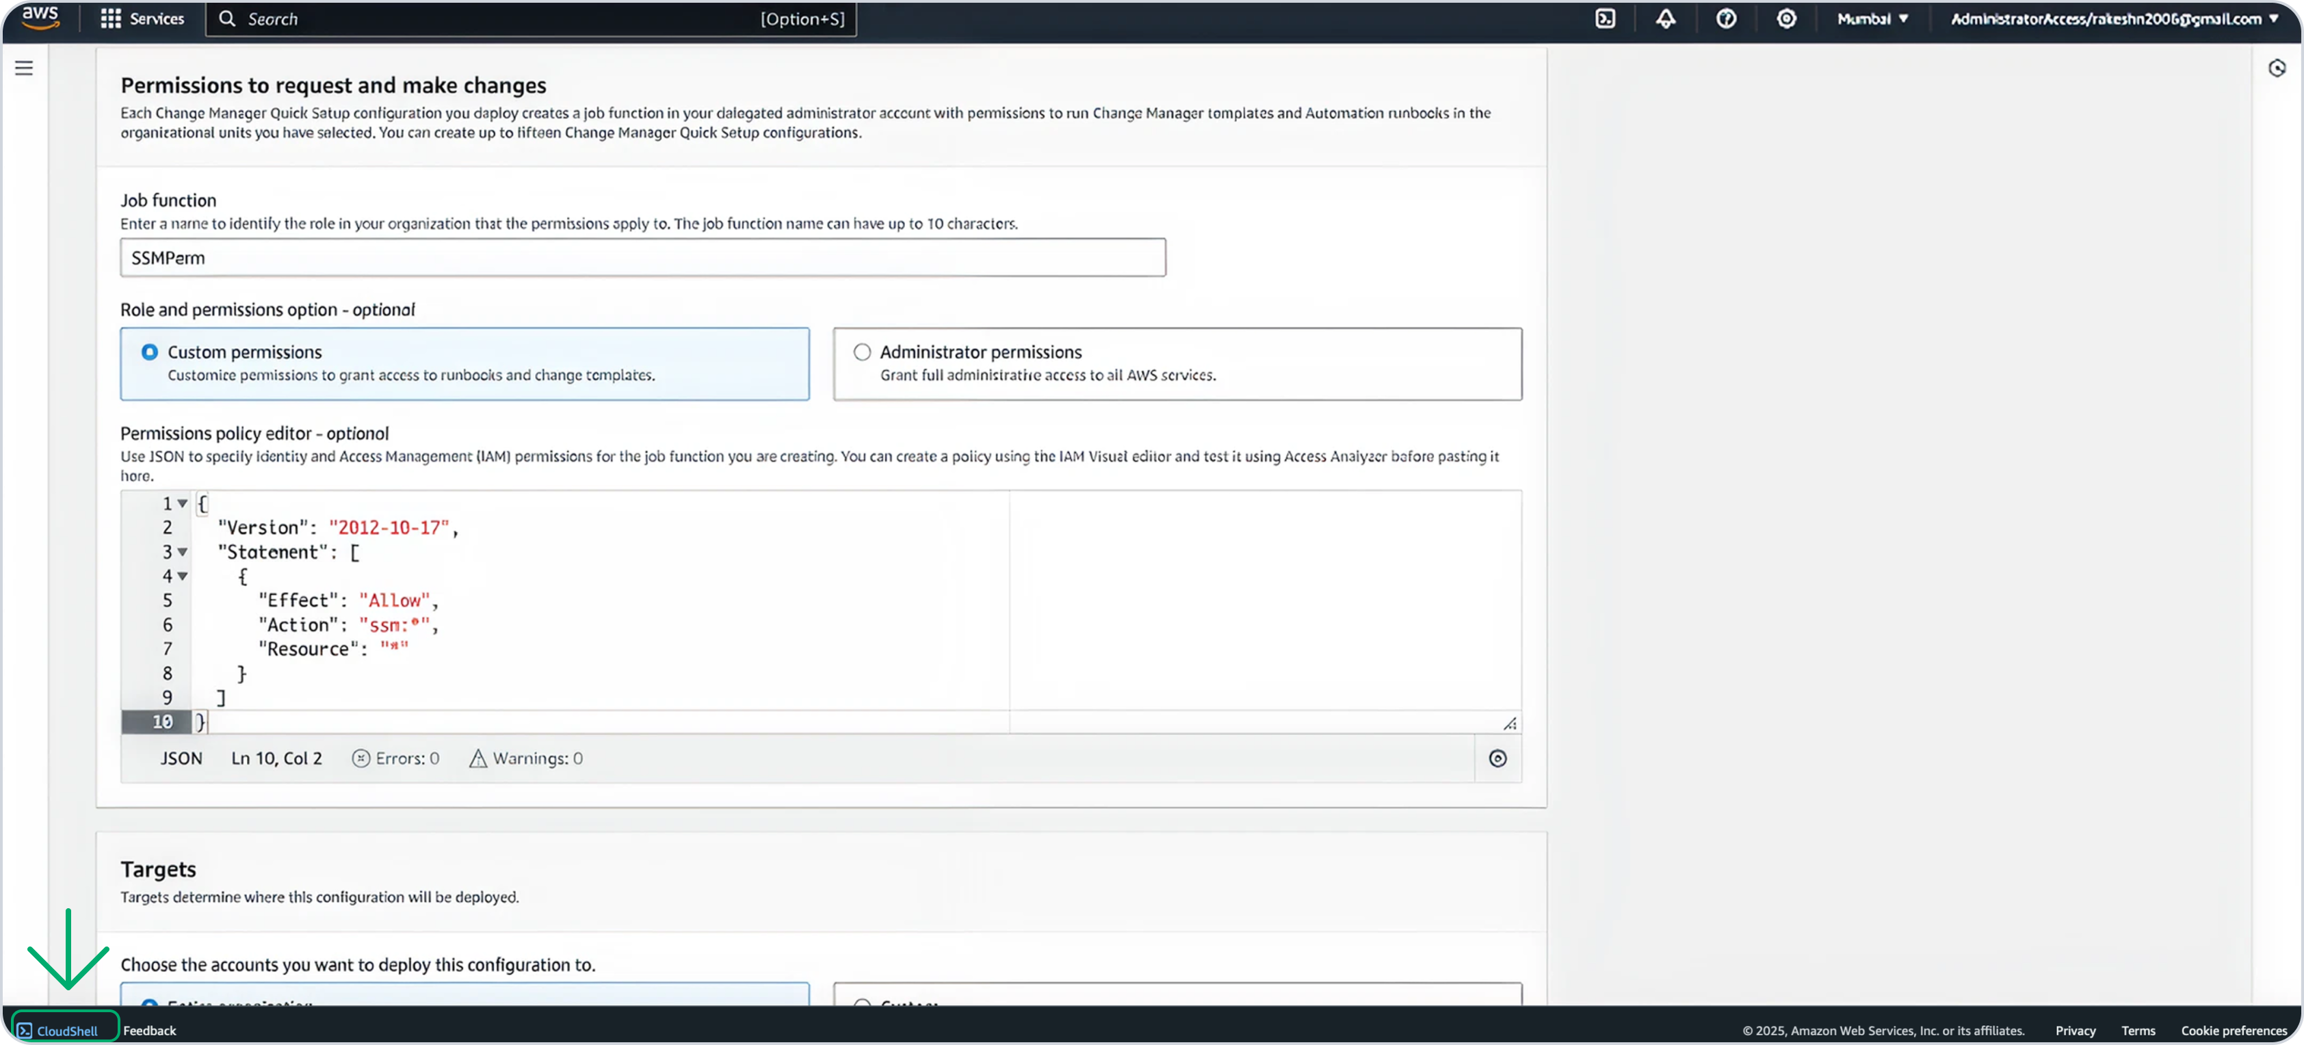
When CloudShell opened run these commands Before running the commands, ensure that you specify the correct region where you want to deploy.
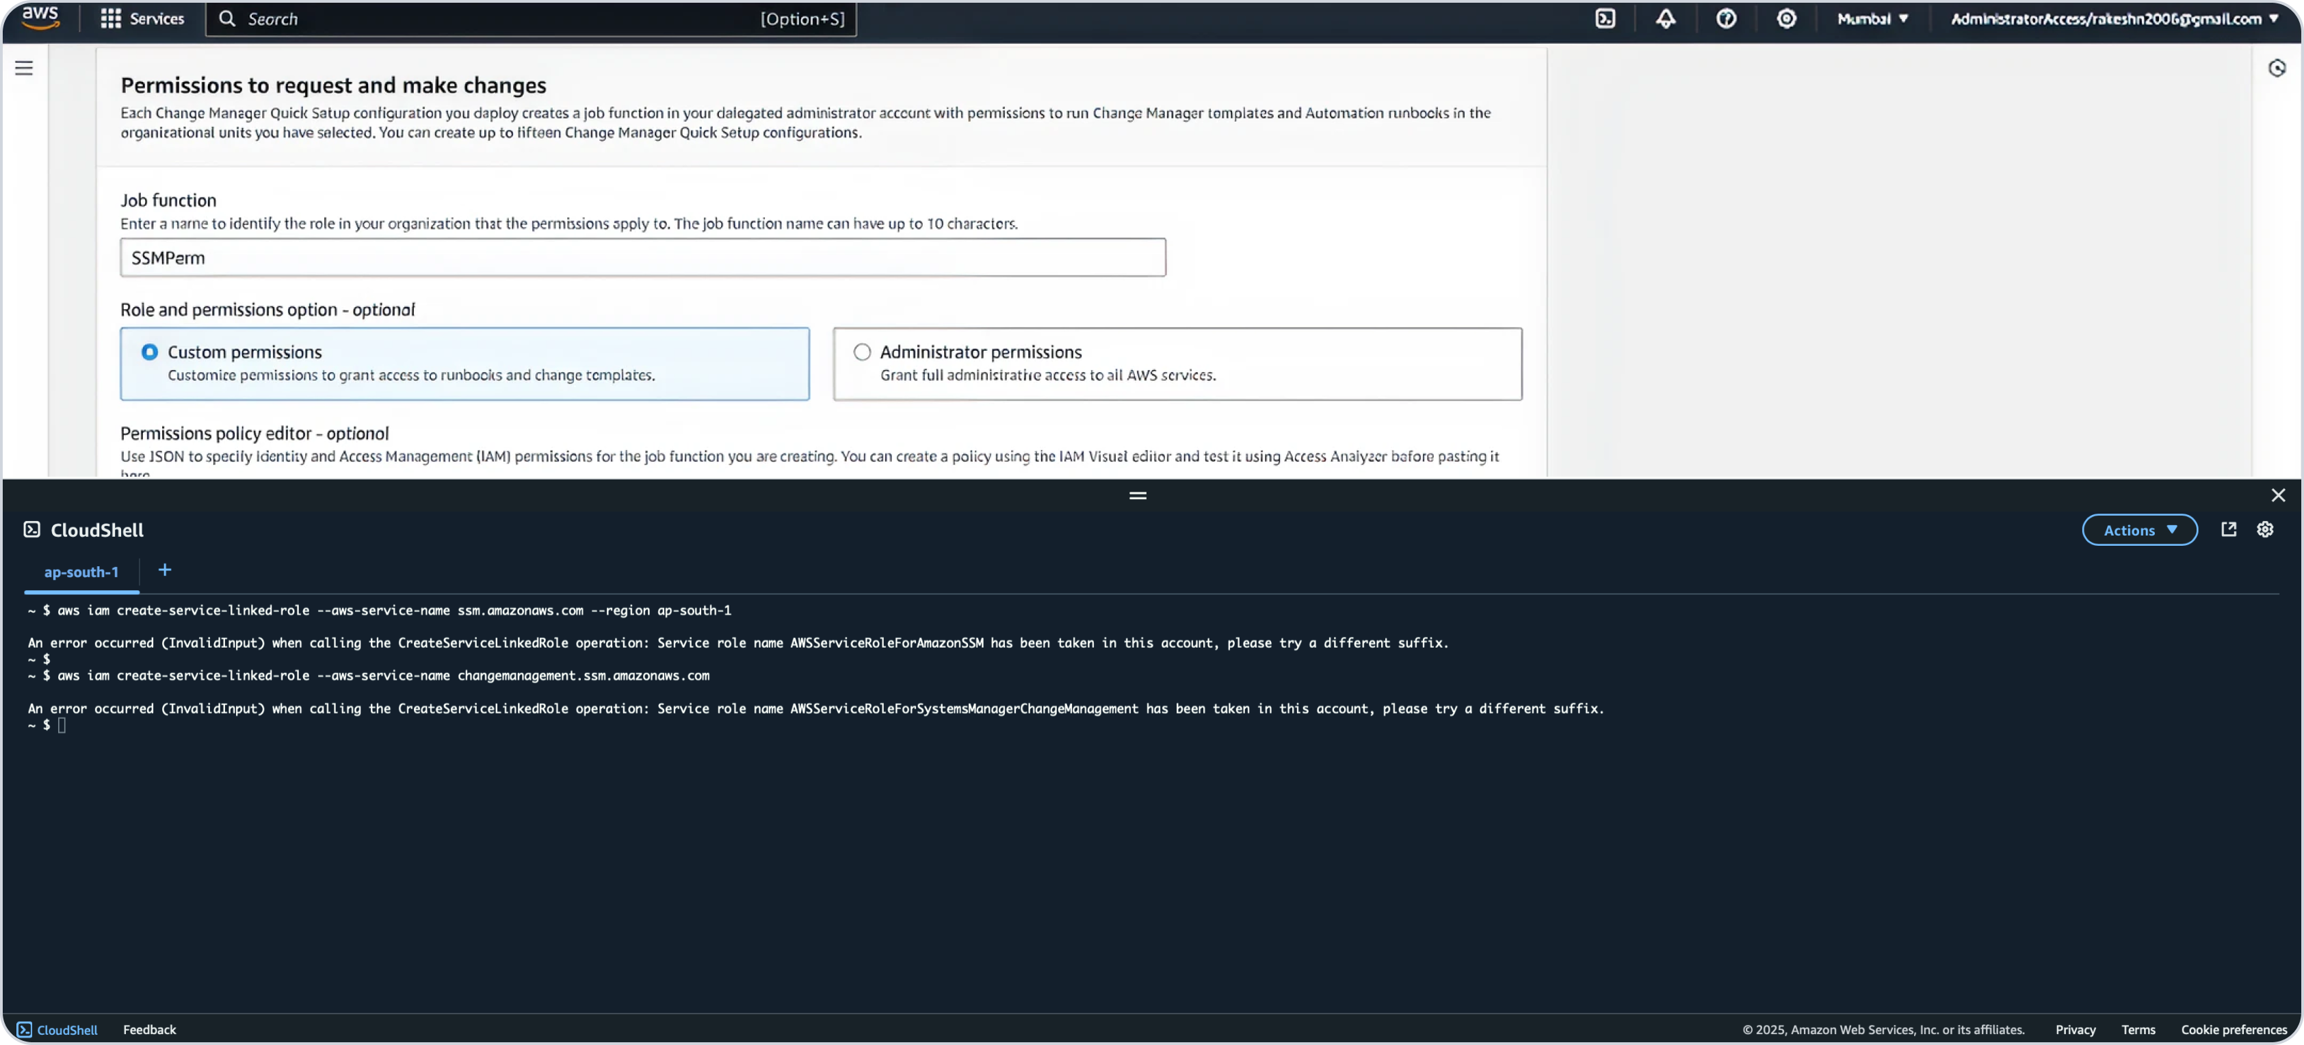
If a command returns an error, first verify the region settings in both your environment and the command. If the region is correct, the error can be ignored.
CloudFormation Templates Deployment
Permissions Required
To enable seamless automation while deploying this CloudFormation Template (CFT), we will acquire the necessary permissions for the Executor and Requestor roles.
Please review the permissions below before proceeding with the deployment.
Executor Role Permissions
IAM RoleManagement
Pass the Onyx-Execution-Role
SSM Parameters
Get and put parameters under parameter/onyx/*
EventBridge Rules
Full access to EventBridge rules starting with Onyx-*
EC2 Operations
Read and write permissions for managing auto-scaling groups, EC2 instance profiles, IAM roles and policies
SSM Parameters
Full access to all SSM operations
SNS
Publish to SNS topics prefixed with Automation* or onyx-*
S3 Bucket Access
Read access to S3 buckets/objects matching *-onyx-*
SQS Queue Access
Full access to Onyx-Orchestrator-Queue
Scheduler Permissions
Full access to schedule group Onyx-Orchestrator-Schedule-Group
Auto Scaling & EC2
Describe and manage Auto Scaling groups and EC2 instance profiles
IAM
Manage IAM roles and policies, attach policies, and pass roles
Lambda
Read and update Lambda functions and layers
Tagging
Add and manage tags for resources
Requestor Role Permissions
ECR
Get Image for Lambda Execution
Organizations
List accounts for parent
SSM (OpsItem)
Get OpsItem, list OpsItem events
SSM (Documents)
Add tags, create, delete, get, and update documents prefixed with Onyx*
EventBridge
List tags for EventBridge rules prefixed with Onyx-
SSM (Automation)
Start change request execution for automations prefixed with Onyx*
SSM (Automation)
Add tags, get automation execution details
S3 Bucket Access
Get and list access for S3 buckets and objects matching *-onyx-*
SQS Queue Access
Full access to Onyx-Orchestrator-Queue
SNS
Publish to SNS topics prefixed with onyx-*
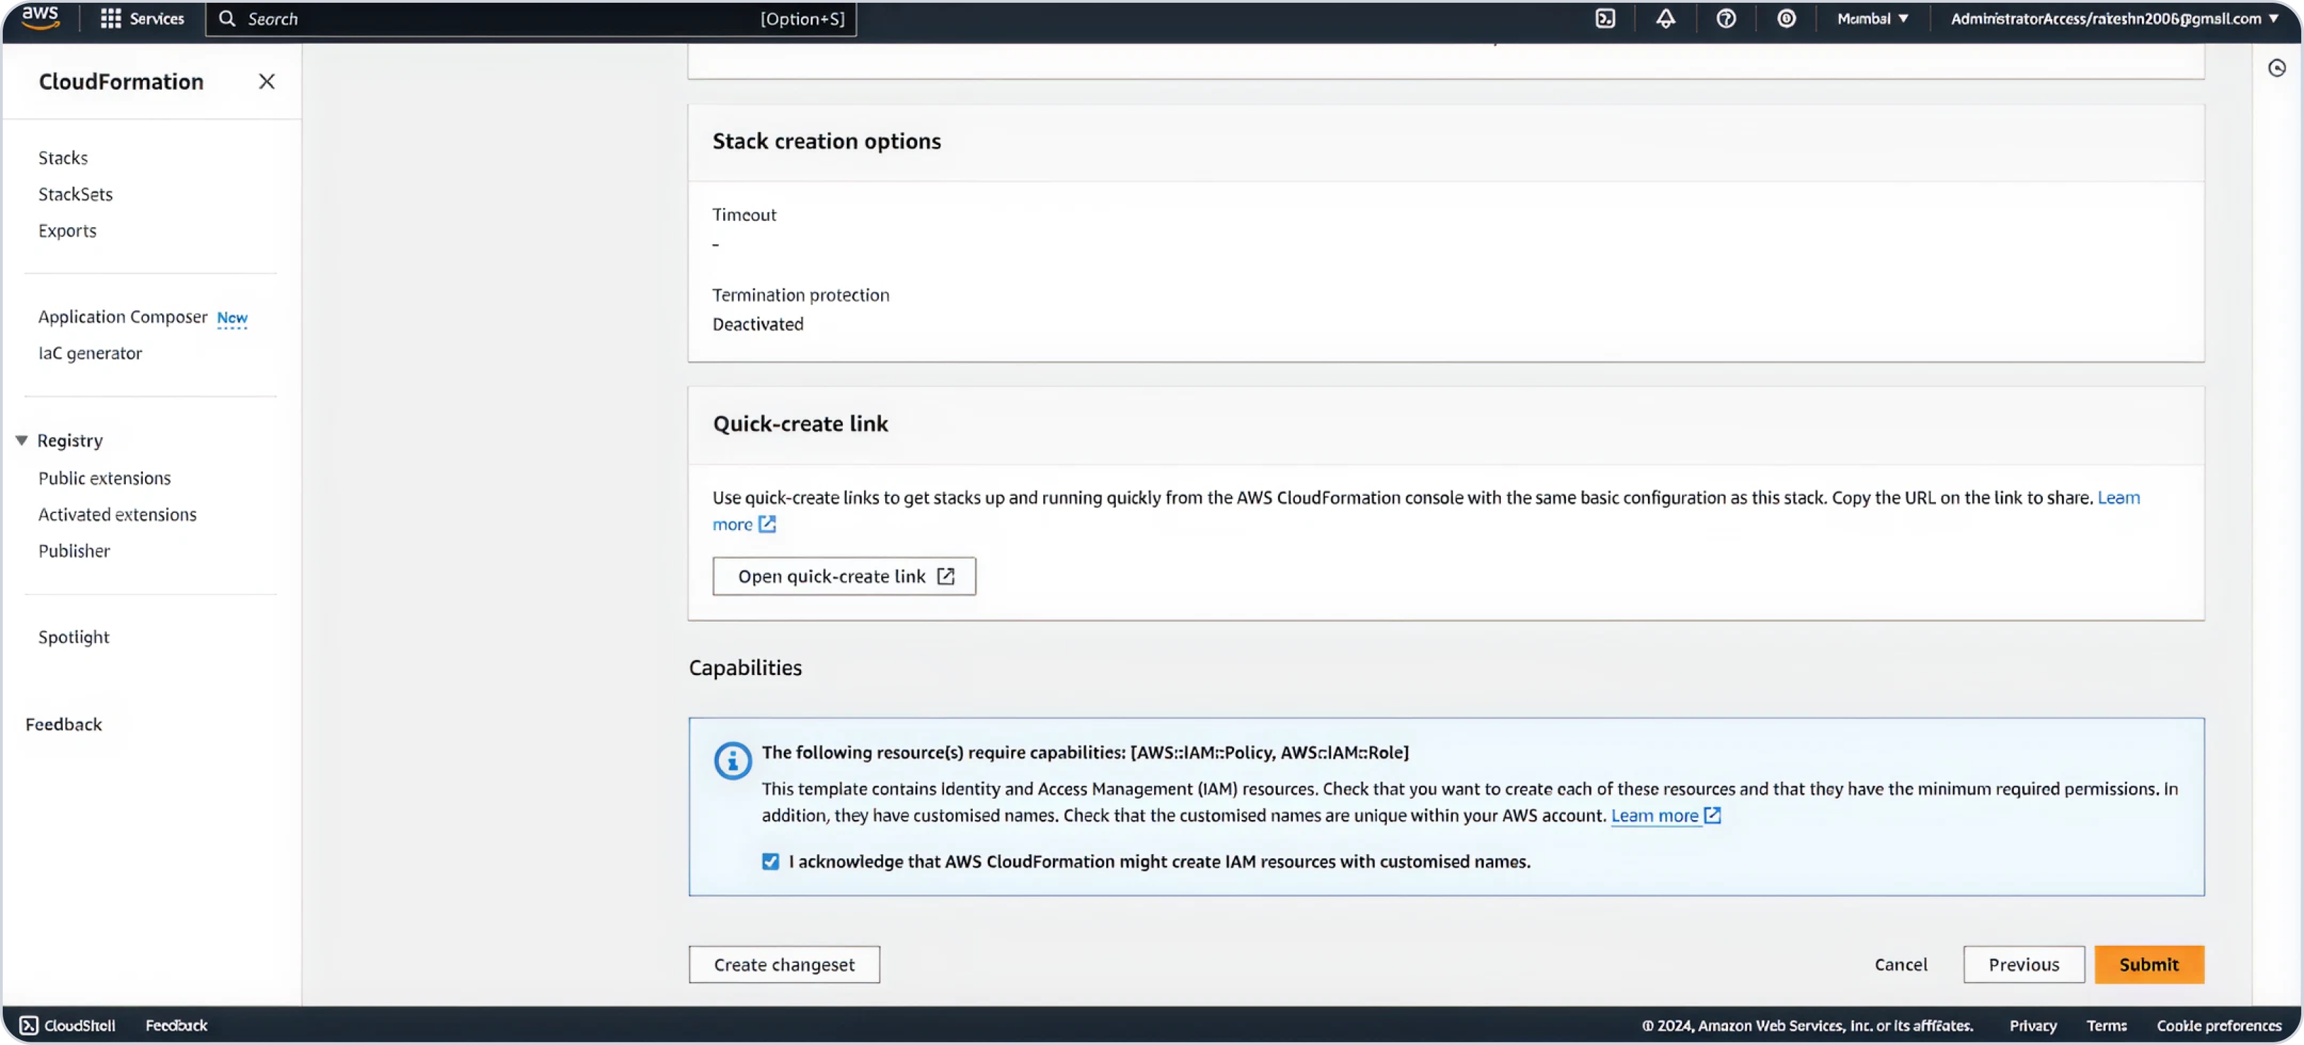
1. Deploy Master CFT as a Stack
Log in to the Delegated Account chosen while setting up the Change Manager.
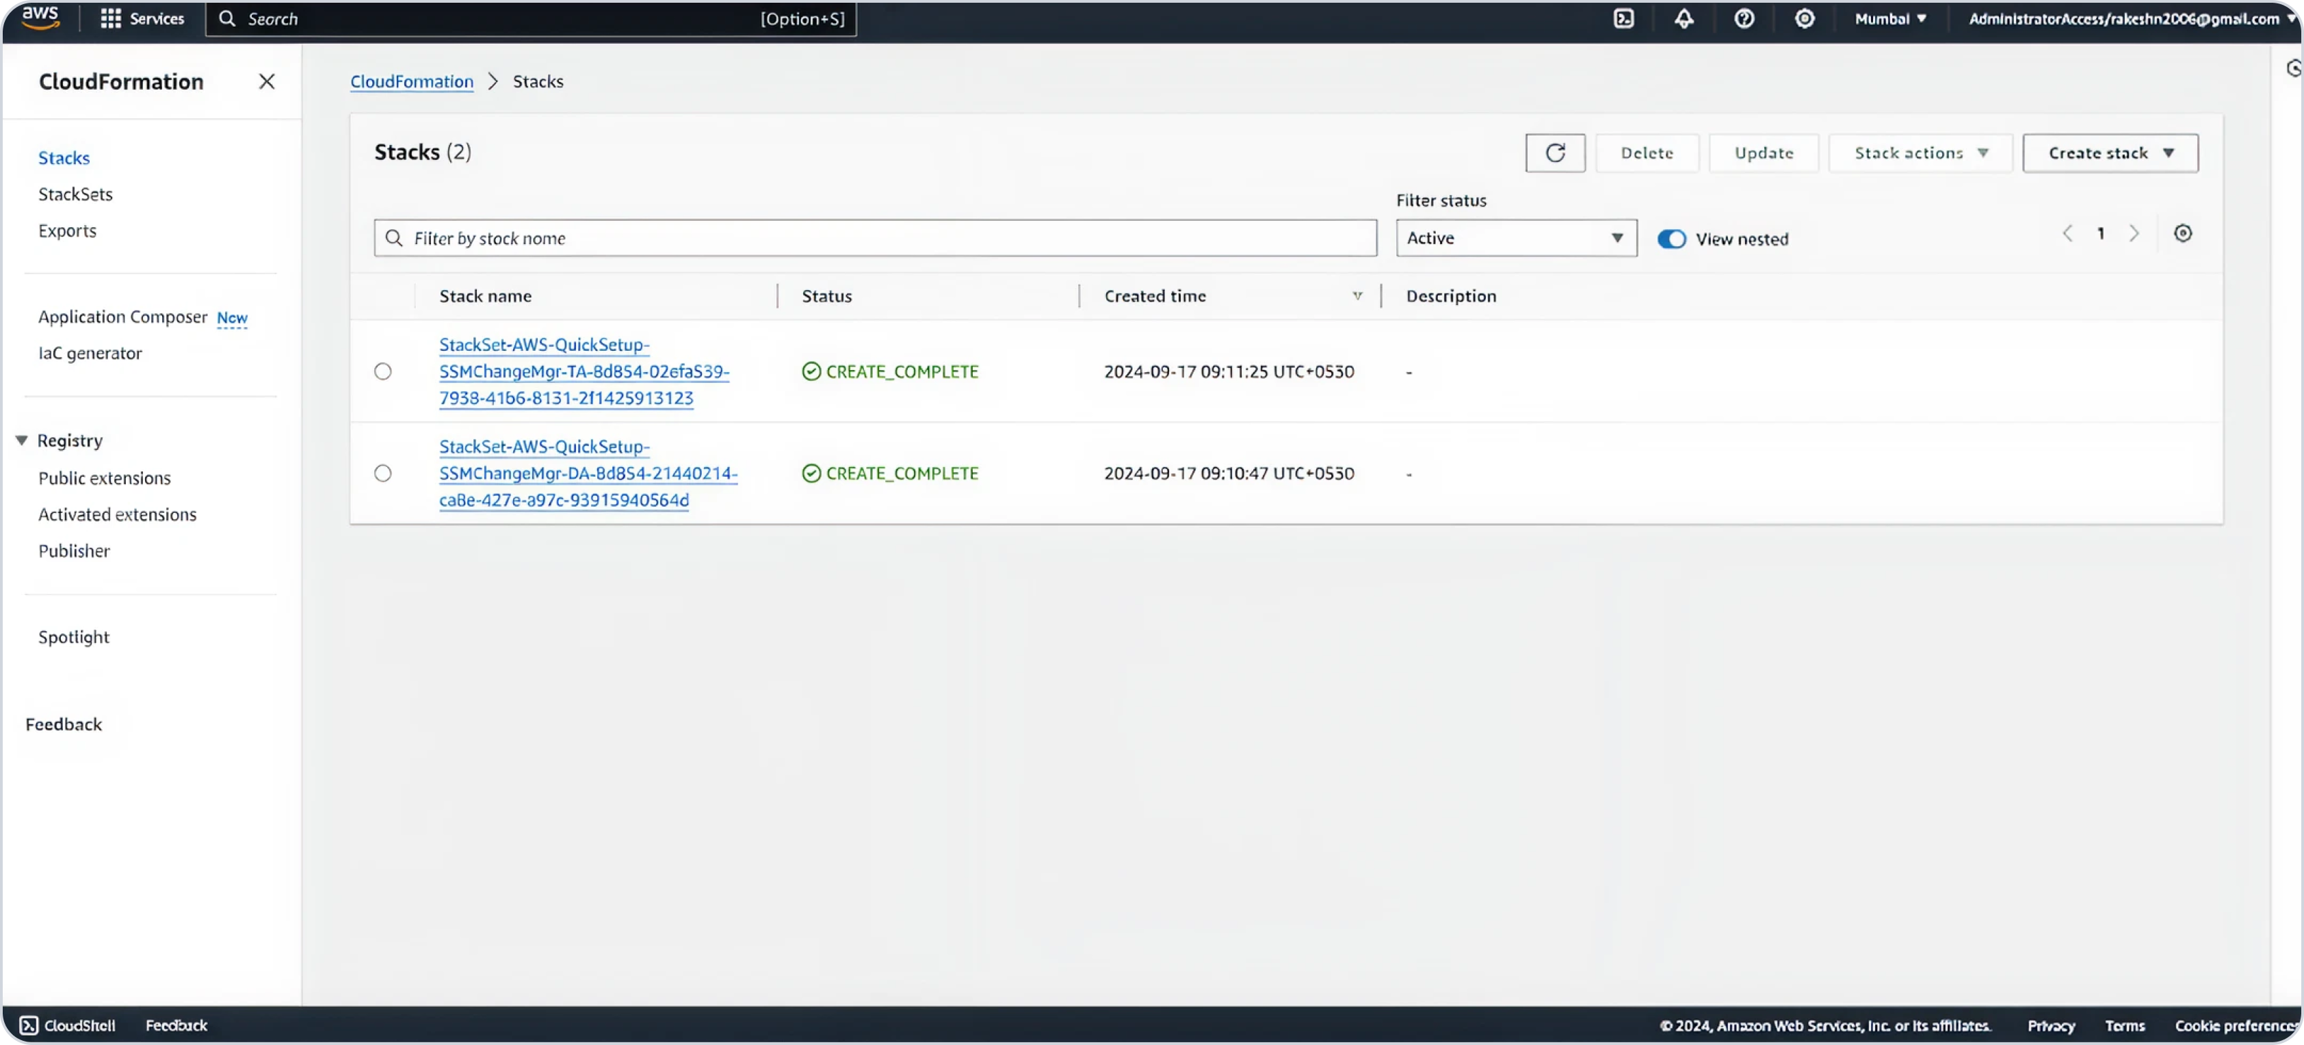
Navigate to CloudFormation and click
Create Stack.
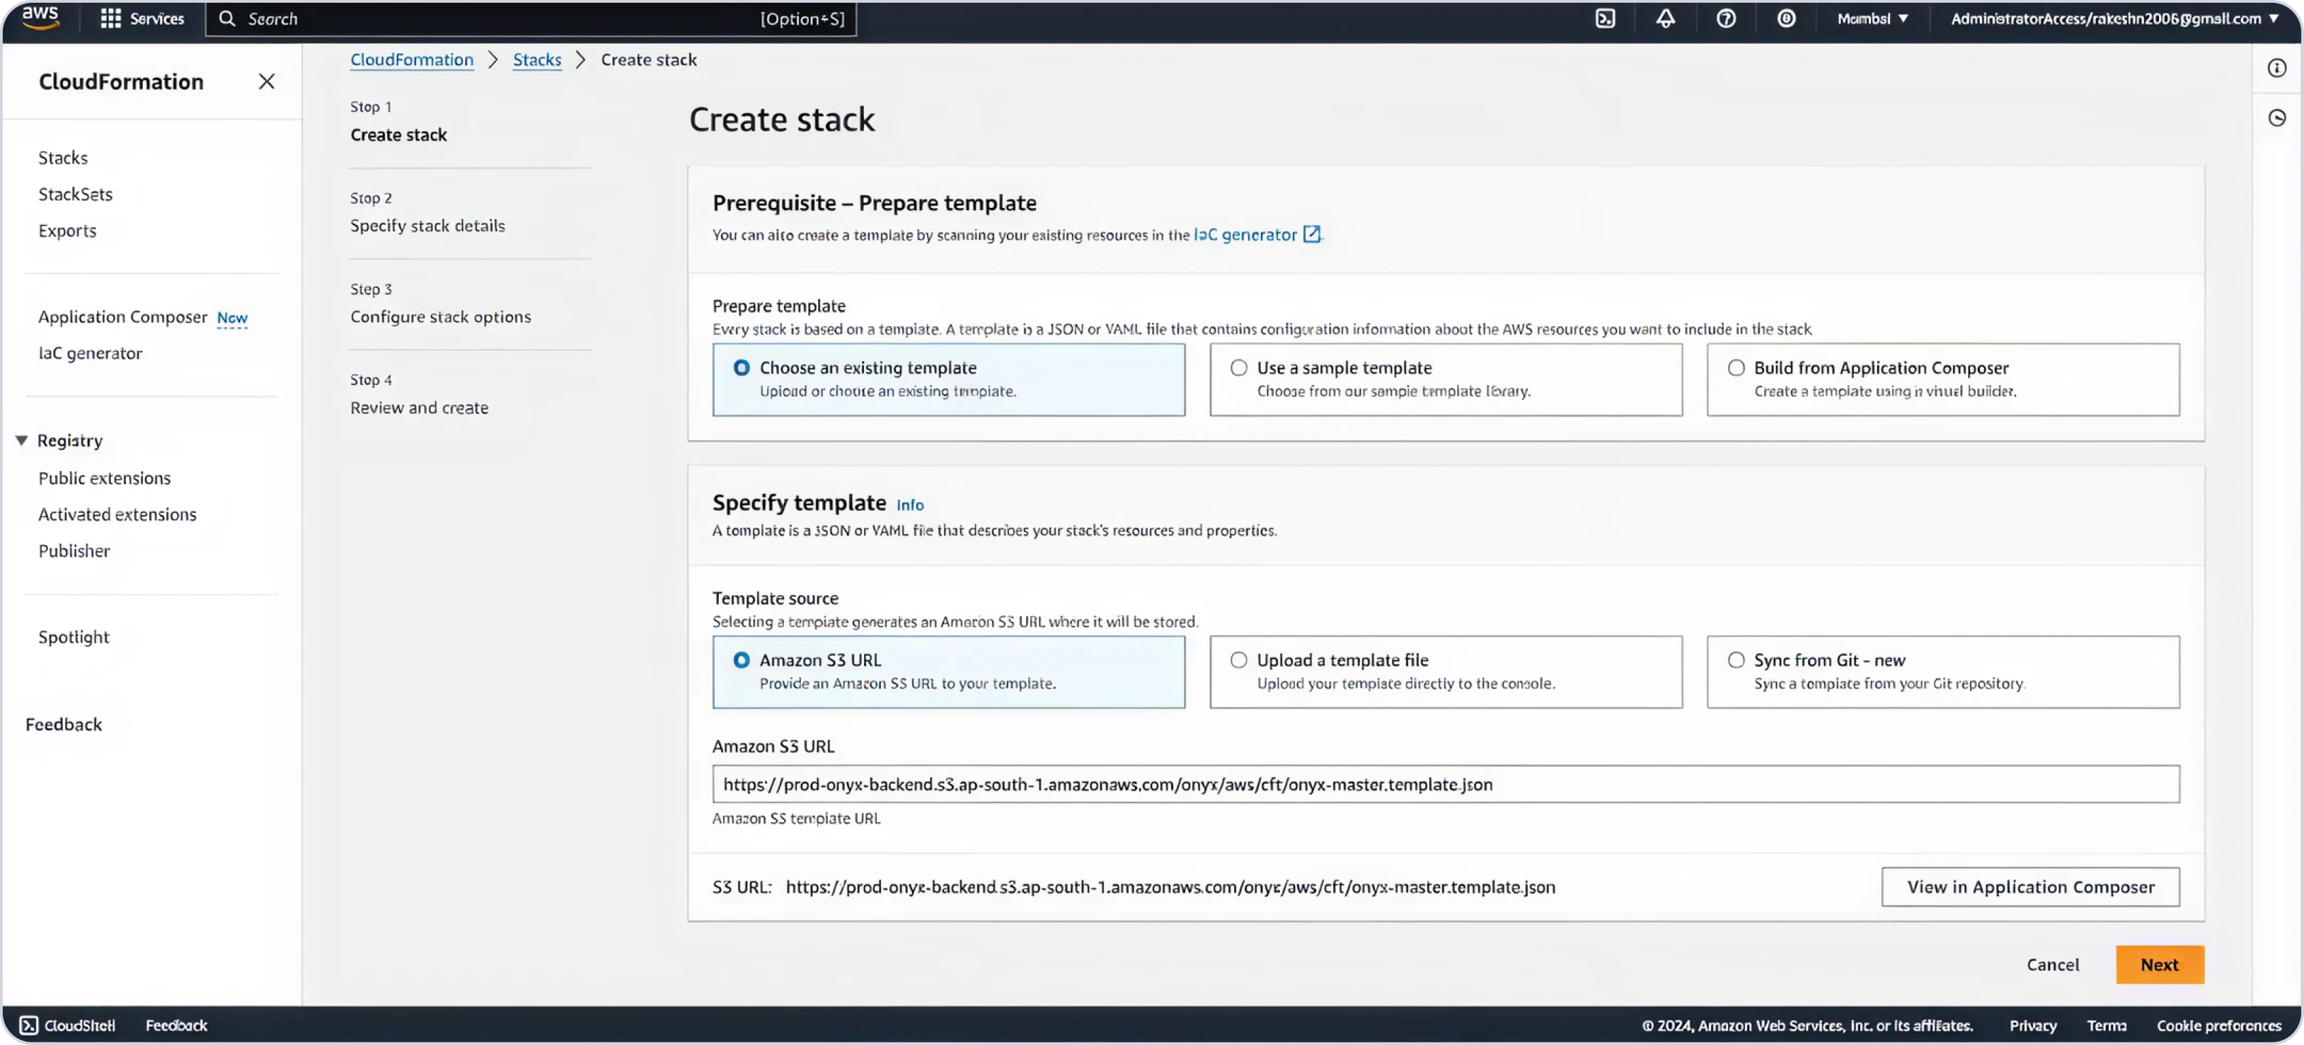
Choose
Use an existing template.Use this URL to paste in template section.
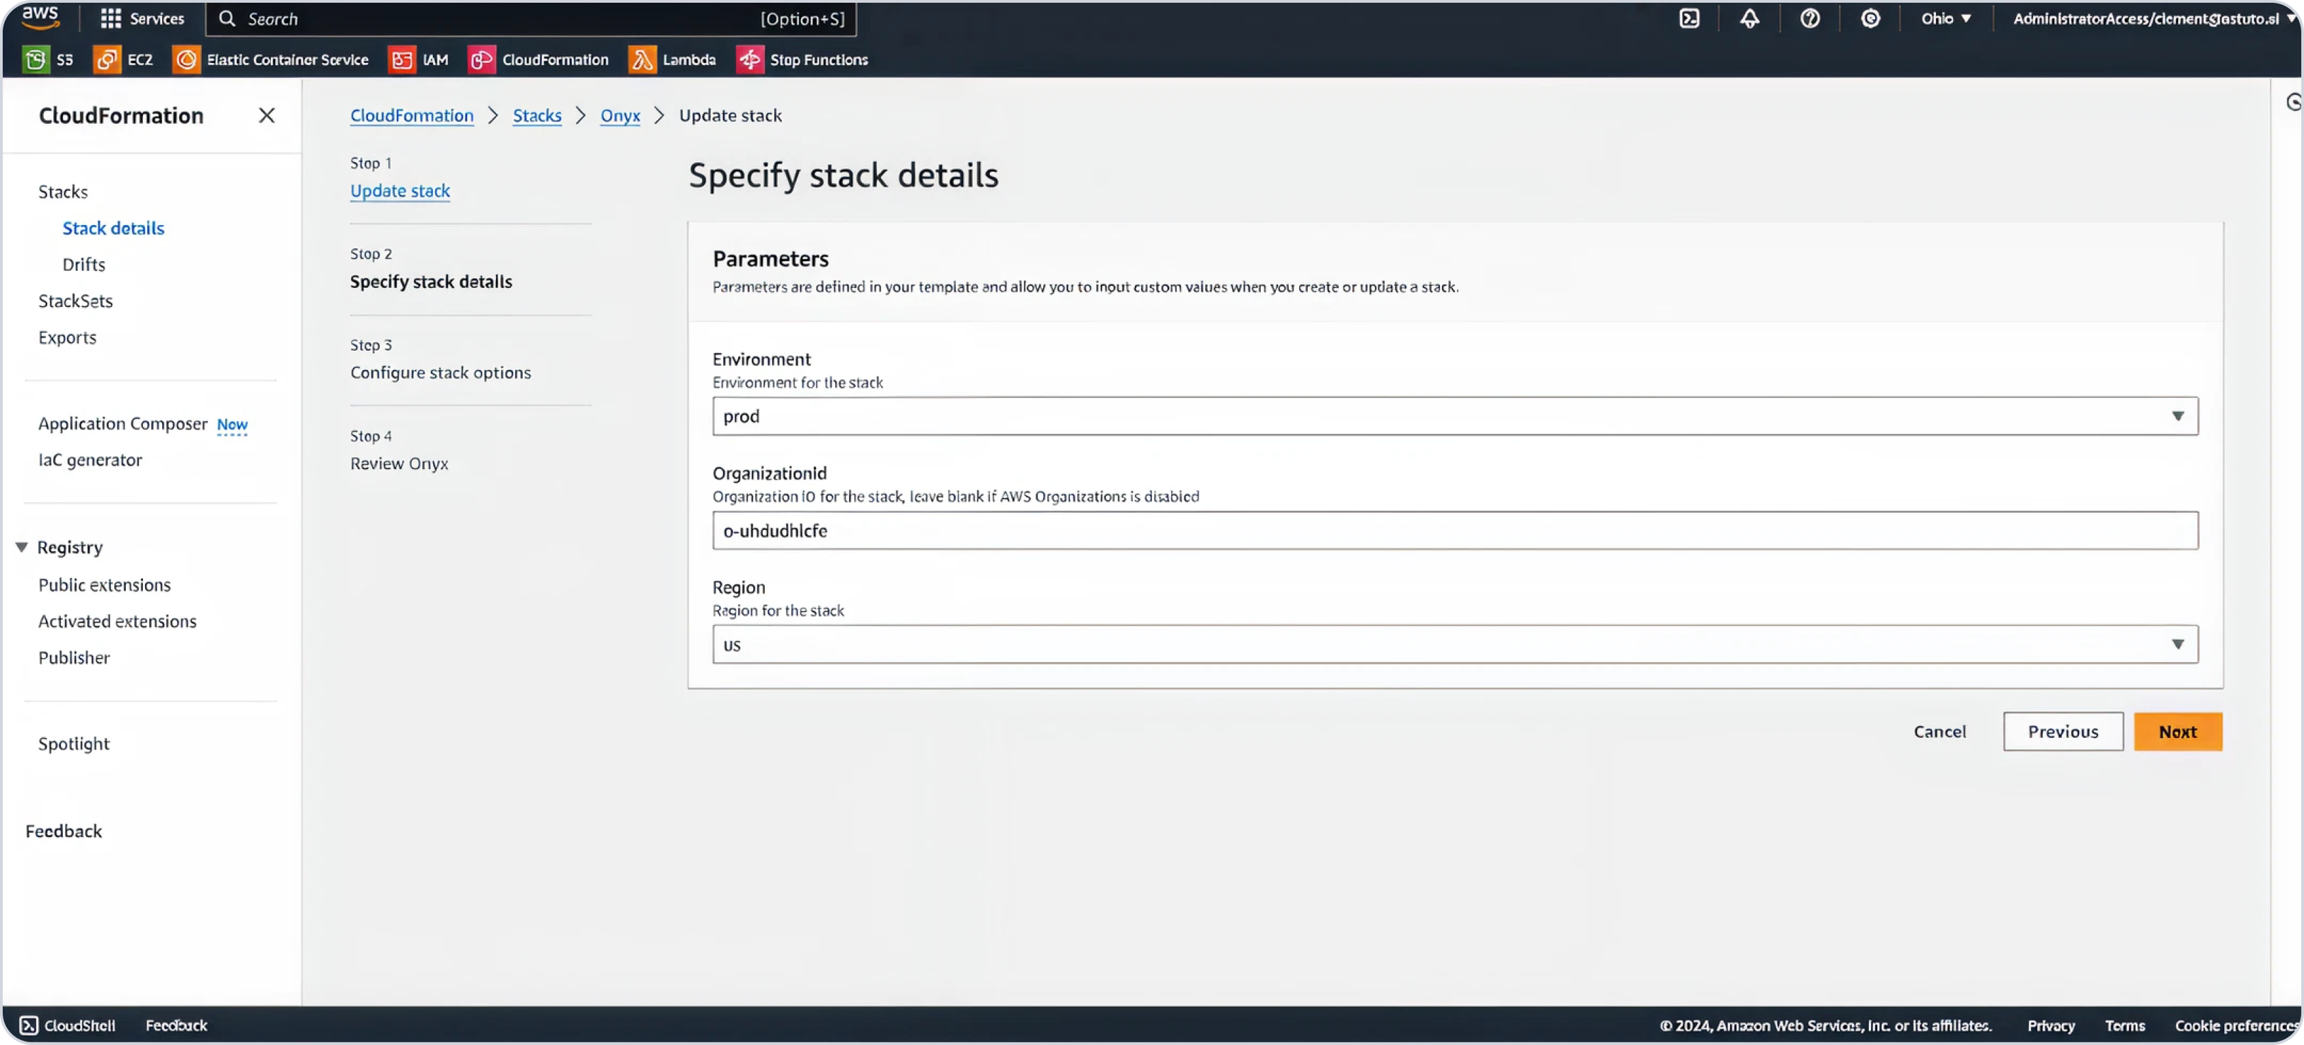
Provide a stack name, keep the Environment as "prod," and Region to "mum" (change region to "us" if in the US region).
Enter your Organization ID (Only if you have master-child setup.)
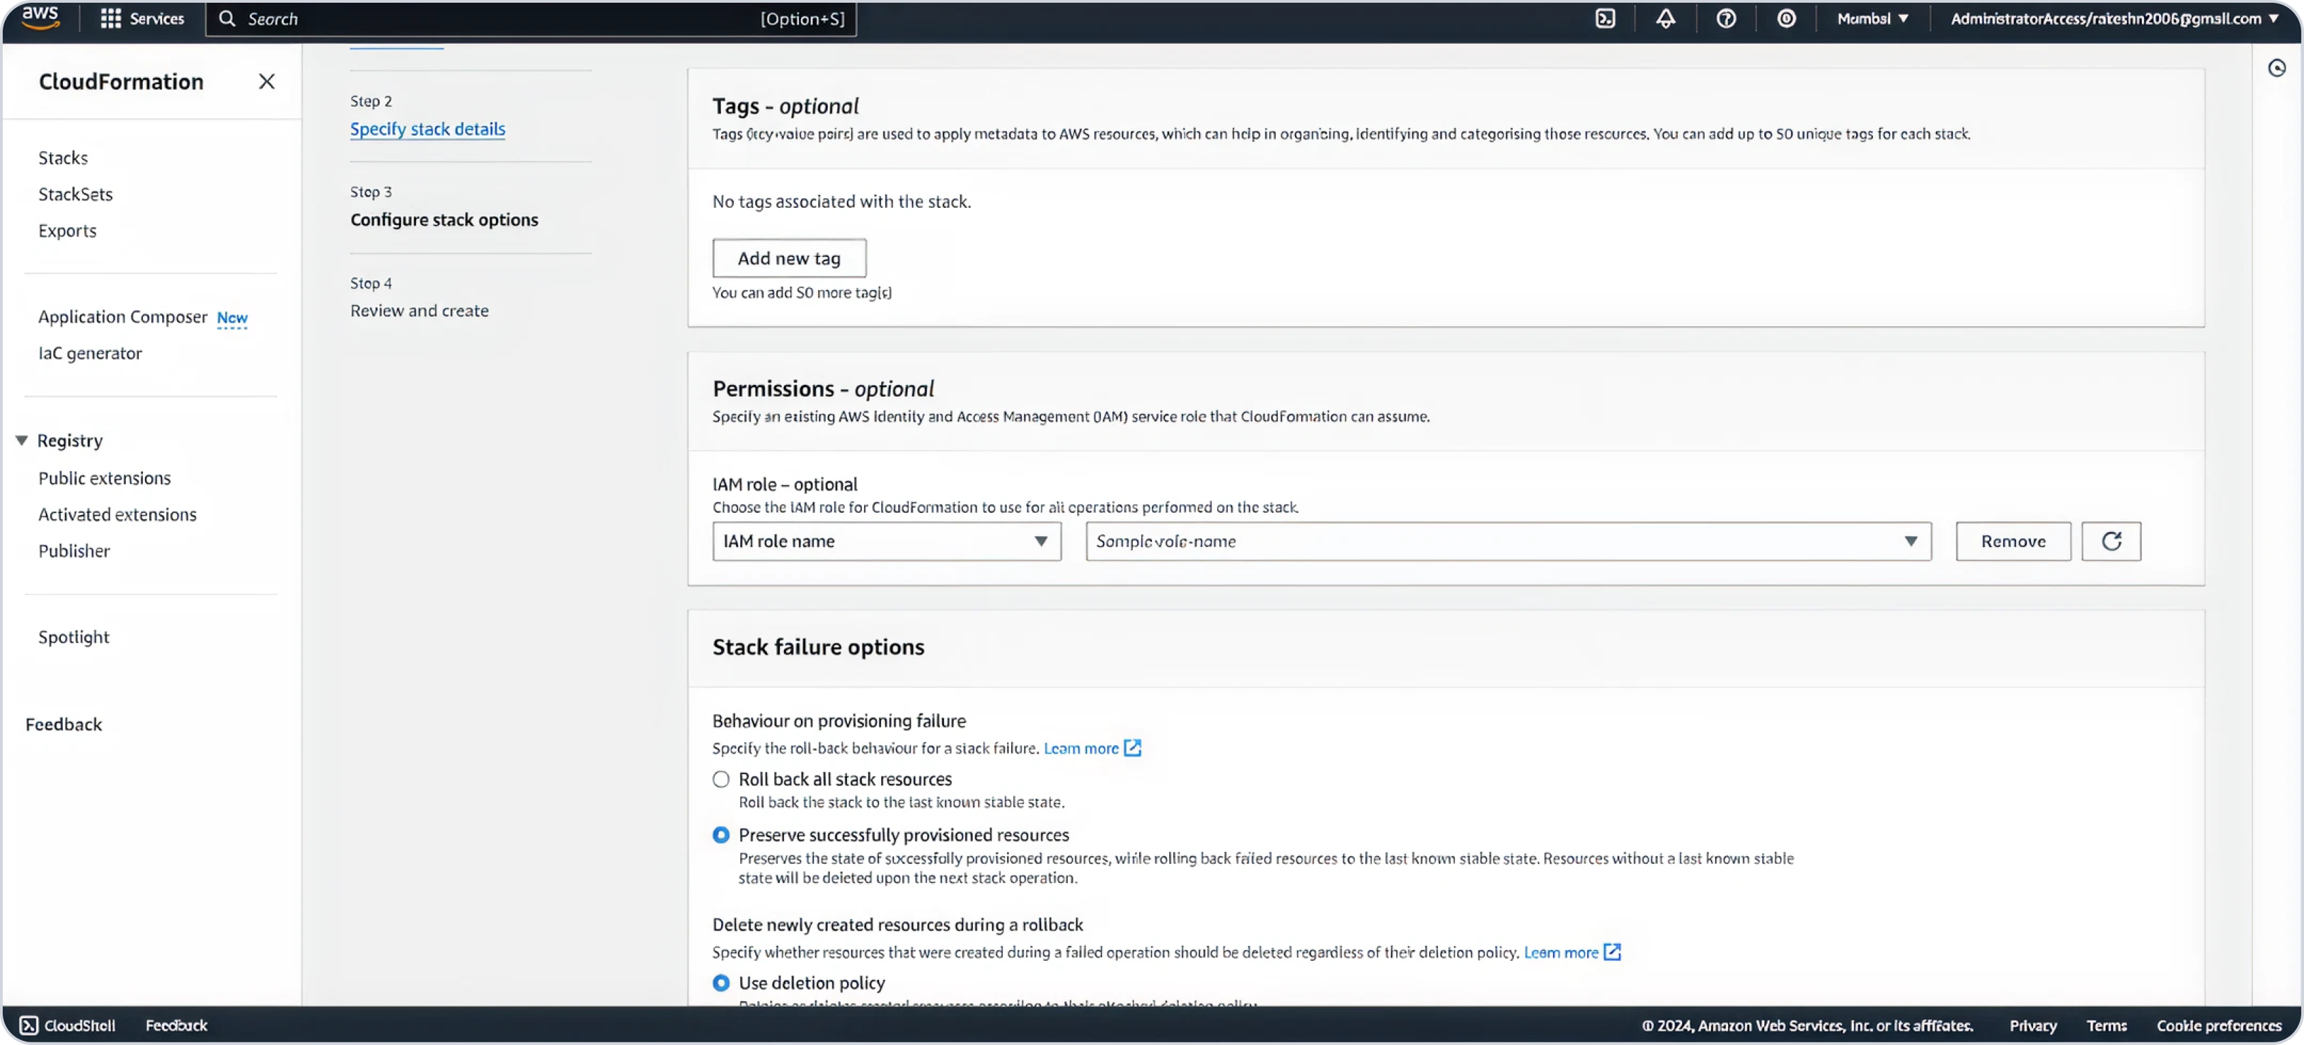
Add tags as needed, acknowledge role creation, and click "Submit."
Wait for deployment to complete.
2. Deploy Child CFT as a Stackset
Log in to the Delegated Account.
Navigate to CloudFormation, select StackSets and click
Create Stack.
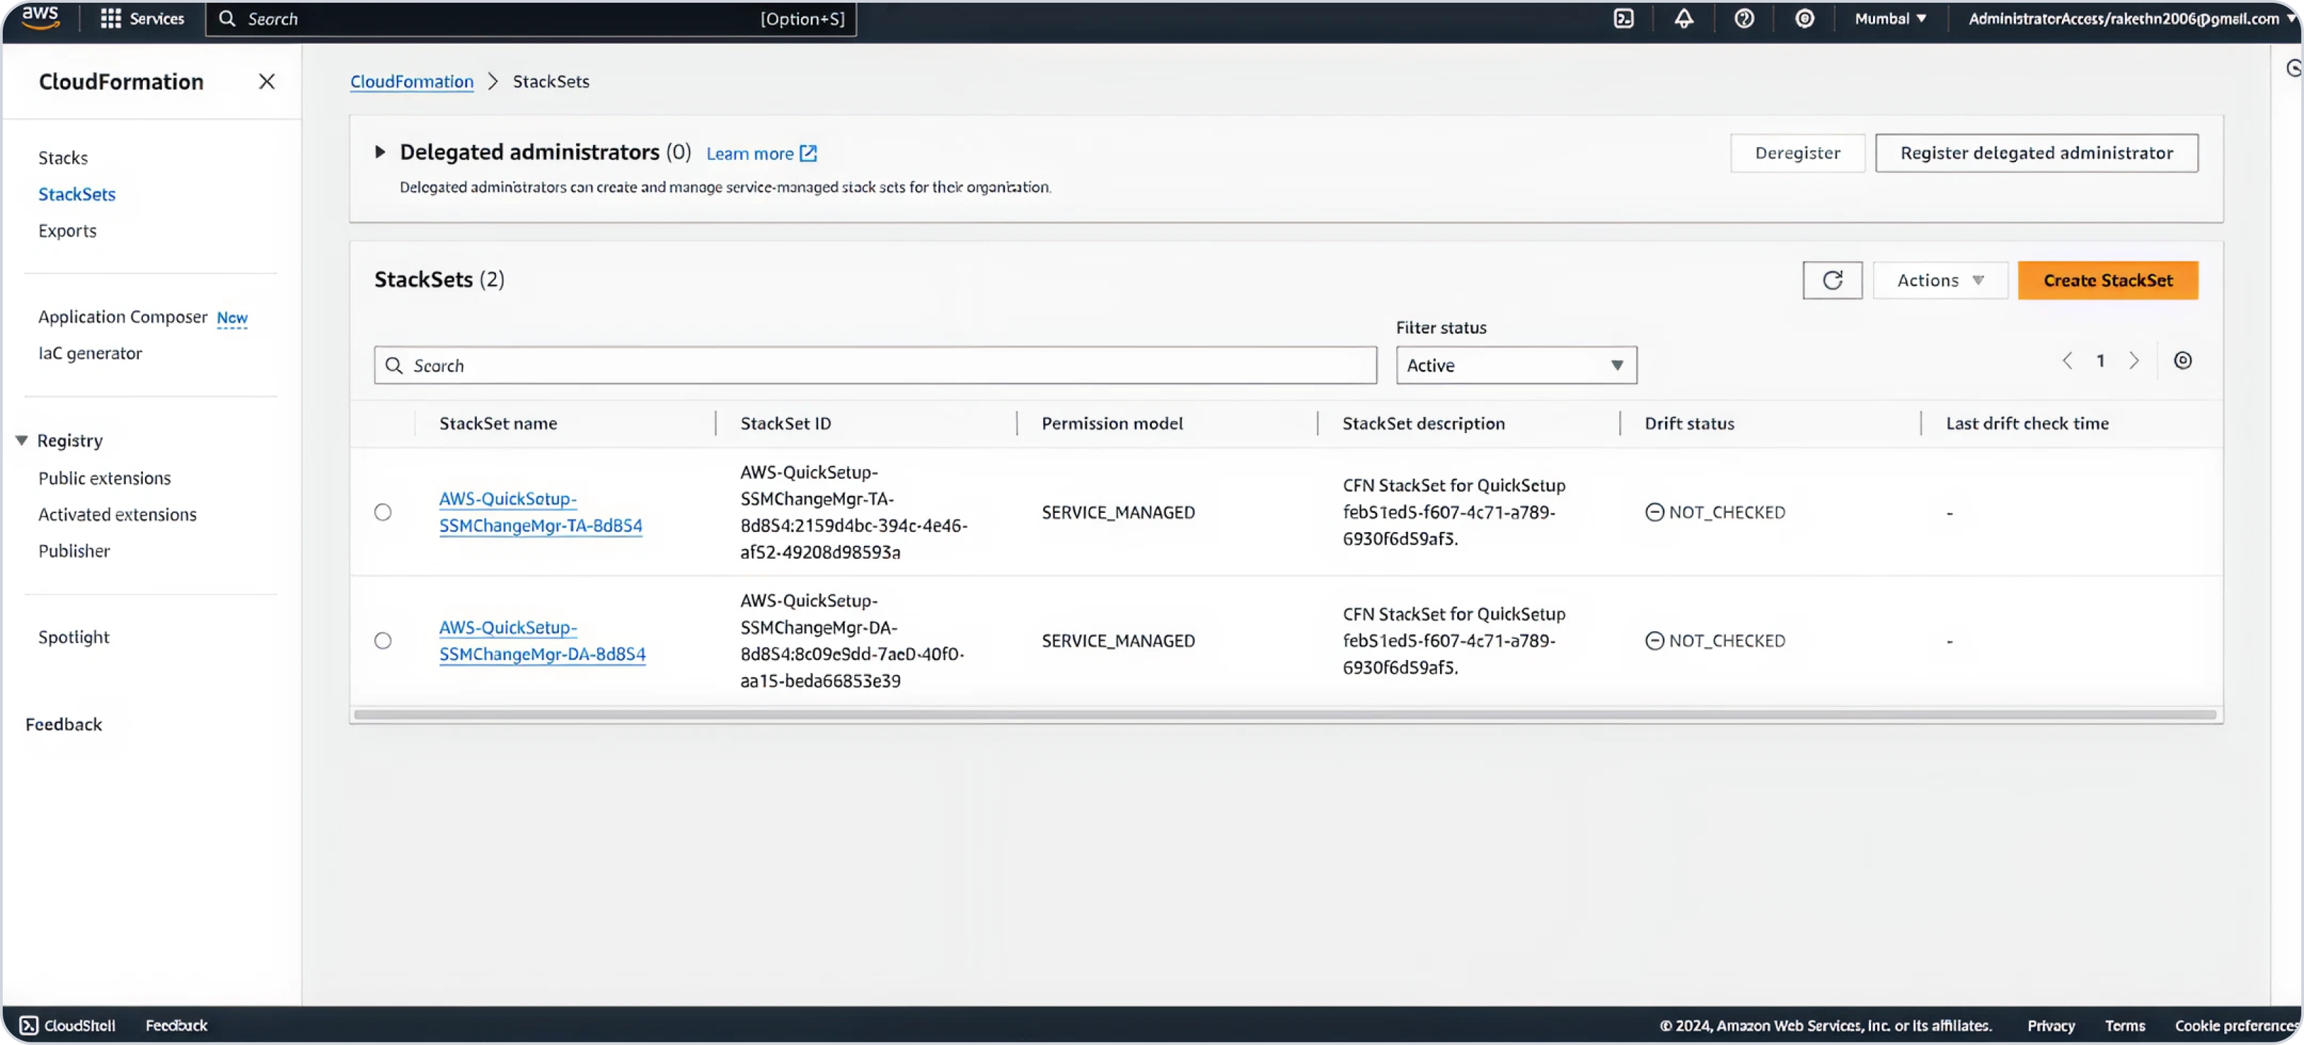
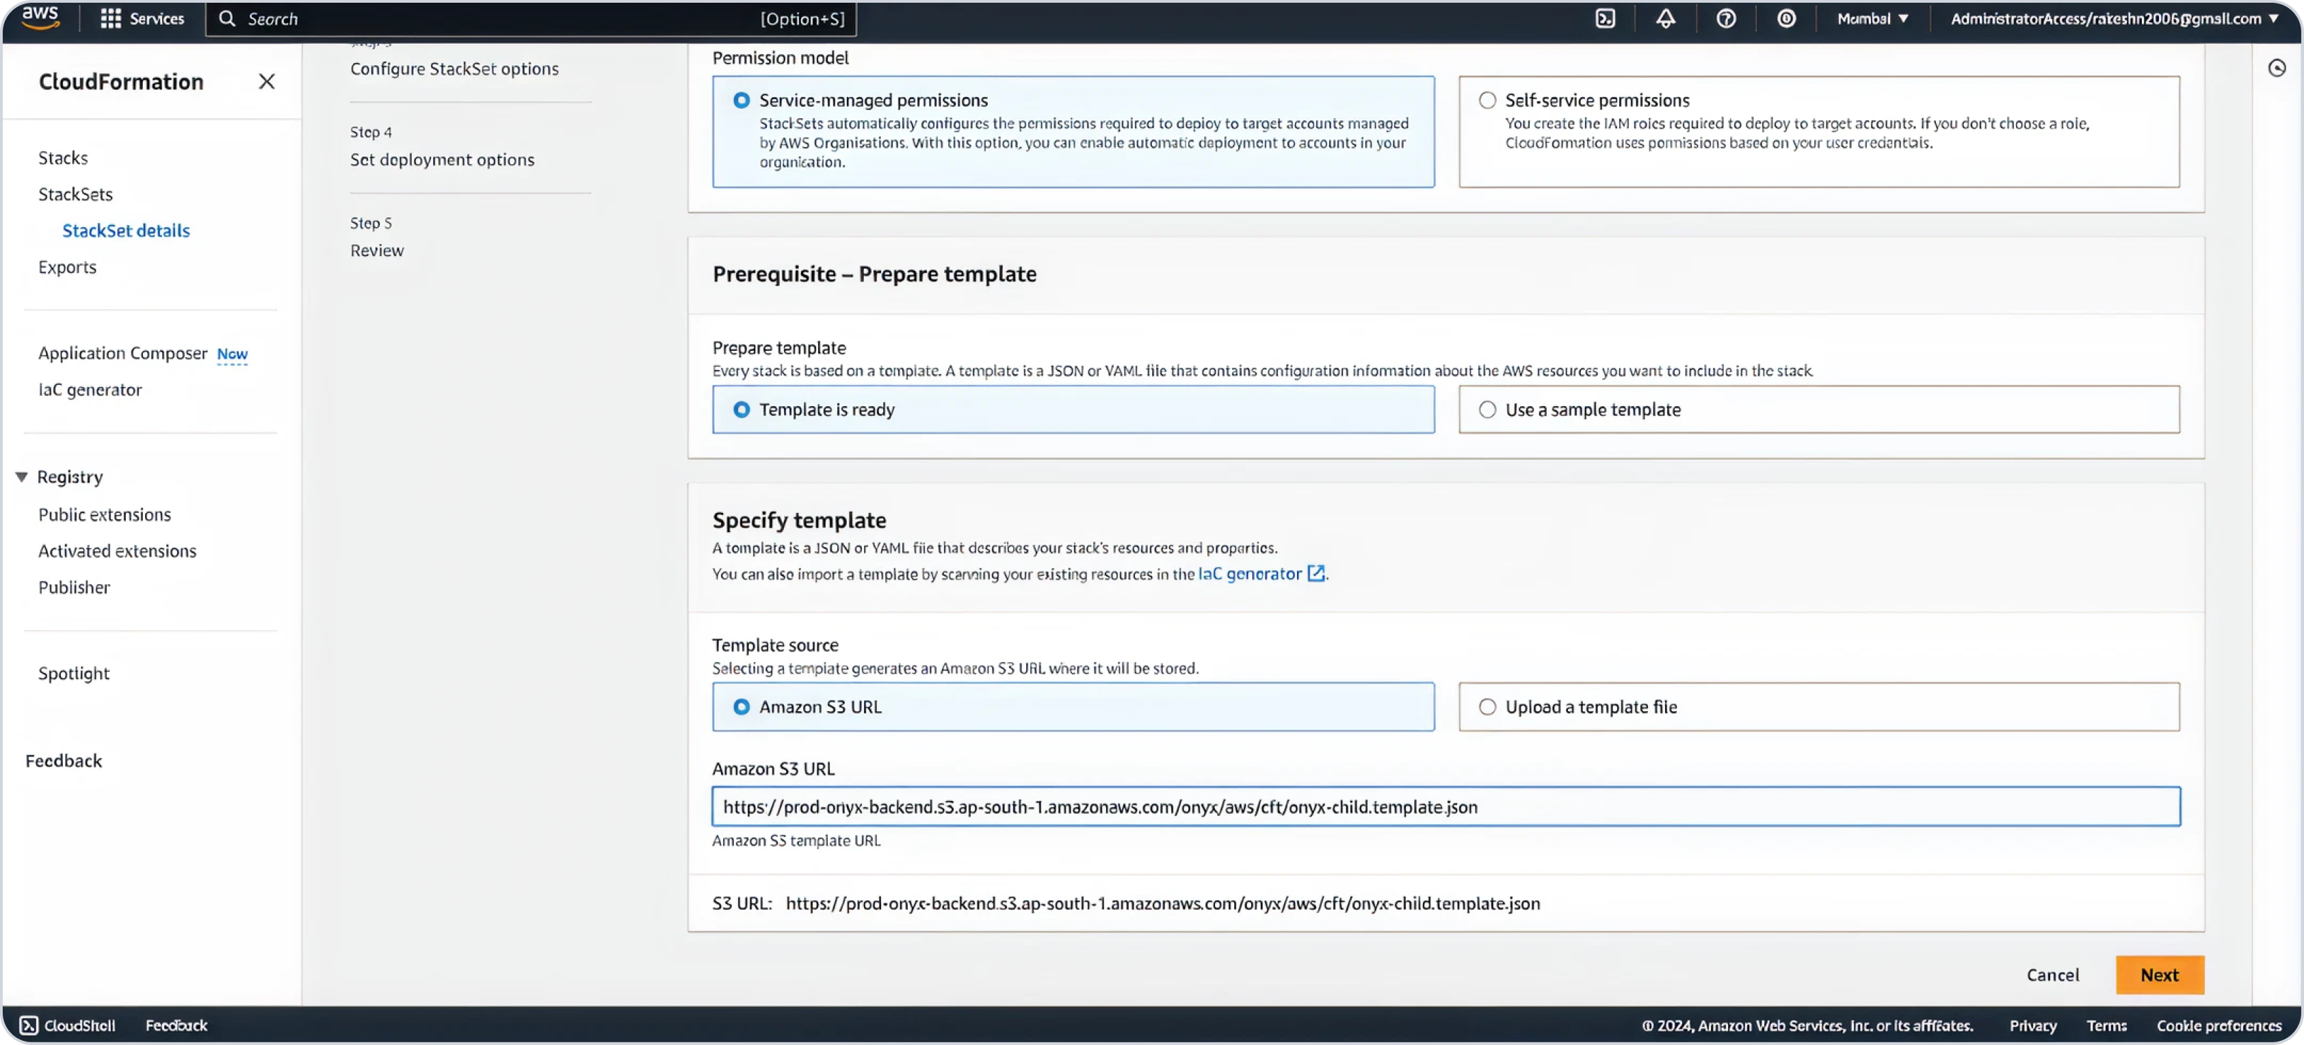
Select "Service-managed permissions" as the Permission Model.
Use this URL to paste in template section.
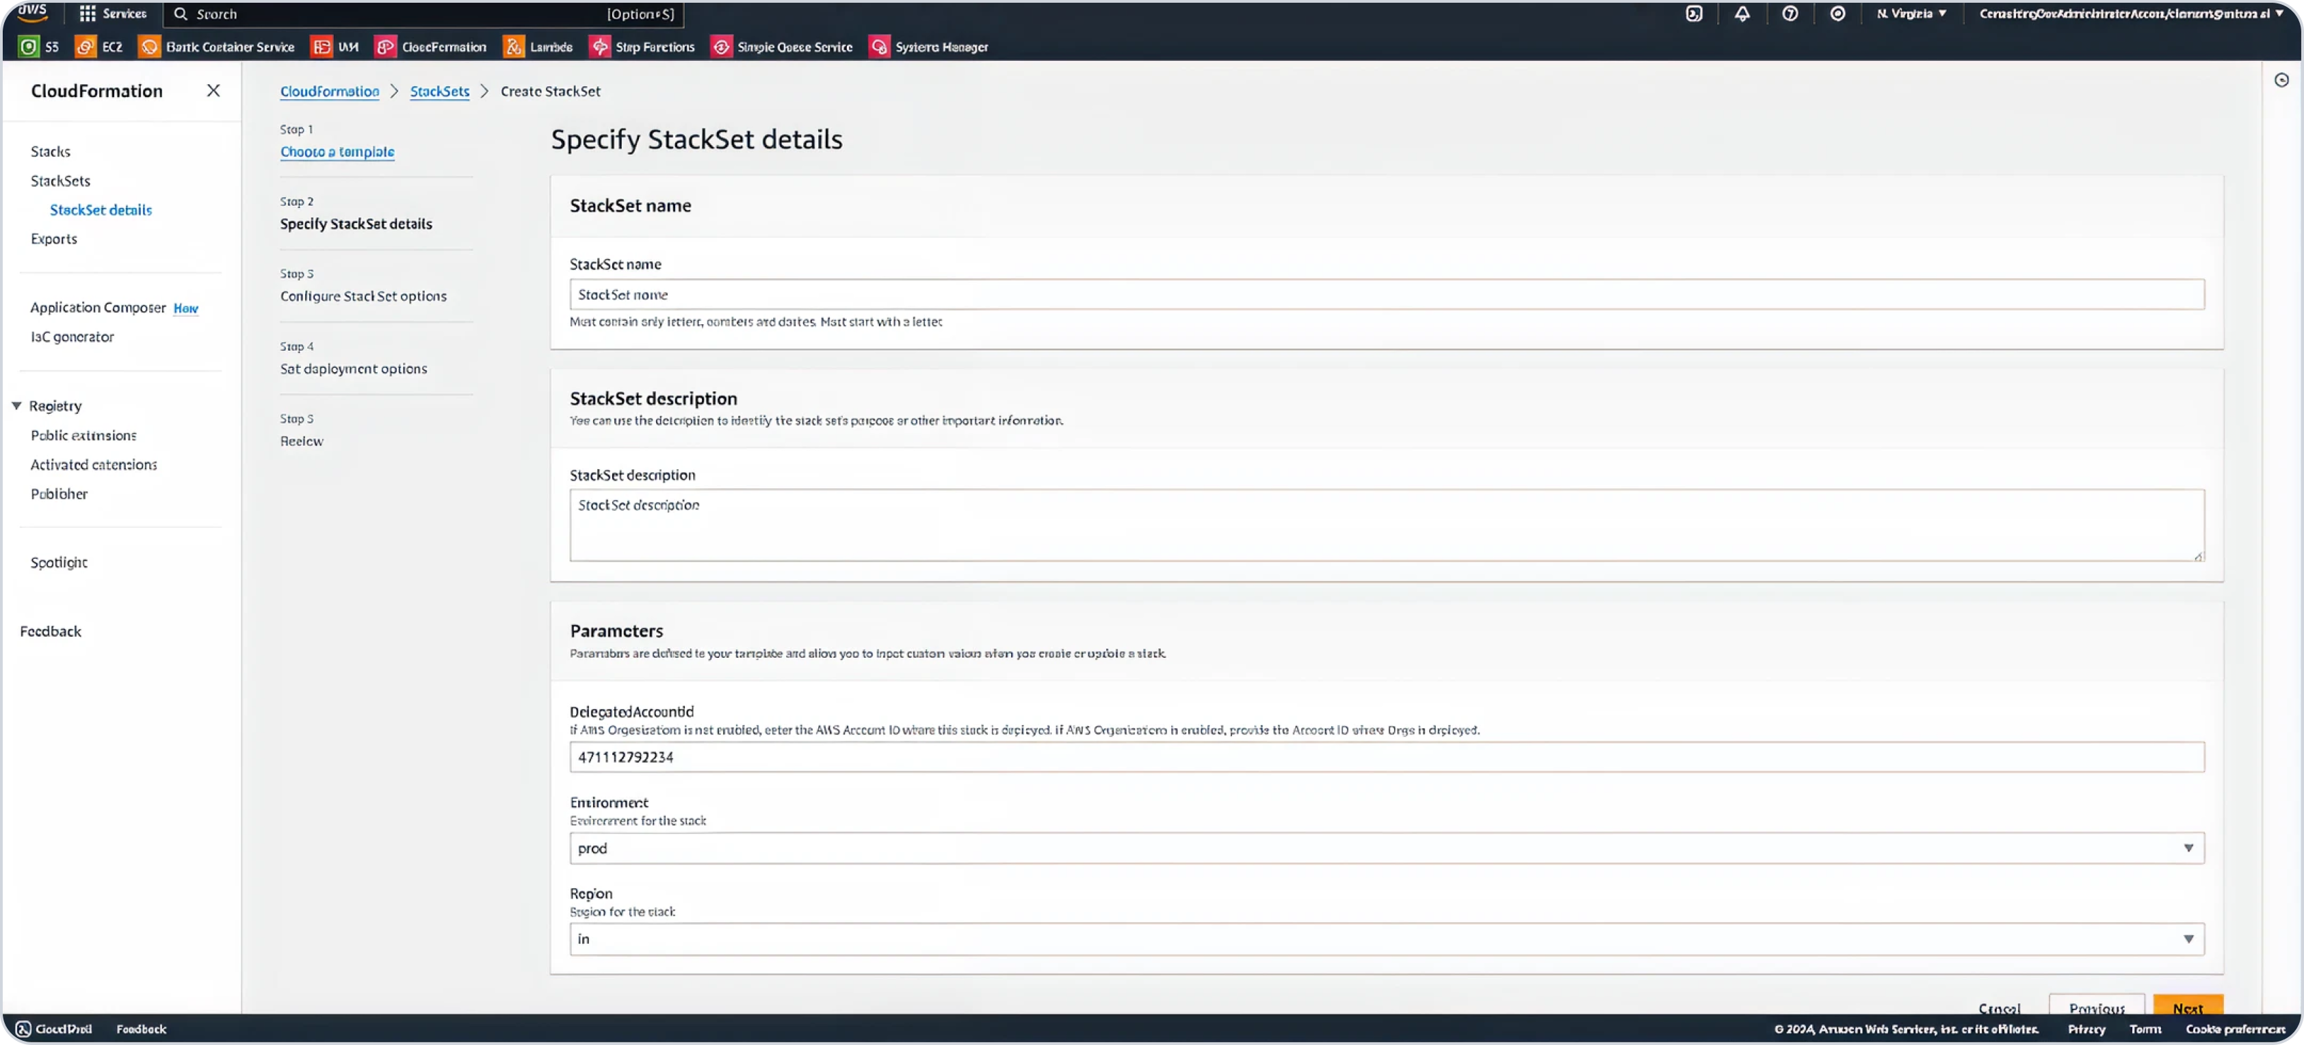
Select a Preferred Stack Name
Enter the Delegated Account ID, keep the Environment as "prod," and Region to "mum" (change region to "us" if in the US region) for deploying the Child Stack.
Add any desired tags and click Next.
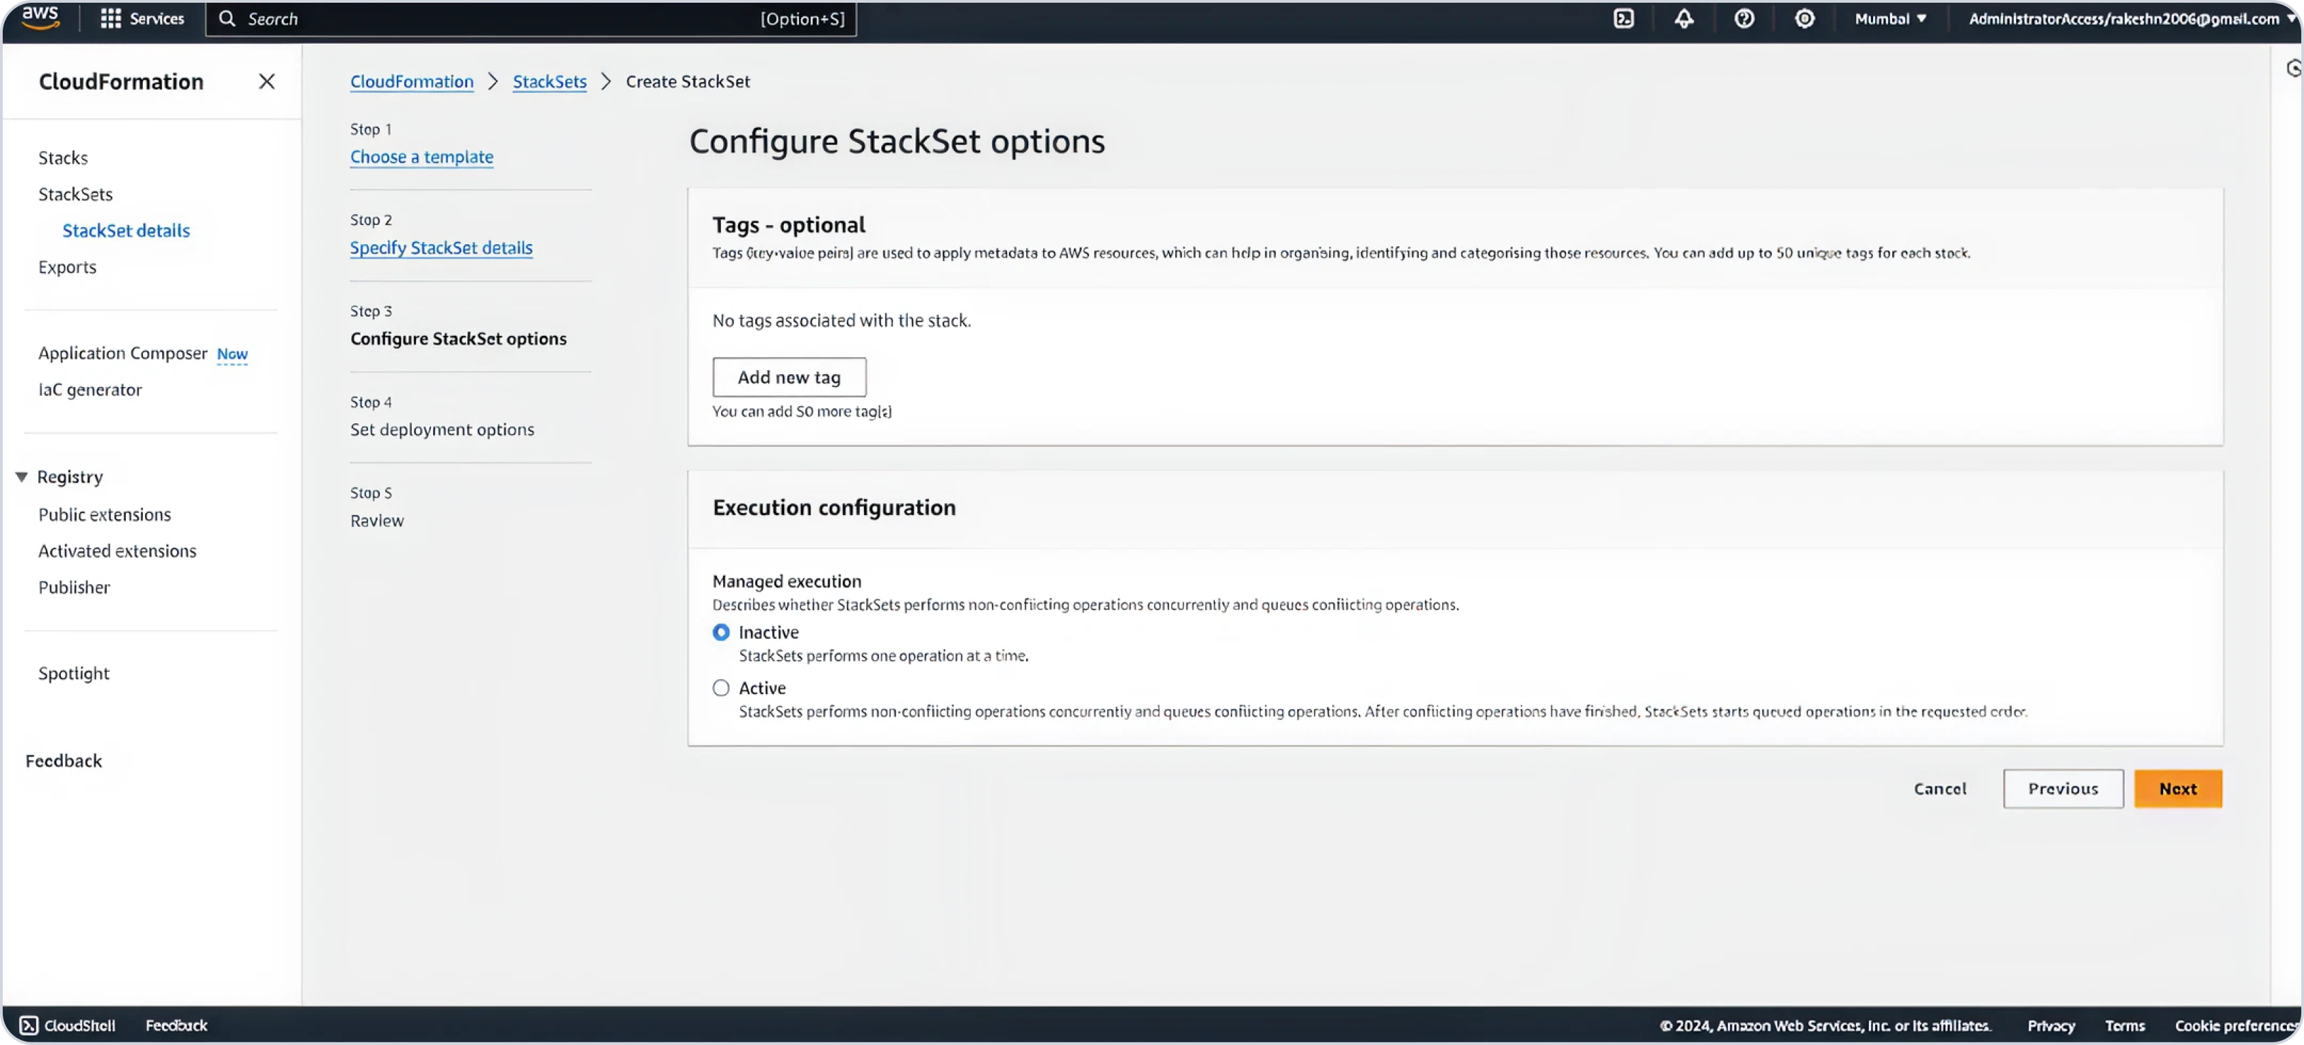
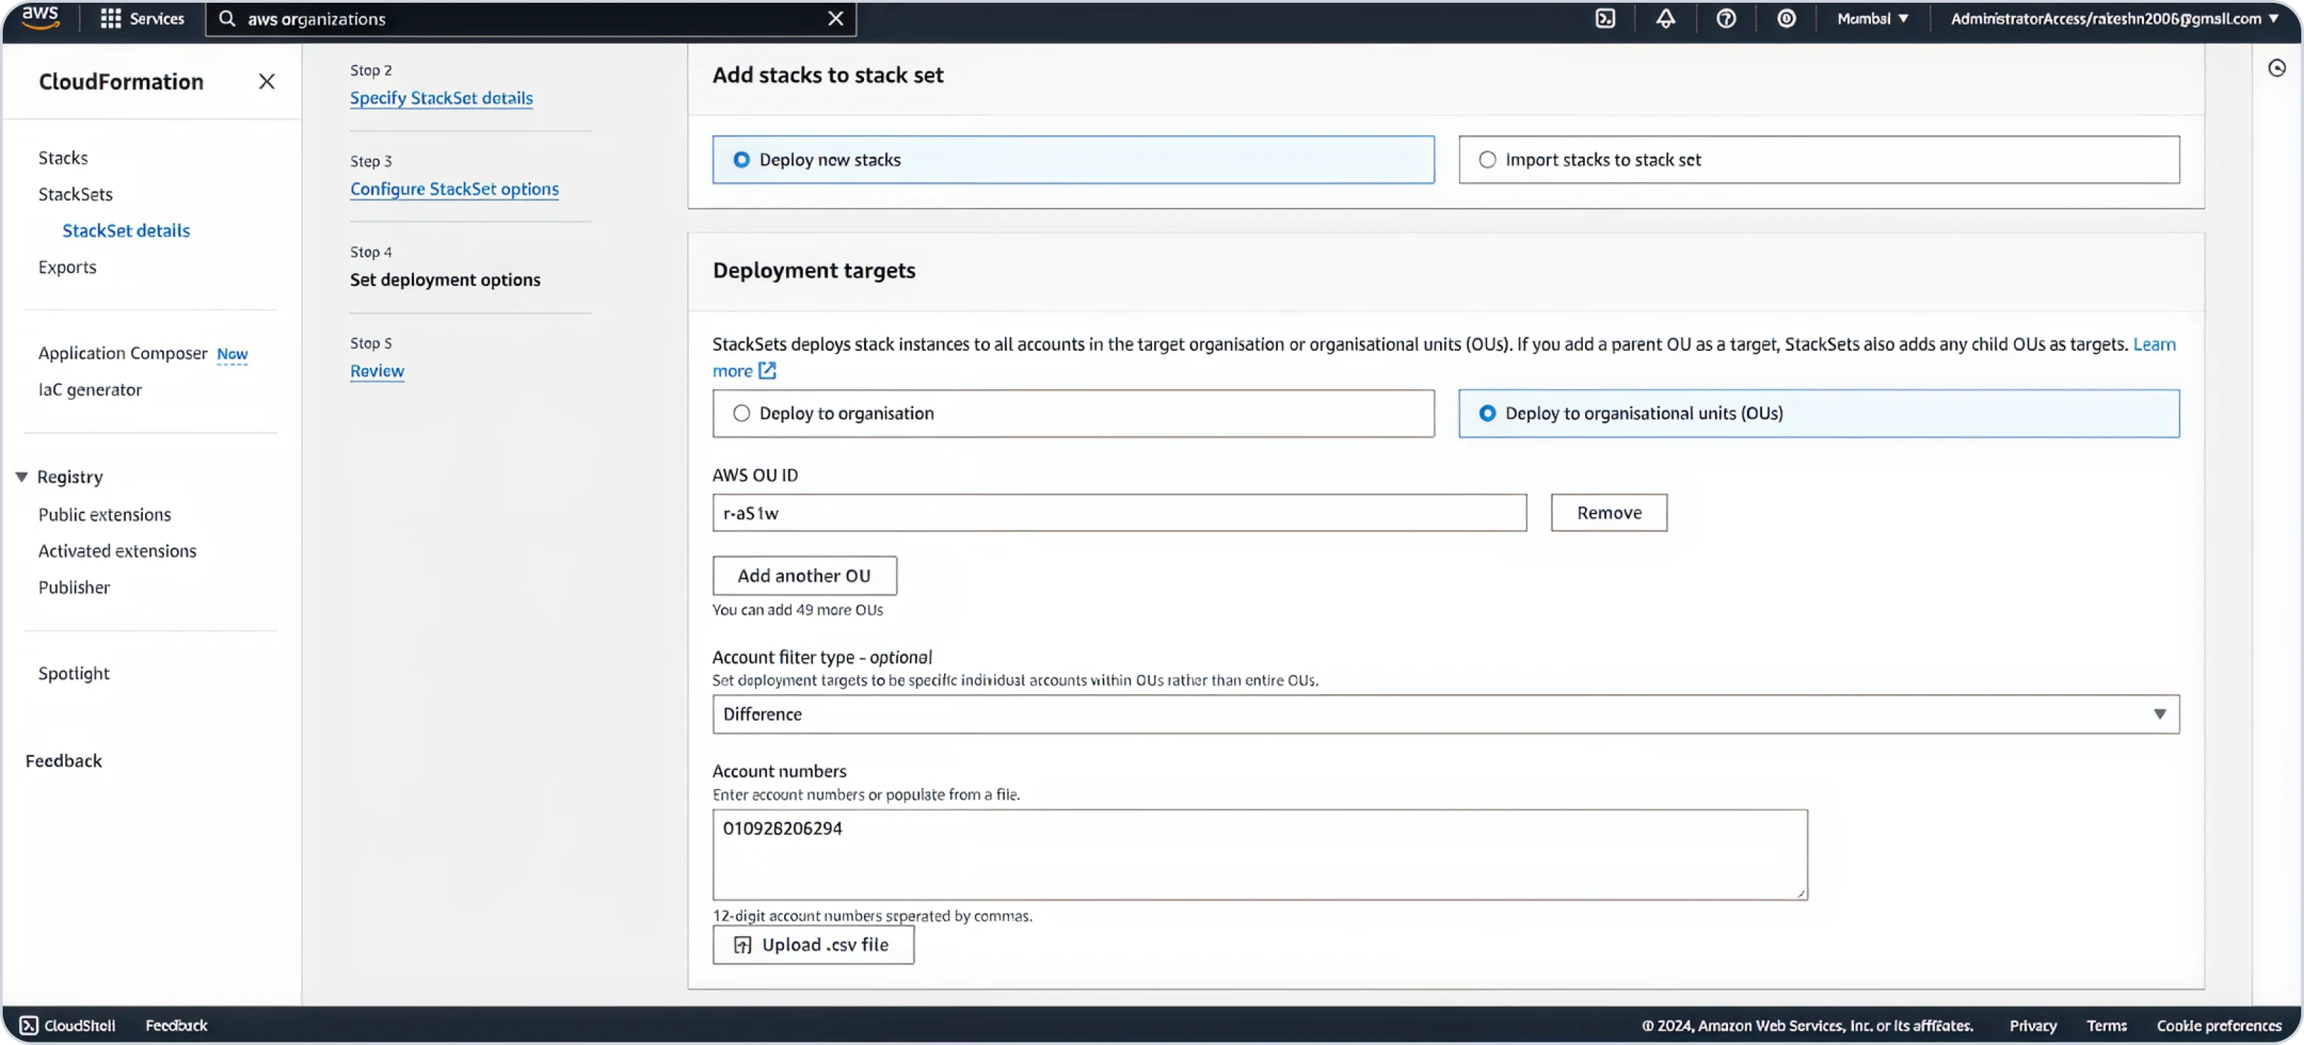
Select
Deploy new stacks.Under Deployment targets, choose
Deploy to organizational units.Enter the root OU ID saved earlier.
For Account filter type, select
Differenceand input the Delegated Account ID in the Account numbers section.
Select a region where you want to deploy the child stack.
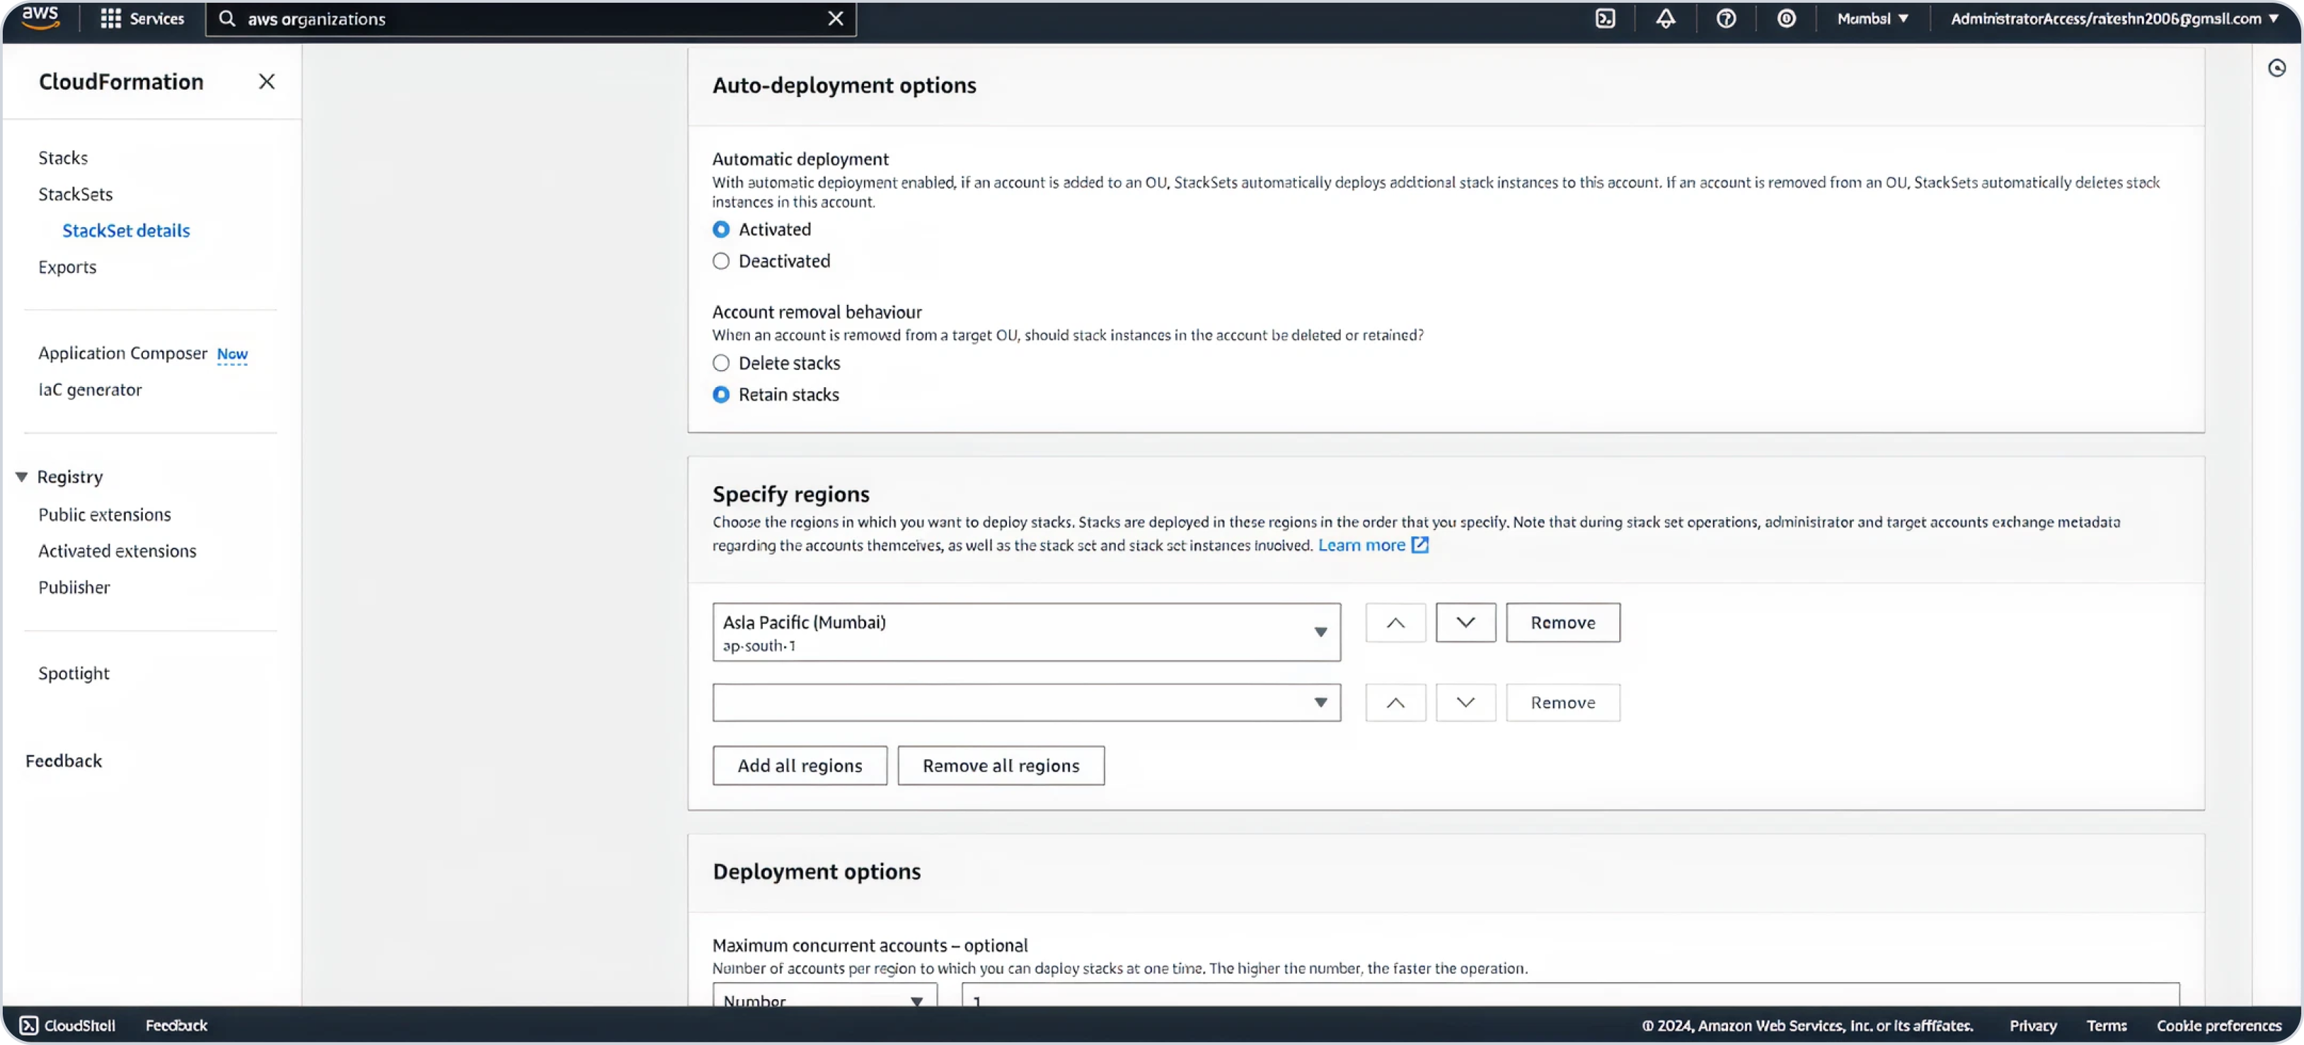
Define the maximum concurrent accounts linked in your organization. Select Parallel for region concurrency and click Next.
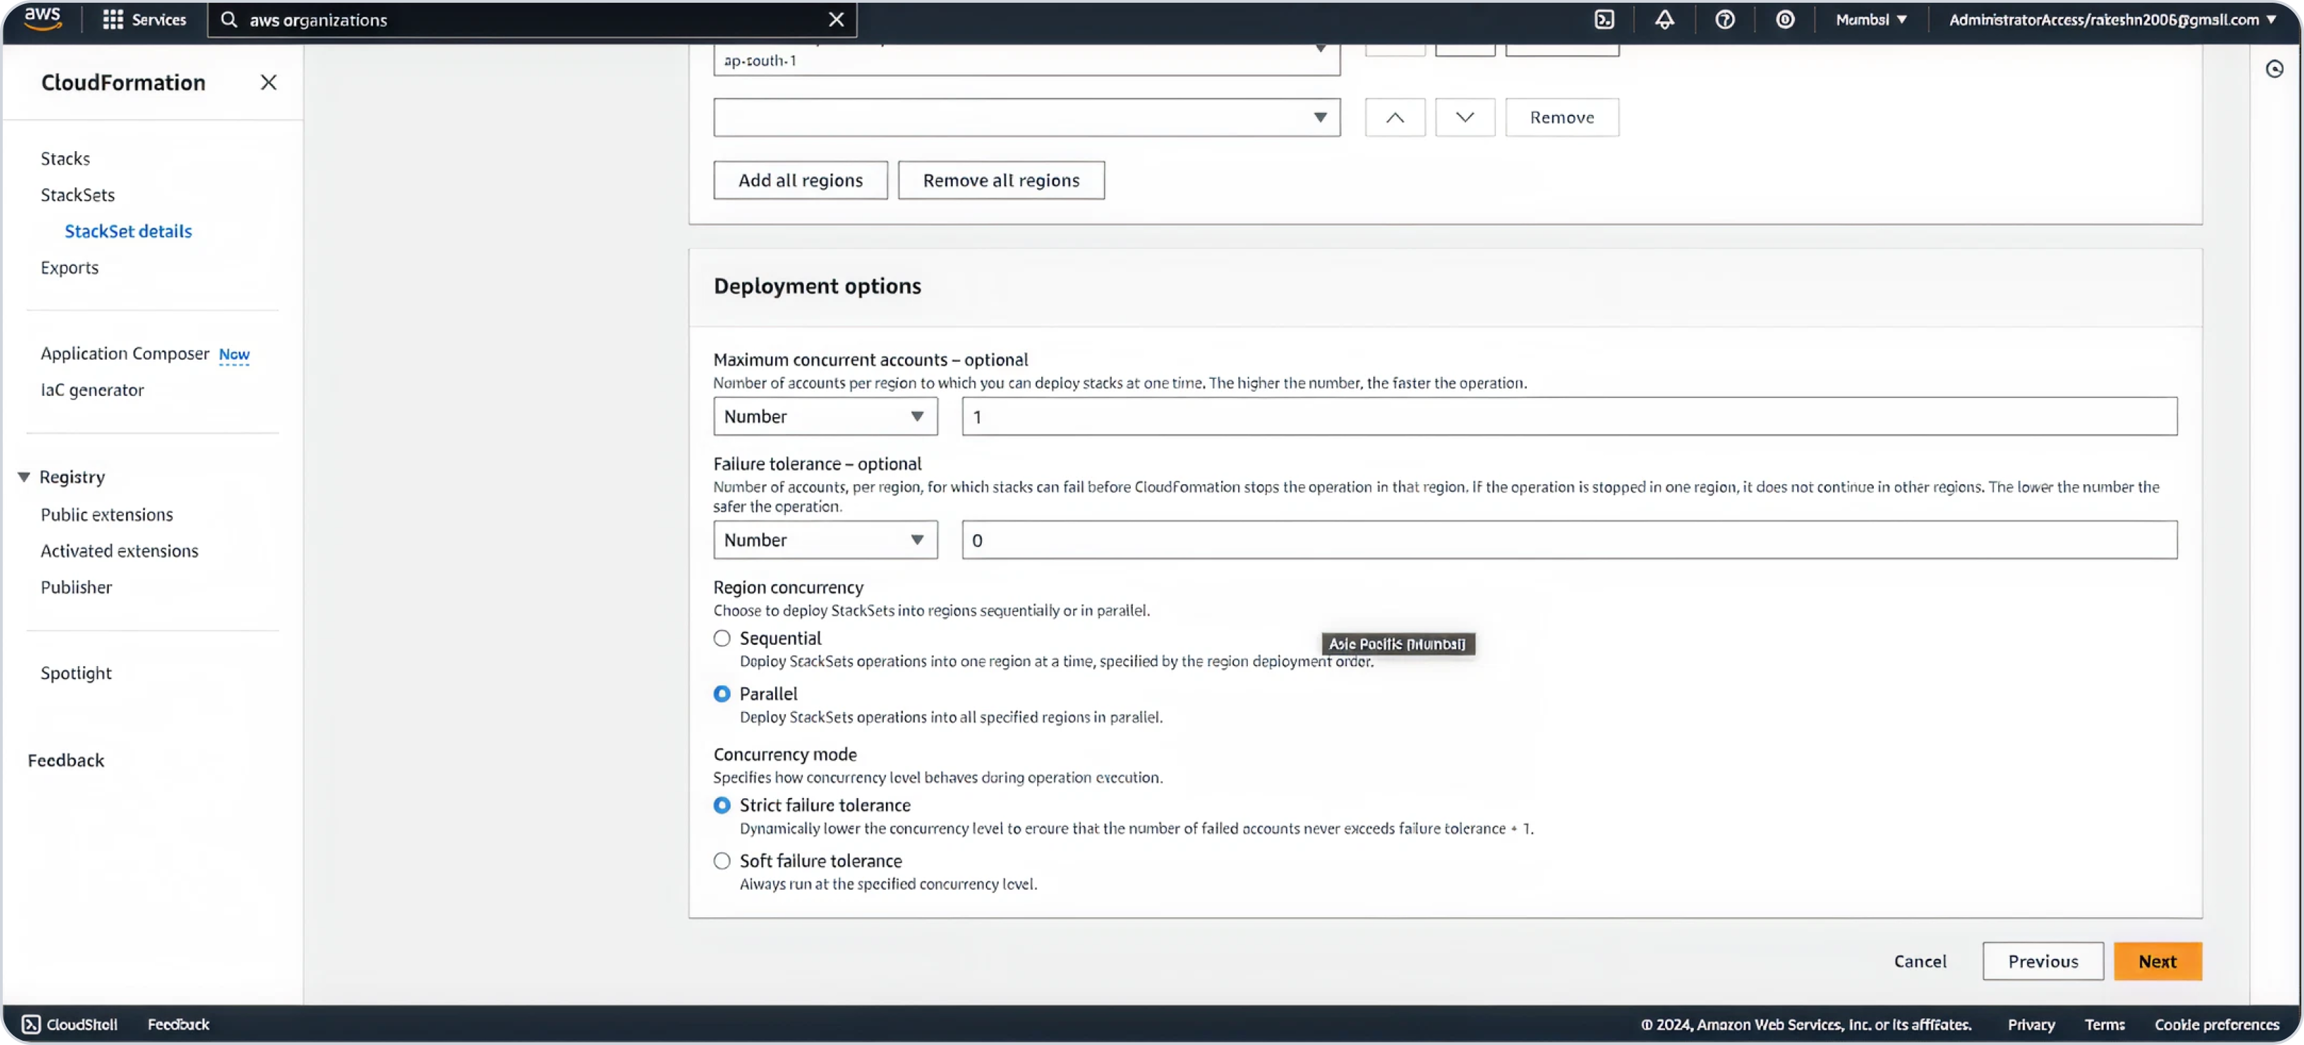
Acknowledge IAM role creation and click
Submit.
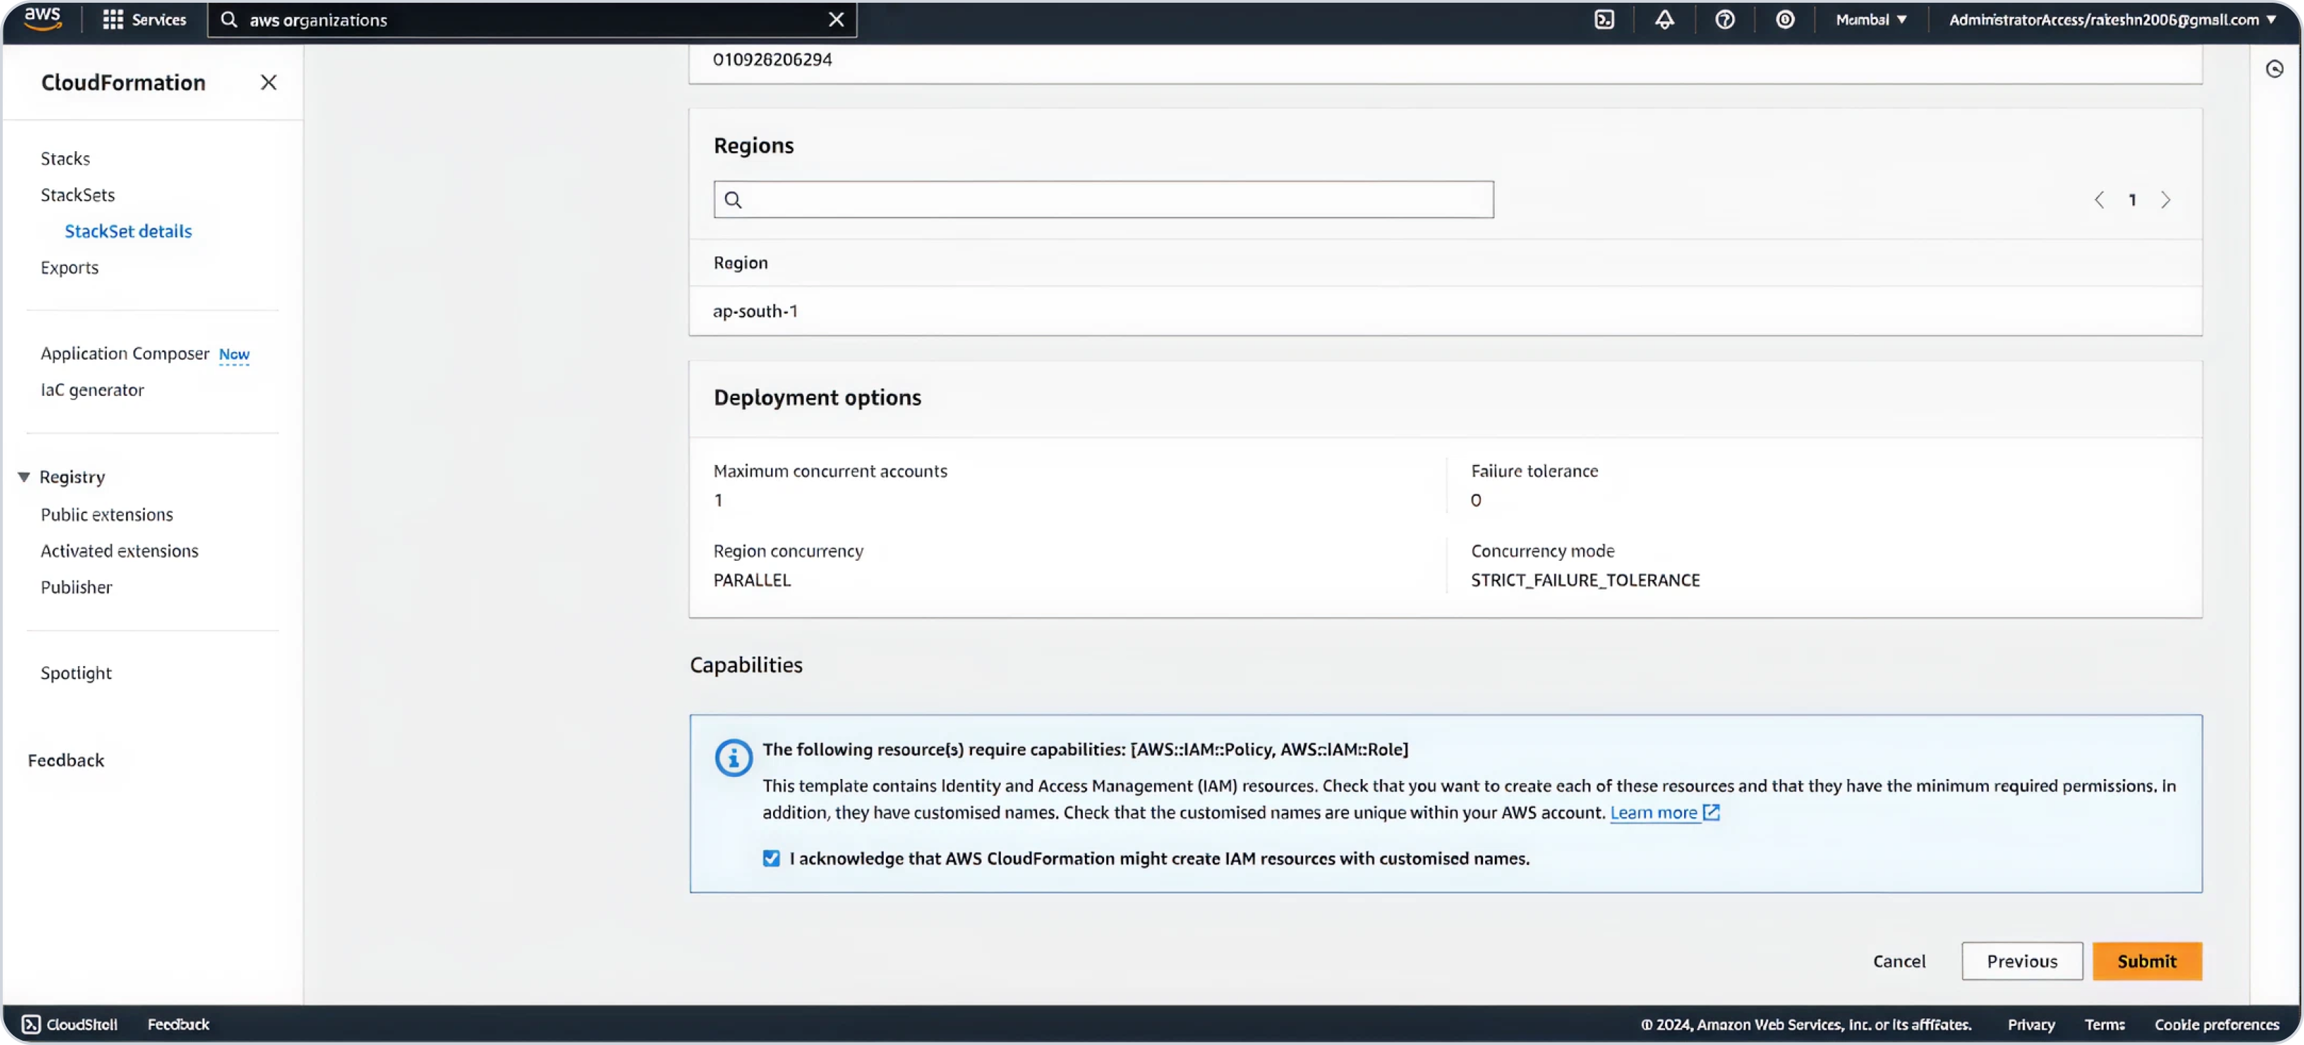
Allow deployment to complete.
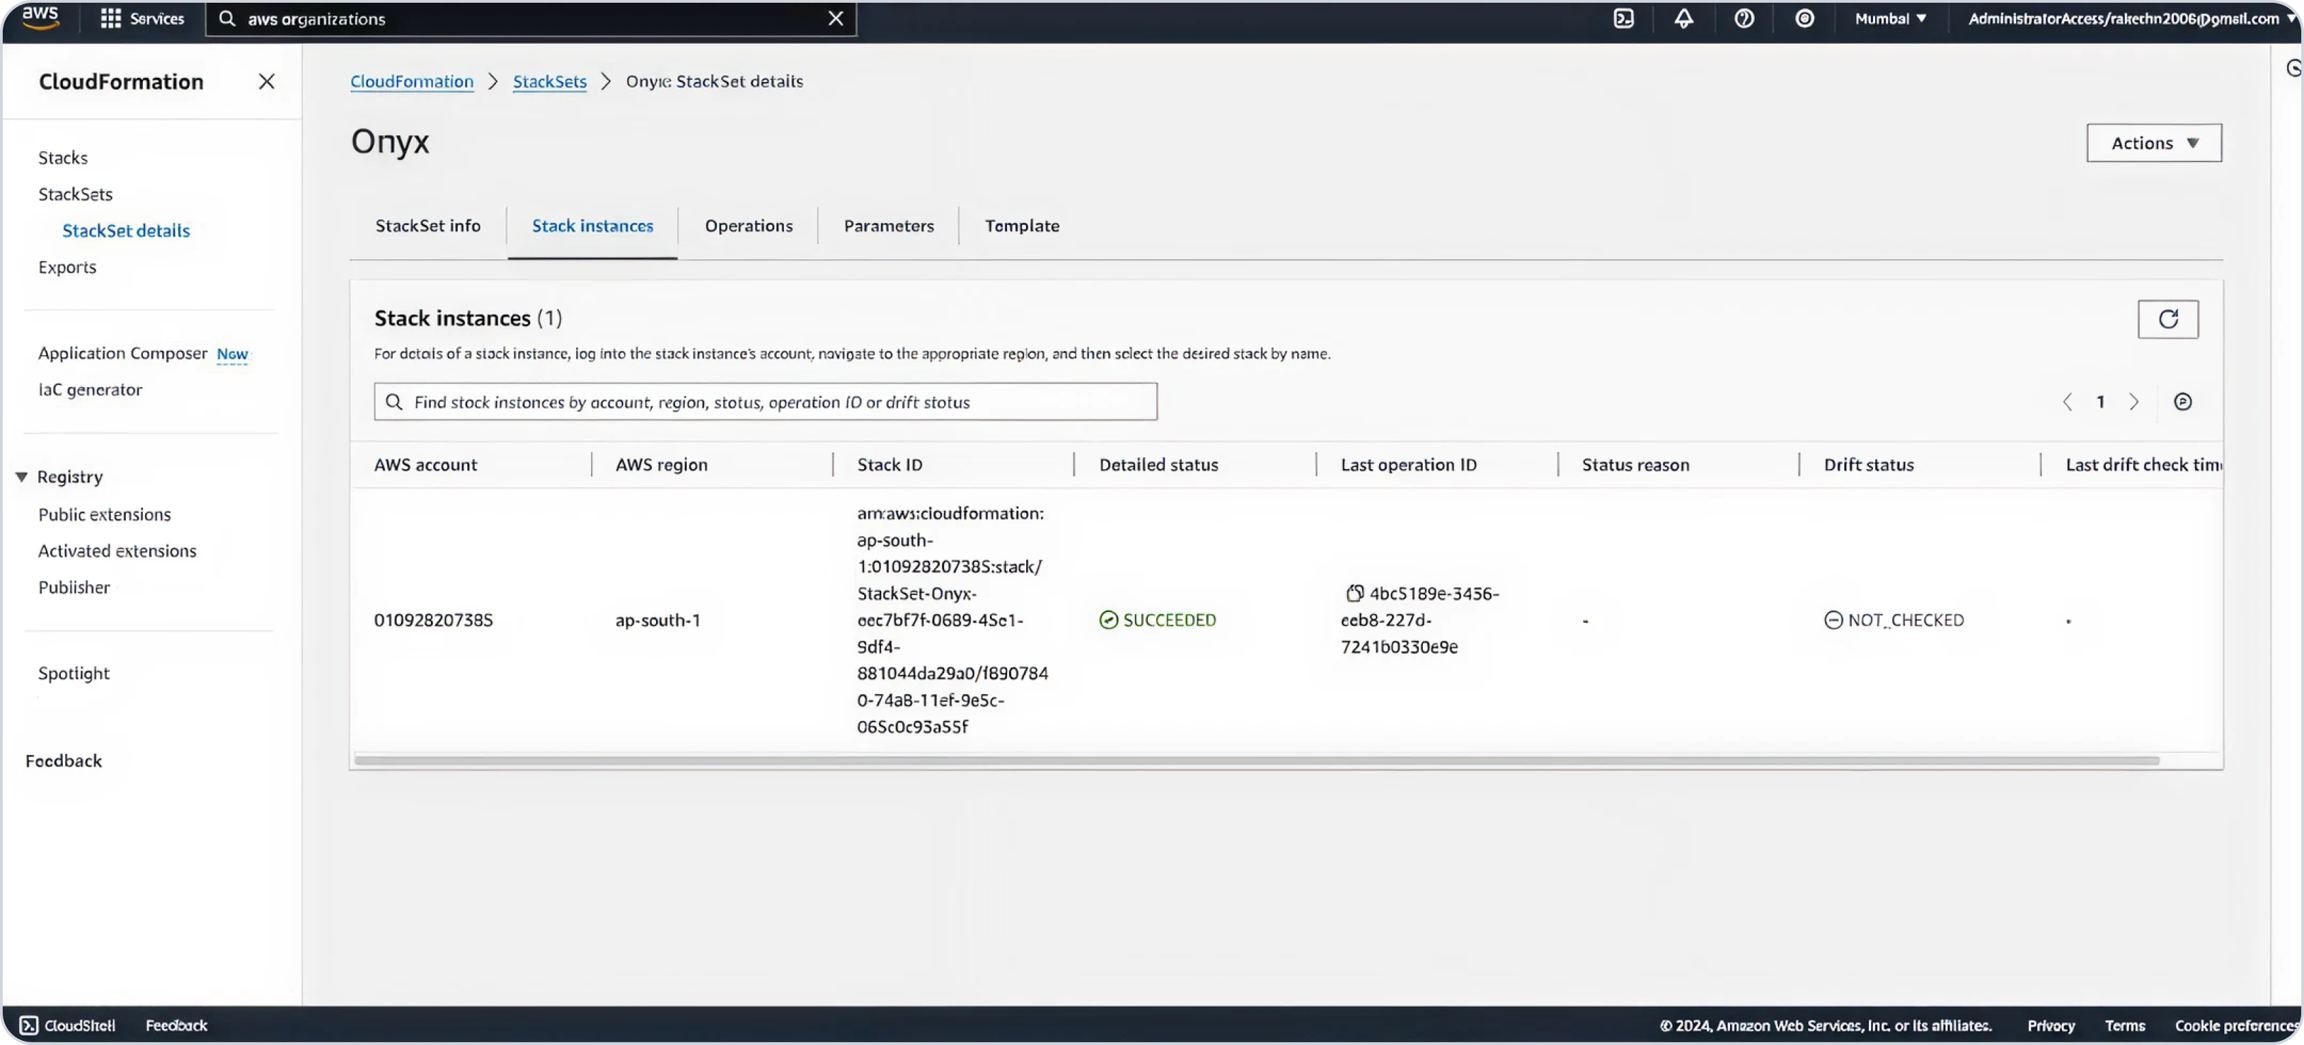
Post-Setup
Once the setup is complete, the connection status in the Memory Metrics tab will update to Connected for the configured account.
From this point forward:
OneLens will automatically manage the enabling and disabling of memory metrics in your account as needed.
Memory usage data will begin flowing automatically into your OneLens dashboard without requiring any manual intervention.
Last updated


