> For the complete documentation index, see [llms.txt](https://docs.onelens.cloud/llms.txt). Markdown versions of documentation pages are available by appending `.md` to page URLs; this page is available as [Markdown](https://docs.onelens.cloud/facts-and-faqs/faqs/connect-slack-private-channels-to-onelens.md).
# Connect Slack Private Channels to OneLens
This article will guide you through the process of granting One Lens access to your private Slack channels for setting up workflows and receiving insights and alerts.
To enable this, you'll follow a four-step process:
1. [Add OneLens bot in the Private Slack Channel](#add_the_onelens)
2. [Verify the Connection by Creating a Workflow](#verification)
## Step-by-Step Guide
### Add the OneLens Bot to the Private Channel
{% hint style="info" %}
**Note:** You must be a member of the private Slack channel to invite the OneLens bot. If you can’t invite it, contact your Slack admin to check your permissions.
{% endhint %}
{% stepper %}
{% step %}
Return to your Slack dashboard and select the private channel you wish to grant access to One Lens.
{% endstep %}
{% step %}
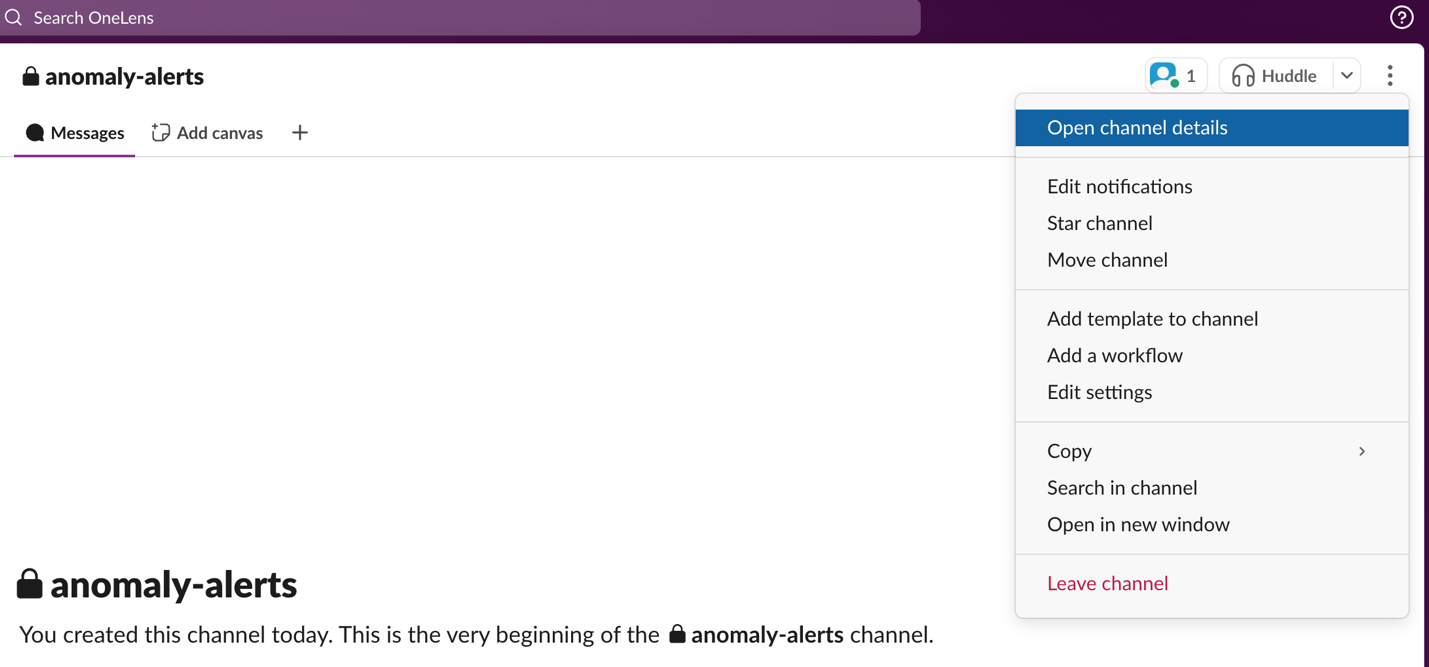
Click on the three dots on the right side and select **Open Channel Details**.
{% endstep %}
{% step %}
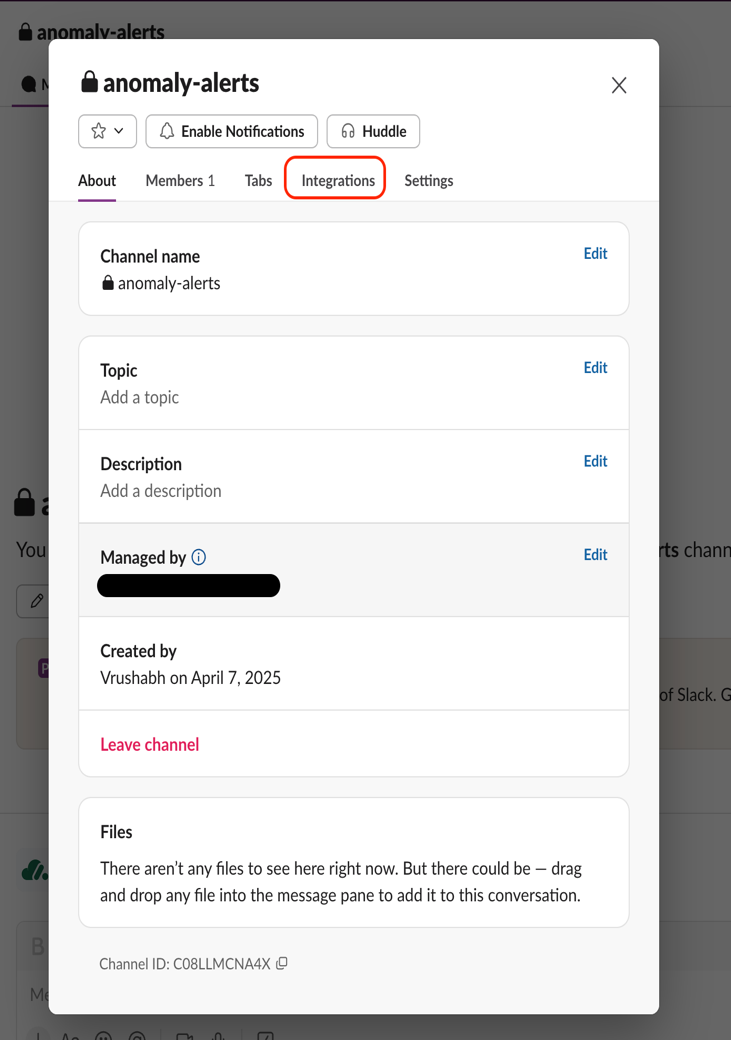
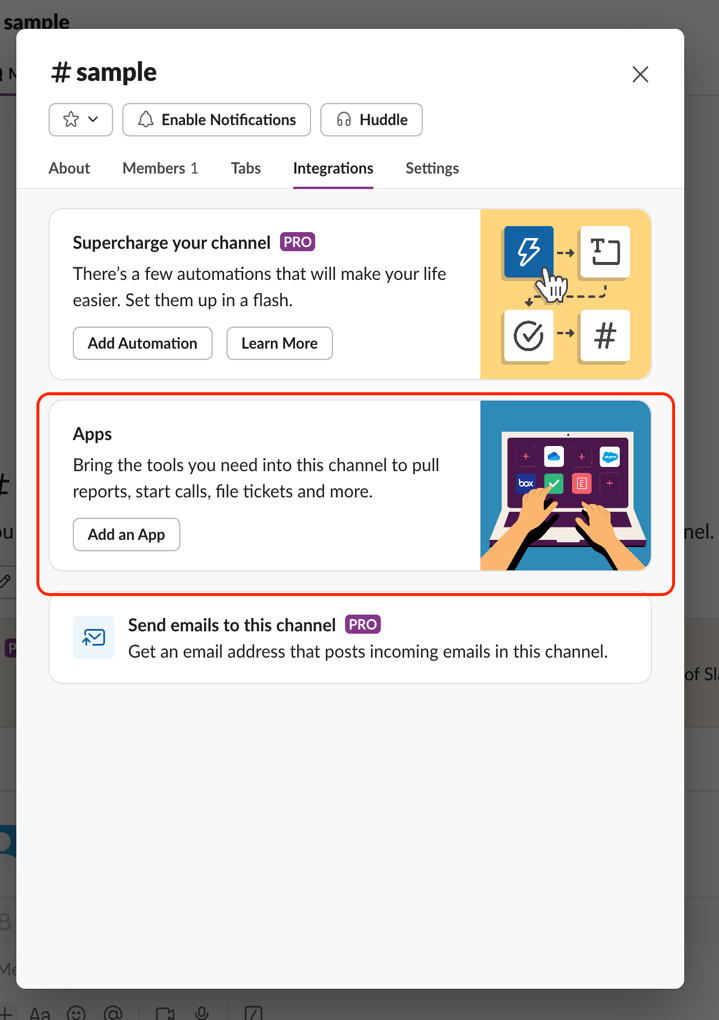
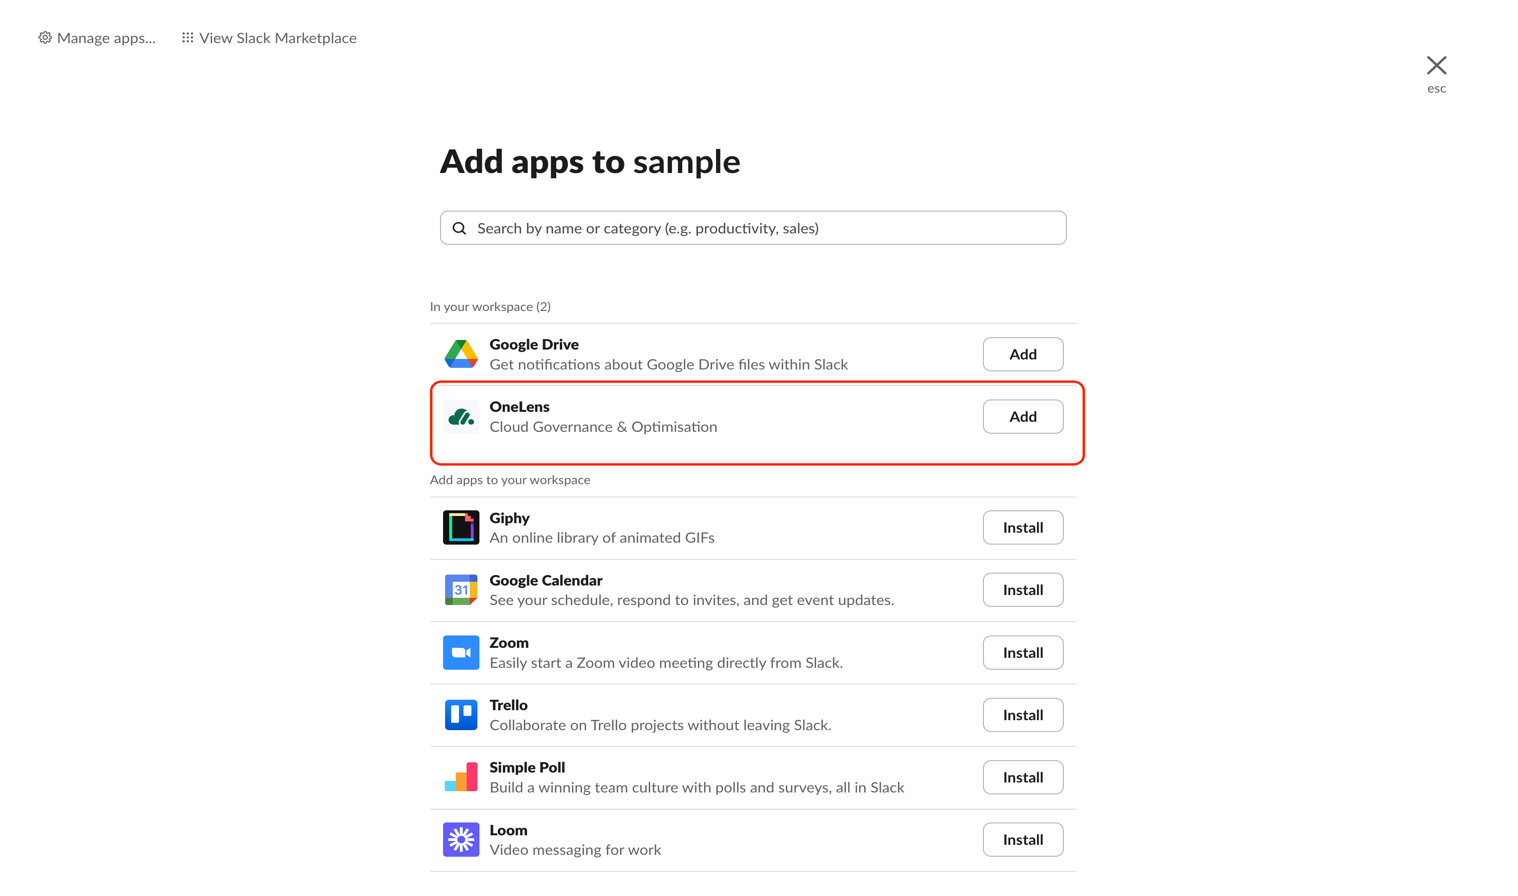
Go to **Integrations** and click on **Add an app**. Choose One Lens. You should see a message indicating that OneLens has been added to your selected channel.
{% endstep %}
{% step %}
Open the private channel and then click on the Channel name to get the channel Details.
Copy the slack private channel ID present at the bottom of it.
{% endstep %}
{% endstepper %}
### Verification
To verify that the private channel has been granted access, let us create a sample workflow for anomaly alerts in your private Slack channel.
{% stepper %}
{% step %}
Navigate to the workflows.
{% endstep %}
{% step %}
Click on **Create** to start a new workflow.
{% endstep %}
{% step %}
Write a workflow name and click **Create Workflow**.
{% endstep %}
{% step %}
Select the trigger that will initiate the workflow. You can choose from multiple trigger types such as:
* **Anomaly Detection**
* **Tickets**
* **Cost Alerts**
* **Resource Events**
{% endstep %}
{% step %}
Once a trigger is selected, configure the conditions that should be met for the workflow to run.
{% endstep %}
{% step %}
Click **Save Changes**.
{% endstep %}
{% step %}
Go to **Add step** and choose **Slack**.
{% endstep %}
{% step %}
Click on **Send Slack alerts to a channel.**
{% endstep %}
{% step %}
Choose the connection as **Default**.
{% endstep %}
{% step %}
In the **Channel** section, you should see your private channel. Choose it.
{% hint style="warning" %}
In case you do not see your private channel, use the **Channel ID** to find it.

{% endhint %}
{% endstep %}
{% step %}
Write an additional message if desired and preview your mock data.
{% endstep %}
{% step %}
Click **Save Changes**.
{% endstep %}
{% step %}
Click **Publish** to finalize your workflow.
{% endstep %}
{% endstepper %}
Congratulations! Your workflow is now set up. Any anomalies detected by One Lens will be added to your private Slack channel.
---
# Agent Instructions
This documentation is published with GitBook. GitBook is the documentation platform designed so that both humans and AI agents can read, navigate, and reason over technical content effectively. Learn more at gitbook.com.
## Querying This Documentation
If you need additional information that is not directly available in this page, you can query the documentation dynamically by asking a question.
Perform an HTTP GET request on the current page URL with the `ask` query parameter, and the optional `goal` query parameter:
```
GET https://docs.onelens.cloud/facts-and-faqs/faqs/connect-slack-private-channels-to-onelens.md?ask=&goal=
```
`ask` is the immediate question: it should be specific, self-contained, and written in natural language.
`goal` is optional and describes the broader end goal you are ultimately trying to accomplish on behalf of the user. GitBook uses it to tailor the answer towards what is most useful for that goal.
The response will contain a direct answer to the question and relevant excerpts and sources from the documentation.
Use this mechanism when the answer is not explicitly present in the current page, you need clarification or additional context, or you want to retrieve related documentation sections.
 {% endstep %}
{% step %}
Go to **Integrations** and click on **Add an app**. Choose One Lens. You should see a message indicating that OneLens has been added to your selected channel.
{% endstep %}
{% step %}
Go to **Integrations** and click on **Add an app**. Choose One Lens. You should see a message indicating that OneLens has been added to your selected channel.
 {% endstep %}
{% step %}
Open the private channel and then click on the Channel name to get the channel Details.
Copy the slack private channel ID present at the bottom of it.
{% endstep %}
{% step %}
Open the private channel and then click on the Channel name to get the channel Details.
Copy the slack private channel ID present at the bottom of it.


