Install Schedulers
Overview
Installation involves setting up the core Scheduler infrastructure in one AWS account and optionally onboarding other accounts for centralized scheduling.
How the Installation Happens
The OneLens Scheduler follows a simple two-step setup process:
Core Account Setup
You designate one AWS account (any account in your organization) as the core scheduler account.
The core account hosts the scheduler infrastructure that manages all schedules and actions.
Connecting Other Accounts
All other AWS accounts connect to the core account through a cross-account IAM role.
This allows the Scheduler to securely execute actions (e.g., start/stop/scale) across multiple accounts without duplicating infrastructure.
This design keeps the setup lightweight, centralized, and easy to maintain while supporting multi-account environments.
Accessing the Scheduler
Log in to your OneLens account.
Navigate to the Scheduler section from the left sidebar.
Click Getting Started with Scheduler Setup.

Following steps to be followed in order to perform deployment:
OneLens Permission Requirement
OneLens requires permission to:
Assume Customer SQS Message Role – Used to process and deliver scheduled execution messages.
After setup, OneLens only interacts with the CustomerQueue (SQS) in your core account. These messages carry scheduling instructions (e.g., start/stop resources) that are executed in connected accounts.
Set Up the Core Infrastructure
You can deploy the OneLens core infrastructure in any AWS account—it does not need to be limited to a master or delegated account.
Role of Core Account
This is the AWS account where the OneLens Scheduler service will be deployed. It serves as the central hub that:
Creates and manages all schedules for your organization
Assumes roles in child accounts to perform scheduled actions (start/stop instances, etc.)
Coordinates cross-account operations through secure IAM role assumptions
Maintains centralized security policies and access controls
Before you proceed, verify the CloudFormation Template (CFT) using the following link:
Deploy the CFT as a Stack
Sign in to the AWS Management Console for the account where you want the core infrastructure.
Account Permission Required
Before deploying the stack, ensure that the AWS account running the setup has the following permissions:
These permissions are strictly used for setting up and operating the OneLens Scheduler. They enable it to create and manage required AWS resources and communicate with your SQS queues to run schedules.
Navigate to CloudFormation and click Create Stack.
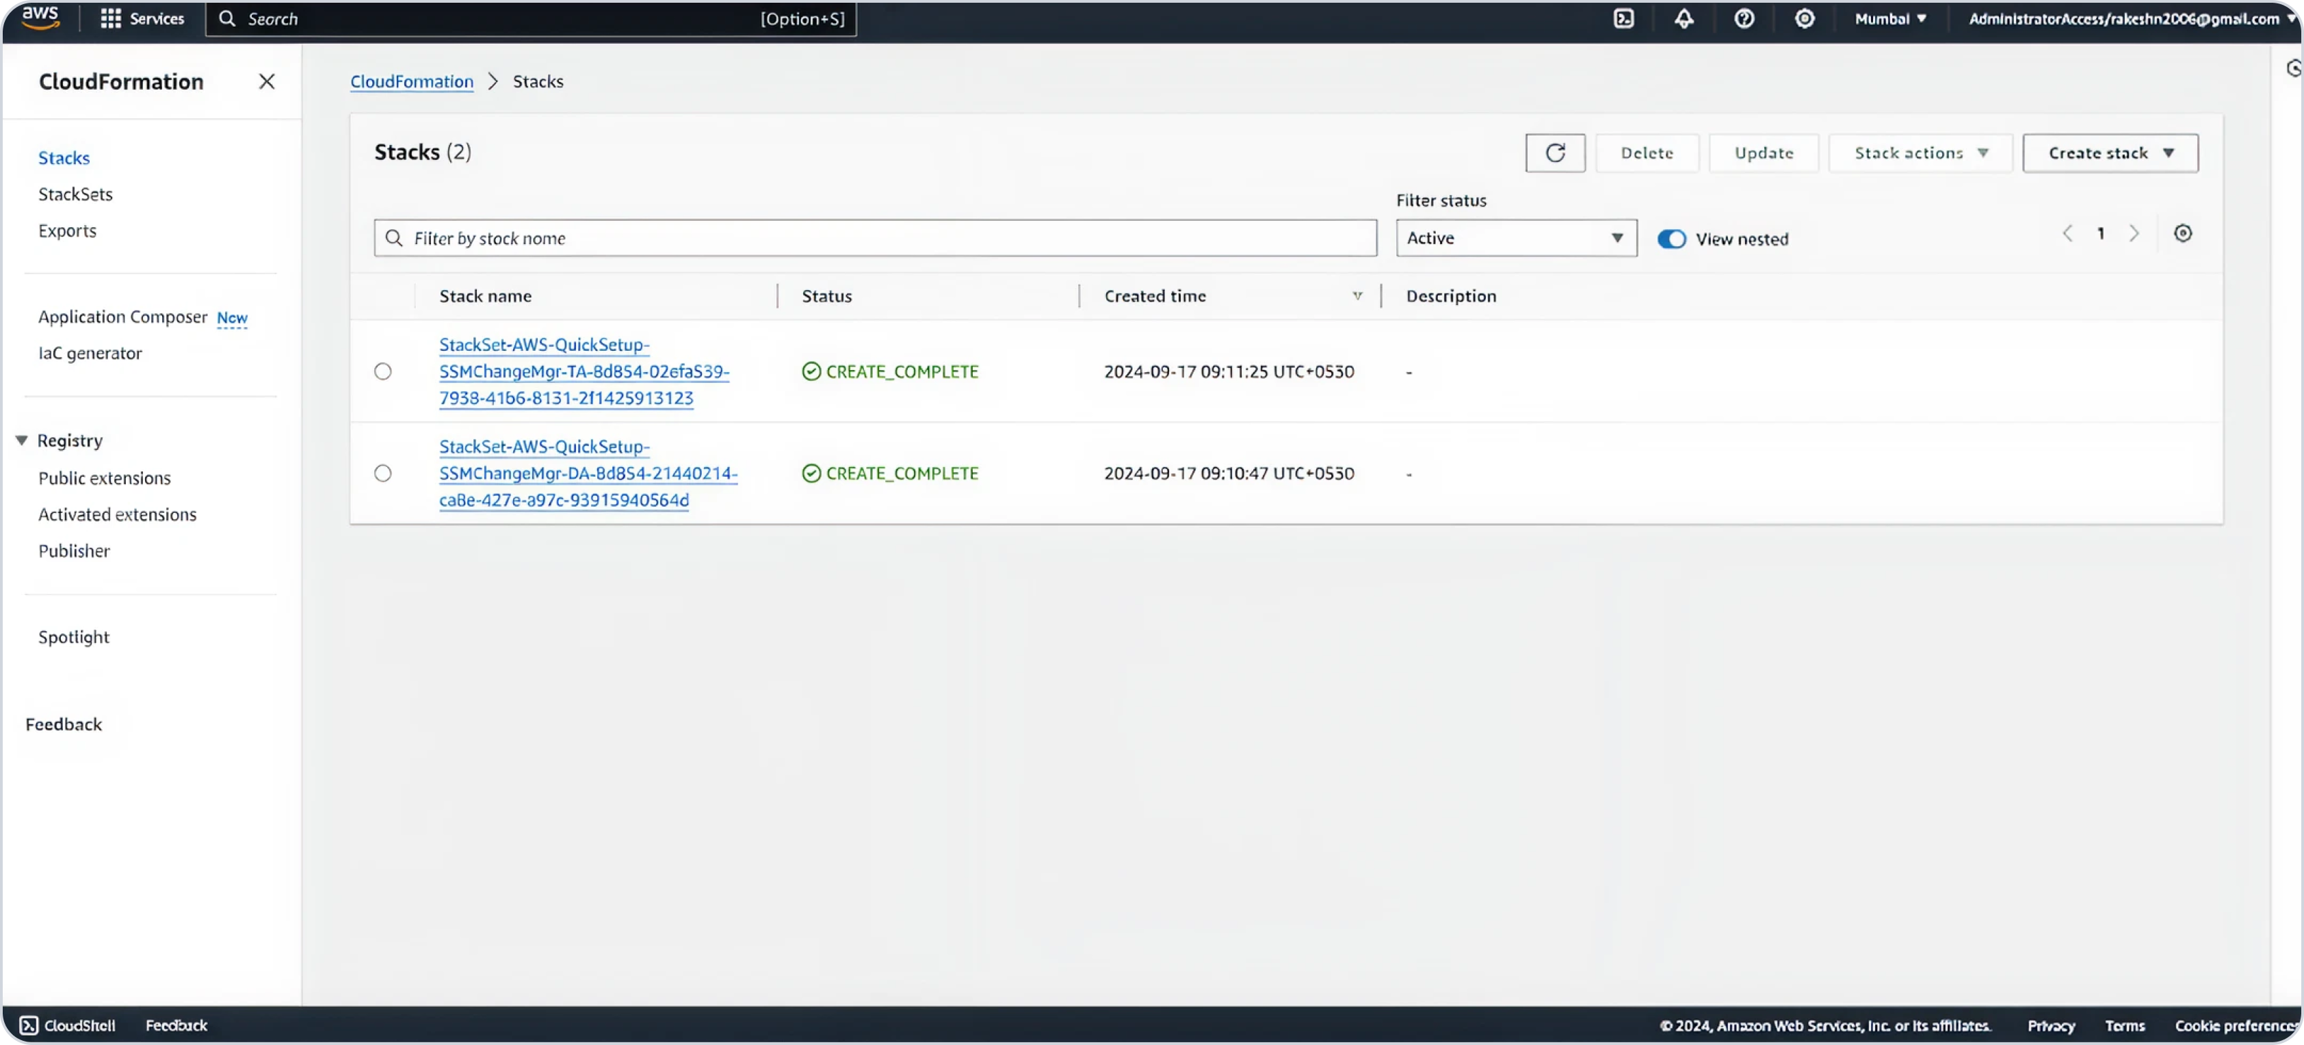
Choose Use an existing template.
Use this URL to paste in template section.

Under the Parameters section, enter your Tenant ID.
You can find this on the Onboarding Setup page in OneLens, under Core Infrastructure setup.
For
DeployMainScheduler:Select Yes if this is your first-time deployment of the Scheduler.
Select No if the Scheduler has already been deployed previously (for example, when adding additional services).

Acknowledge the role creation.

Review the details and click Submit.

Wait for deployment to complete.

Resources Created
When you deploy the core scheduler infrastructure in your chosen account, the following resources are created:
List of Resources
SQS Queue – CustomerQueue
Handles incoming schedule messages.
SQS Queue Policy – CustomerQueuePolicy
Grants required access permissions to the SQS Queue.
EventBridge Schedule Group – SchedulerGroup
Groups and manages all schedule rules.
Scheduler Execution Role – SchedulerExecutionRole
Provides permissions for executing schedules.
SQS Message Role – SQSMessageRole
Allows sending messages to the queue.
Orchestrator Execution Role – OrchestratorExecutionRole
Enables the orchestrator to coordinate schedule executions.
EC2 Scheduler Execution Role – EC2SchedulerExecutionRole
Grants permissions to start/stop EC2 instances.
Distributor Execution Role – DistributorExecutionRole
Allows the distributor to send tasks to execution Lambdas.
Orchestrator Lambda – OrchestratorLambda
Main scheduling orchestrator function.
Orchestrator SQS Event Mapping – OrchestratorSQSEventMapping
Connects the Orchestrator Lambda to the SQS Queue.
EC2 Scheduler Lambda – EC2SchedulerLambda
Performs EC2 start/stop actions.
Distributor Lambda – DistributorLambda
Distributes execution requests to the appropriate Lambda functions.
Connect the Other Accounts
To enable the core Scheduler infrastructure to manage resources in other AWS accounts, deploy the provided CFT template in each account (or centrally using StackSets).
This template:
Creates an IAM role with the required permissions (e.g., EC2 start/stop).
Configures a trust policy that allows the core account to assume this role.
Applies resource-based policies to ensure secure cross-account acces
Deploy Child CFT as a StackSet
Sign in to the AWS Management Console in your management/organization root account.
Navigate to CloudFormation, select StackSets and click Create Stack.

Select Service-managed permissions as the Permission Model.
Use this URL to paste in template section.
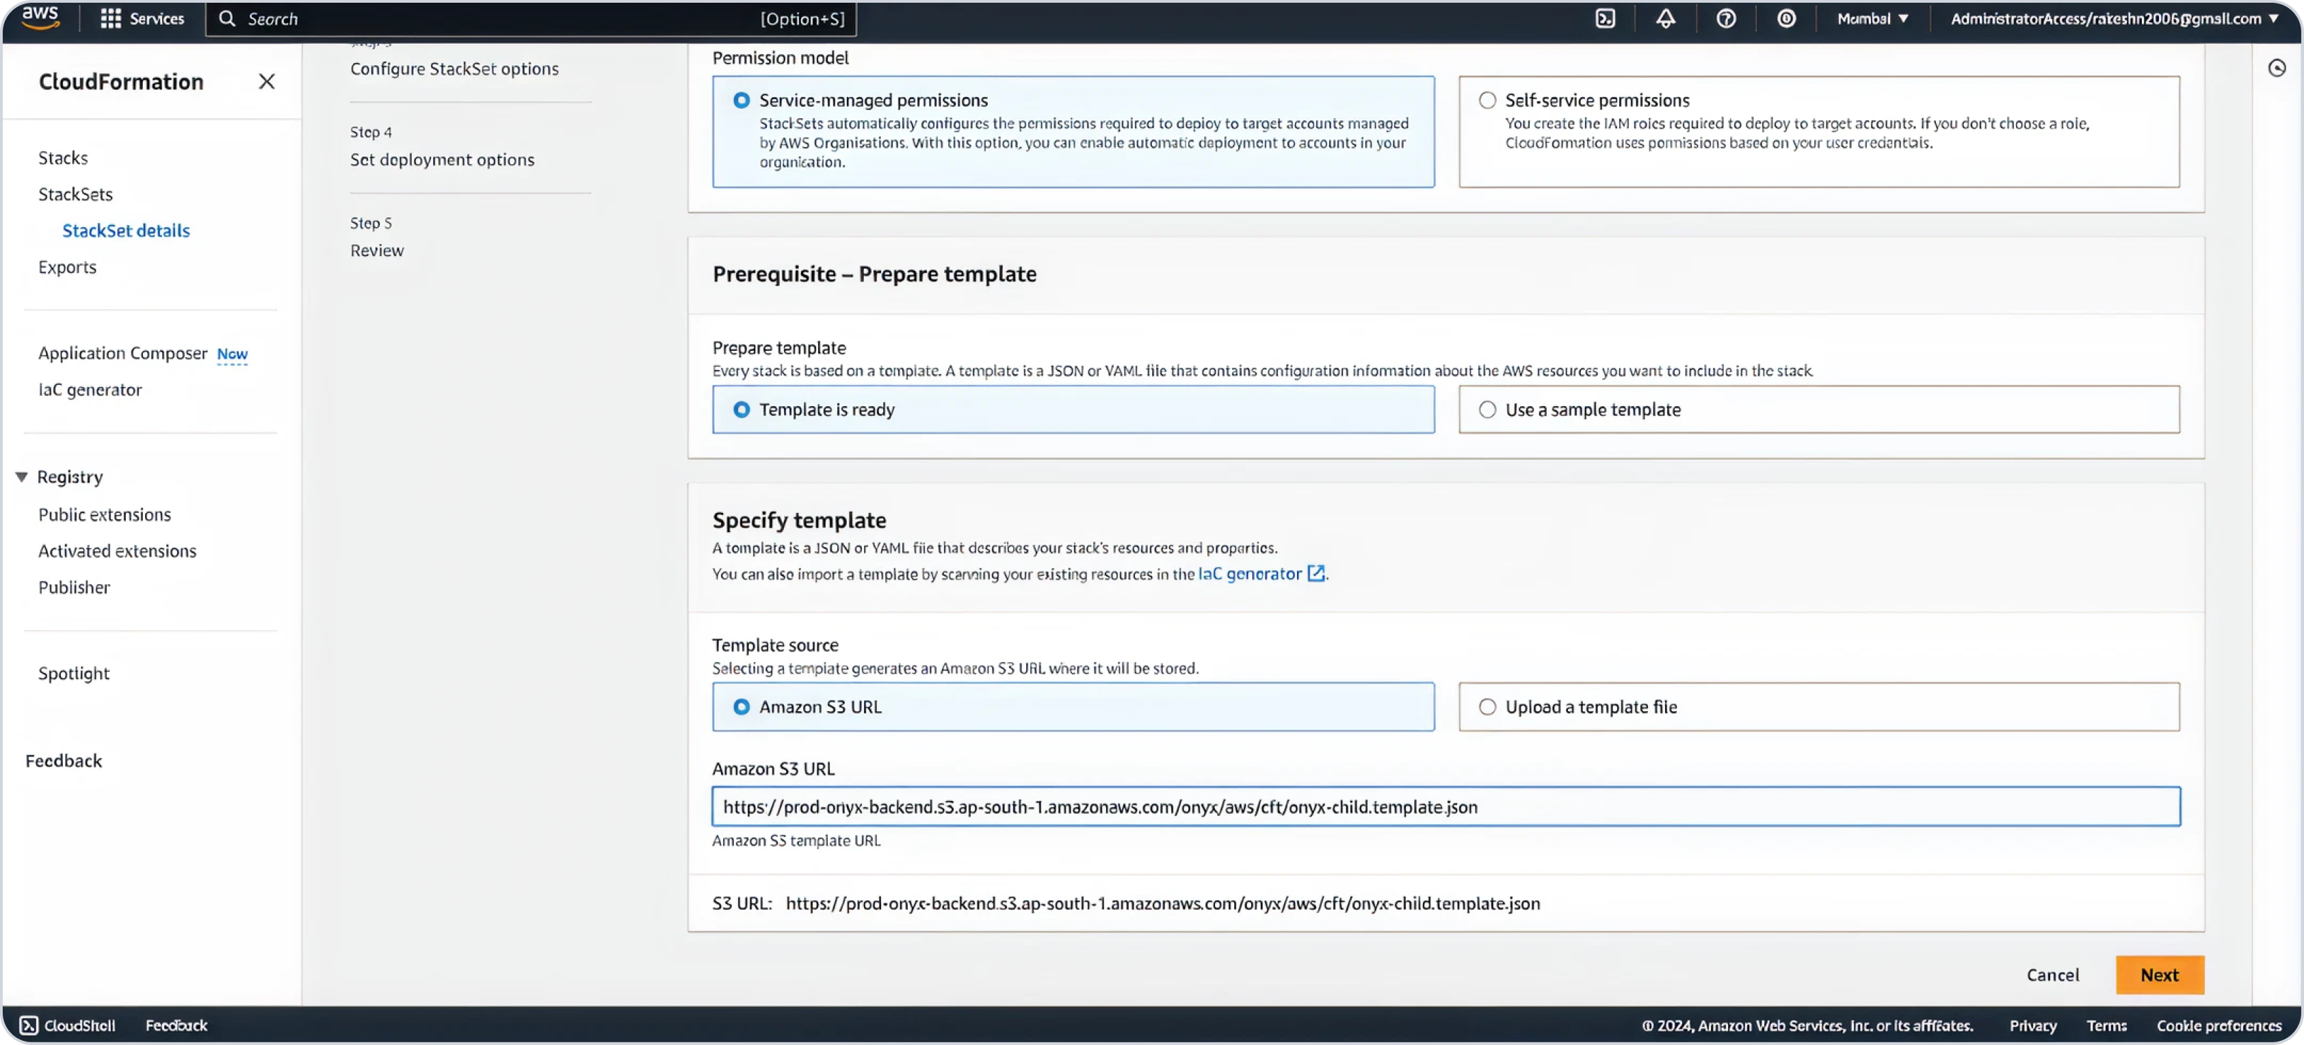
Select a Preferred Stack Name.
In the Parameters section, enter your Core Account ID where infrastructure is installed under
DelegateAccountIDsection.
Add any desired tags and click Next.
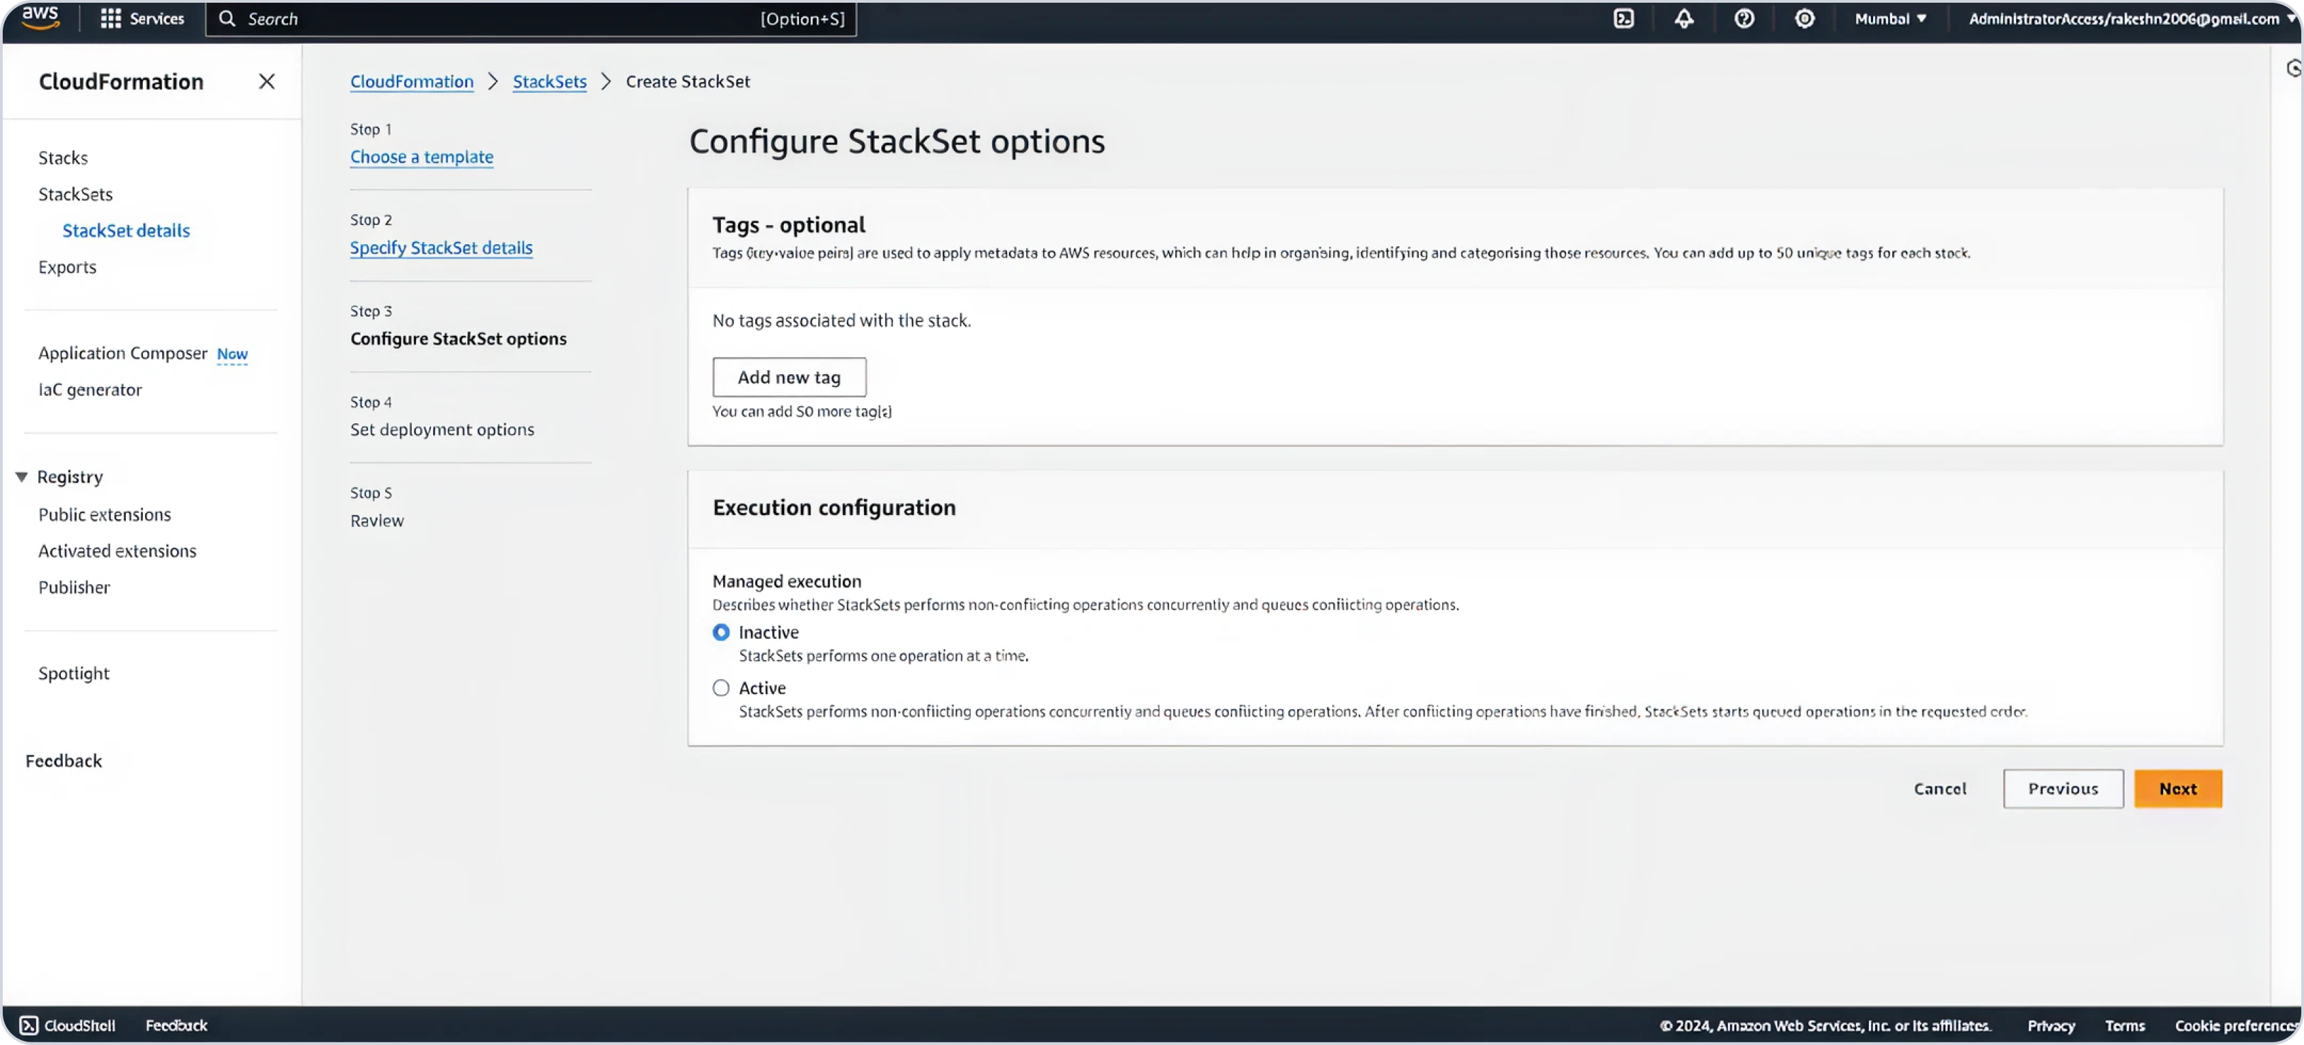
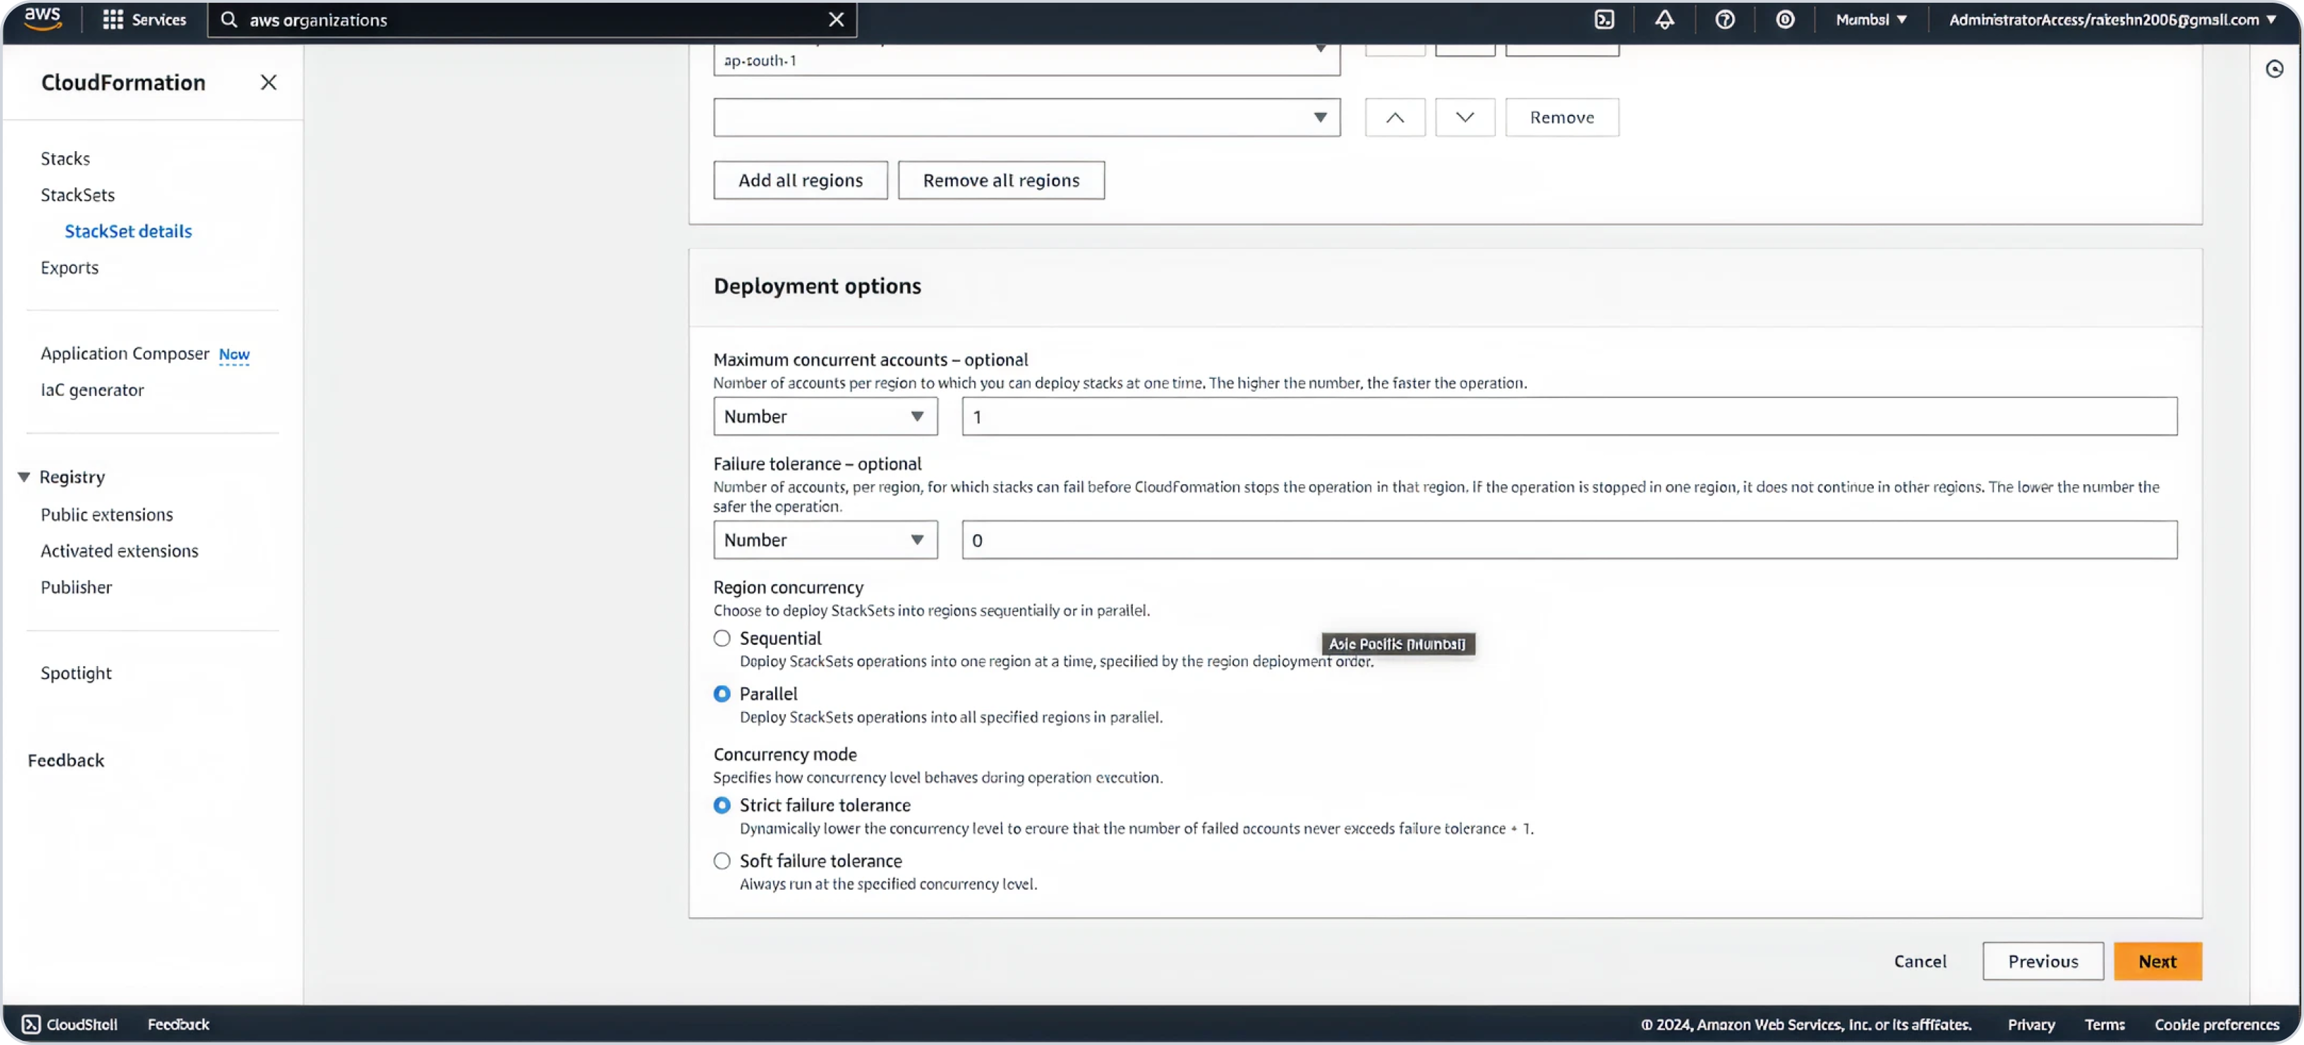
Select a region where you want to deploy the child stack.
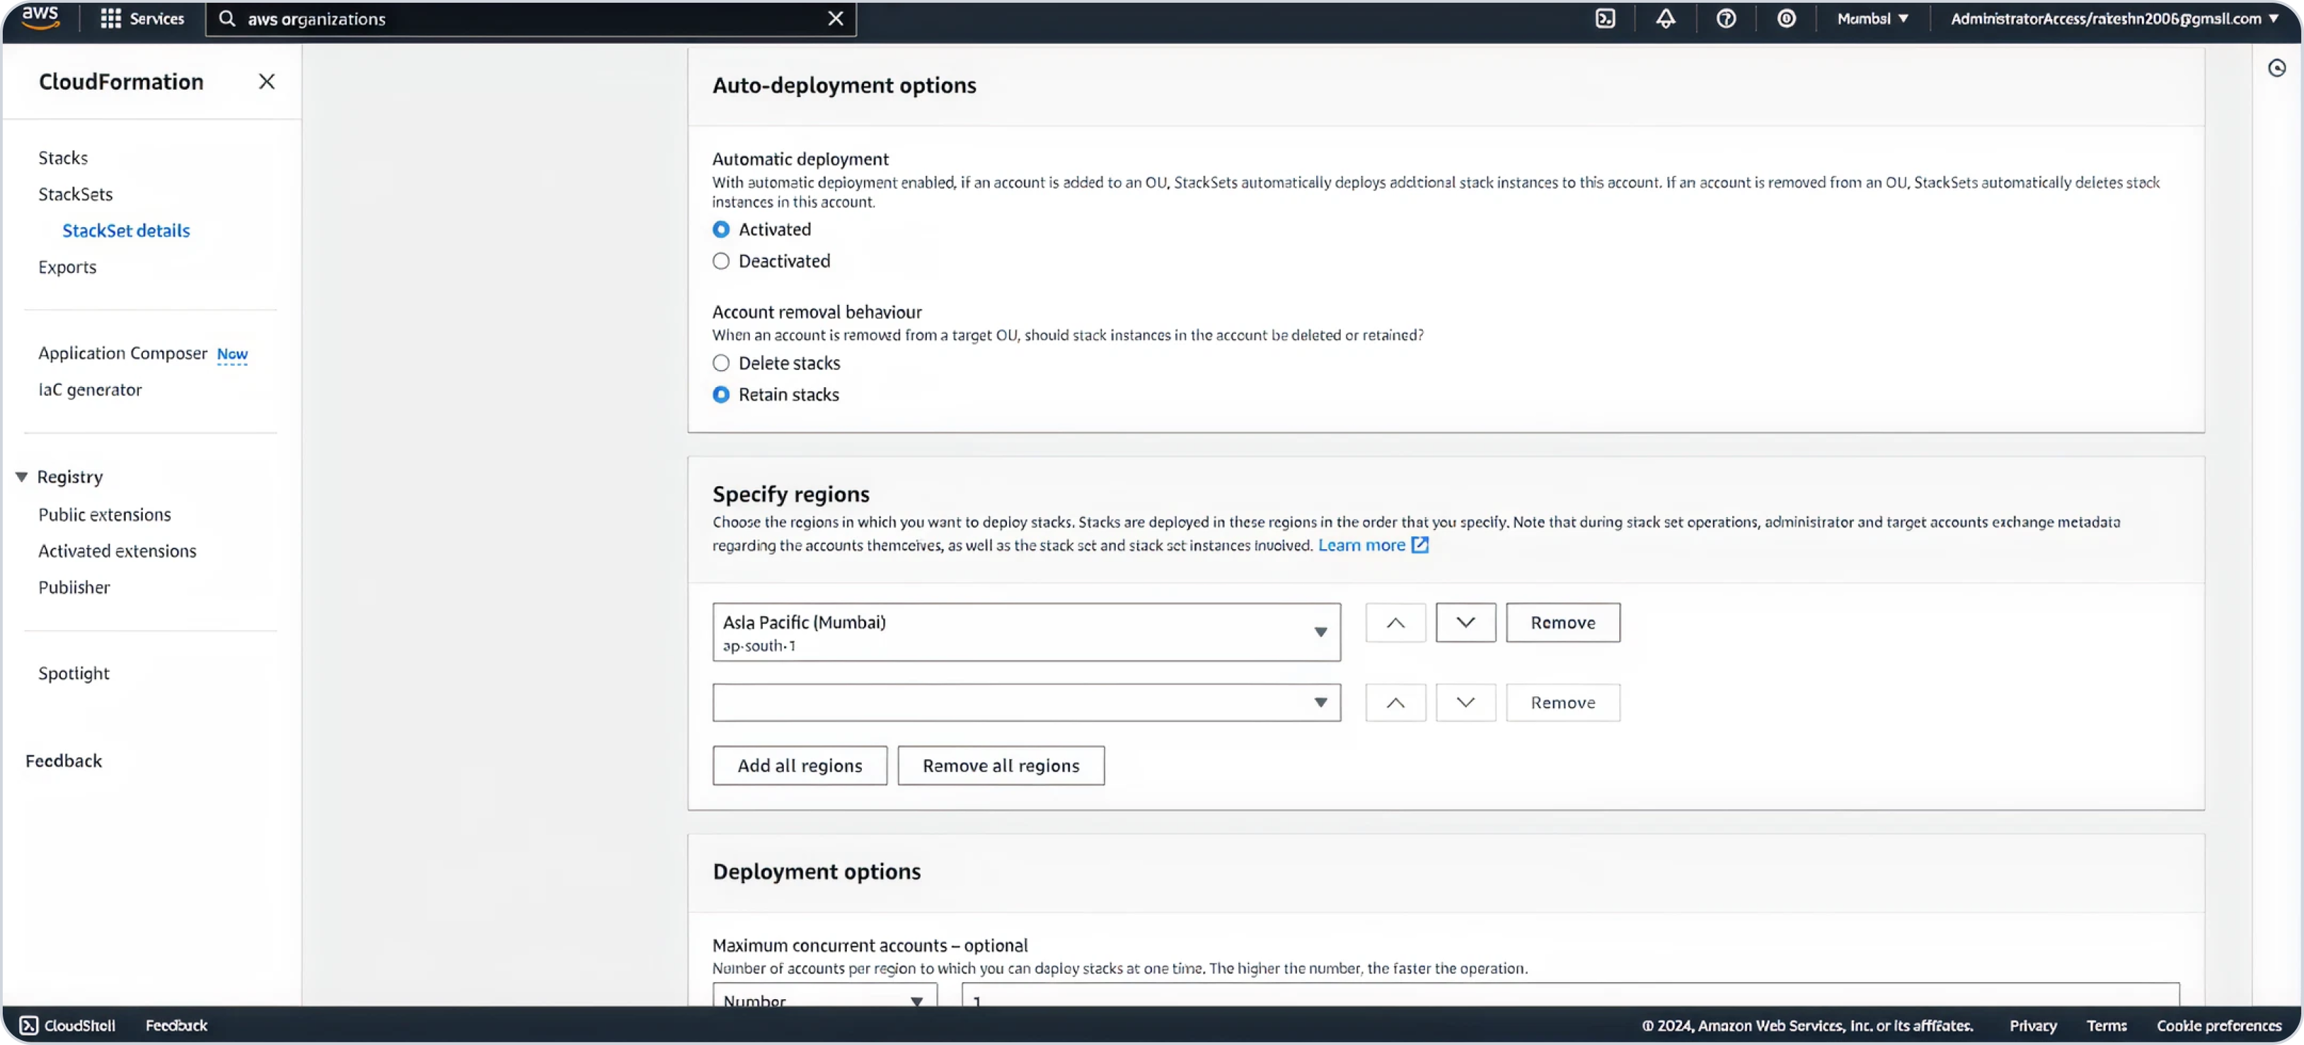
Define the maximum concurrent accounts linked in your organization. Select Parallel for region concurrency and click Next.
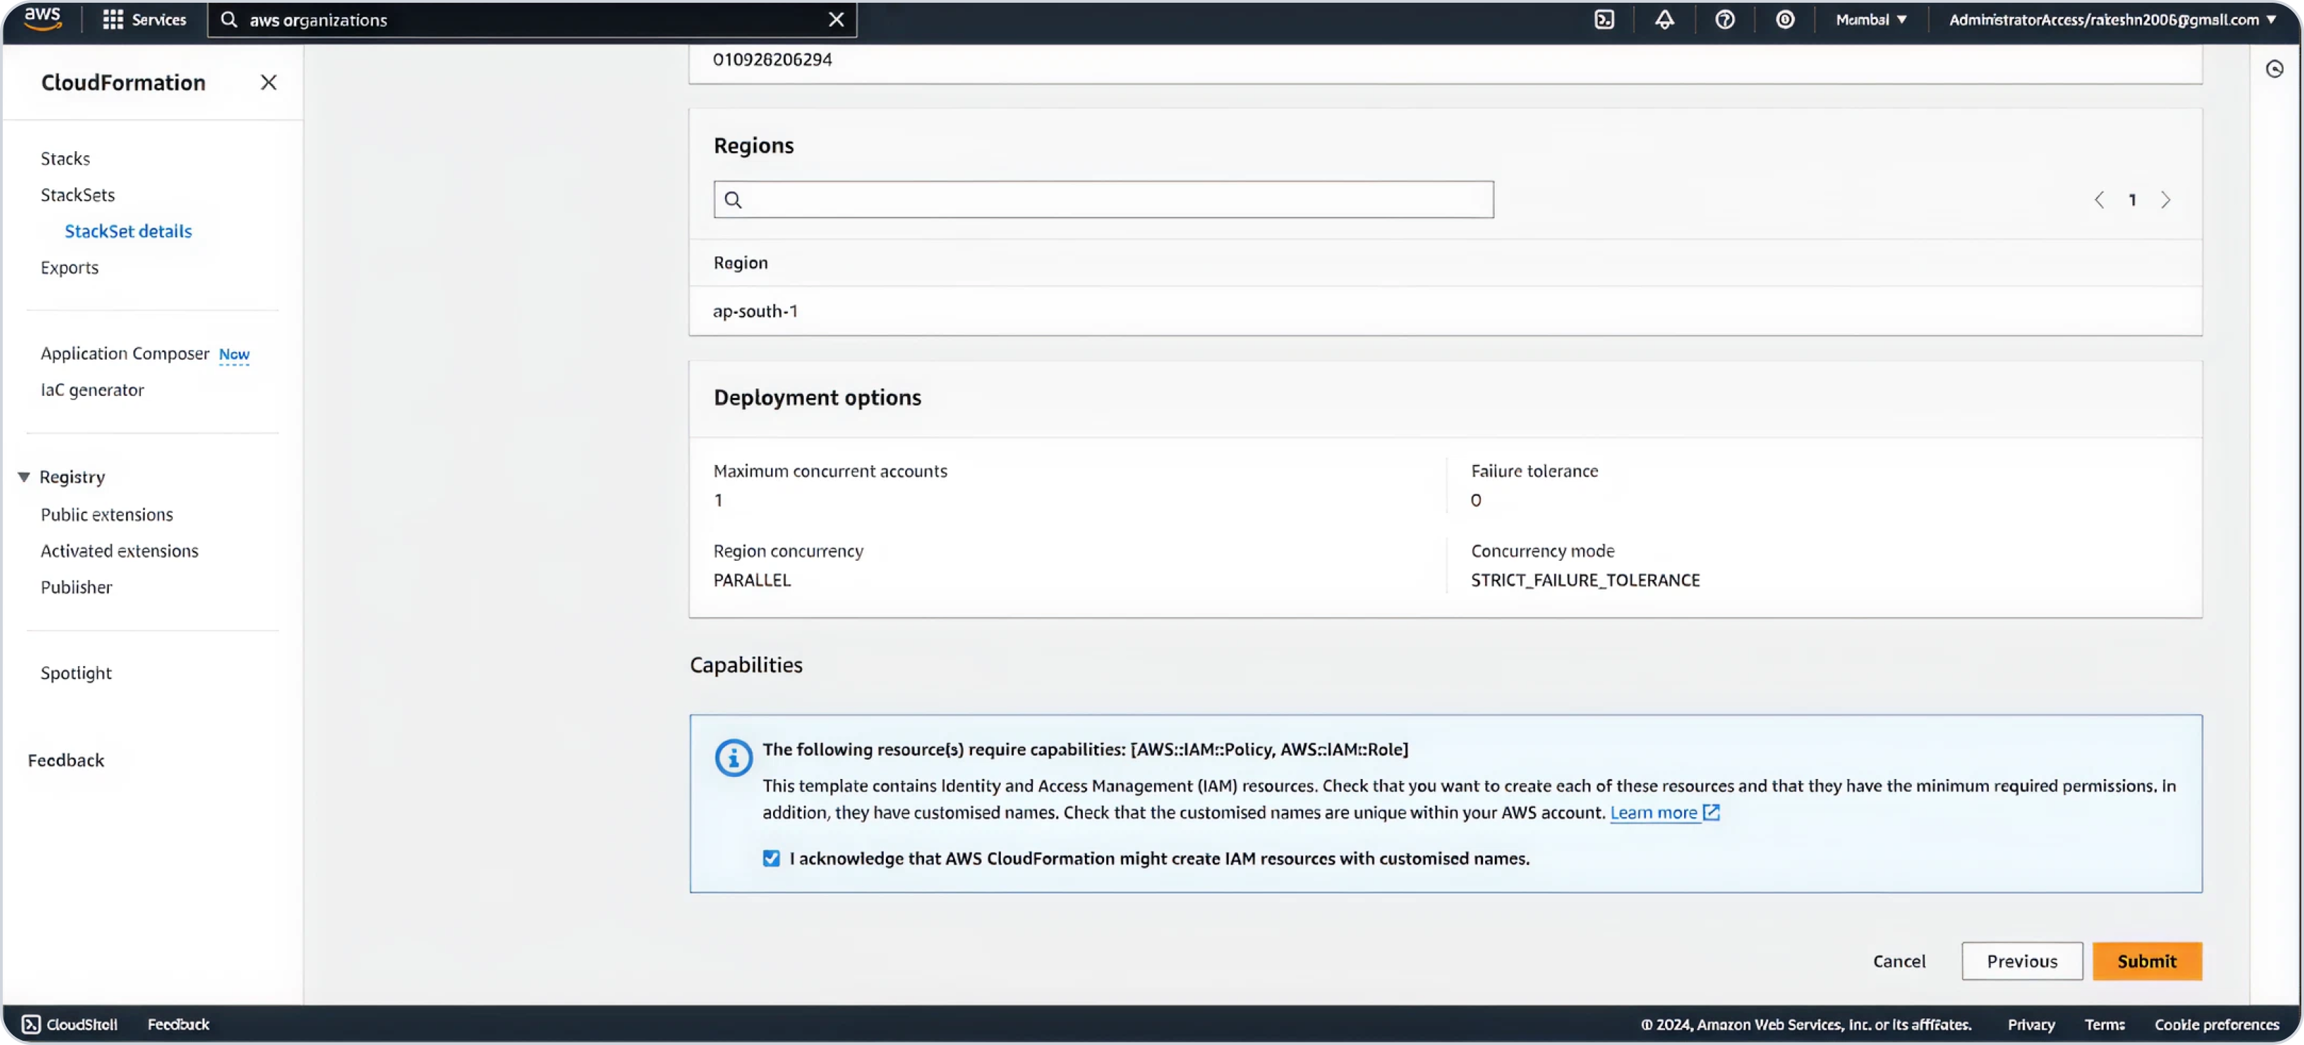
Acknowledge IAM role creation and click Submit.
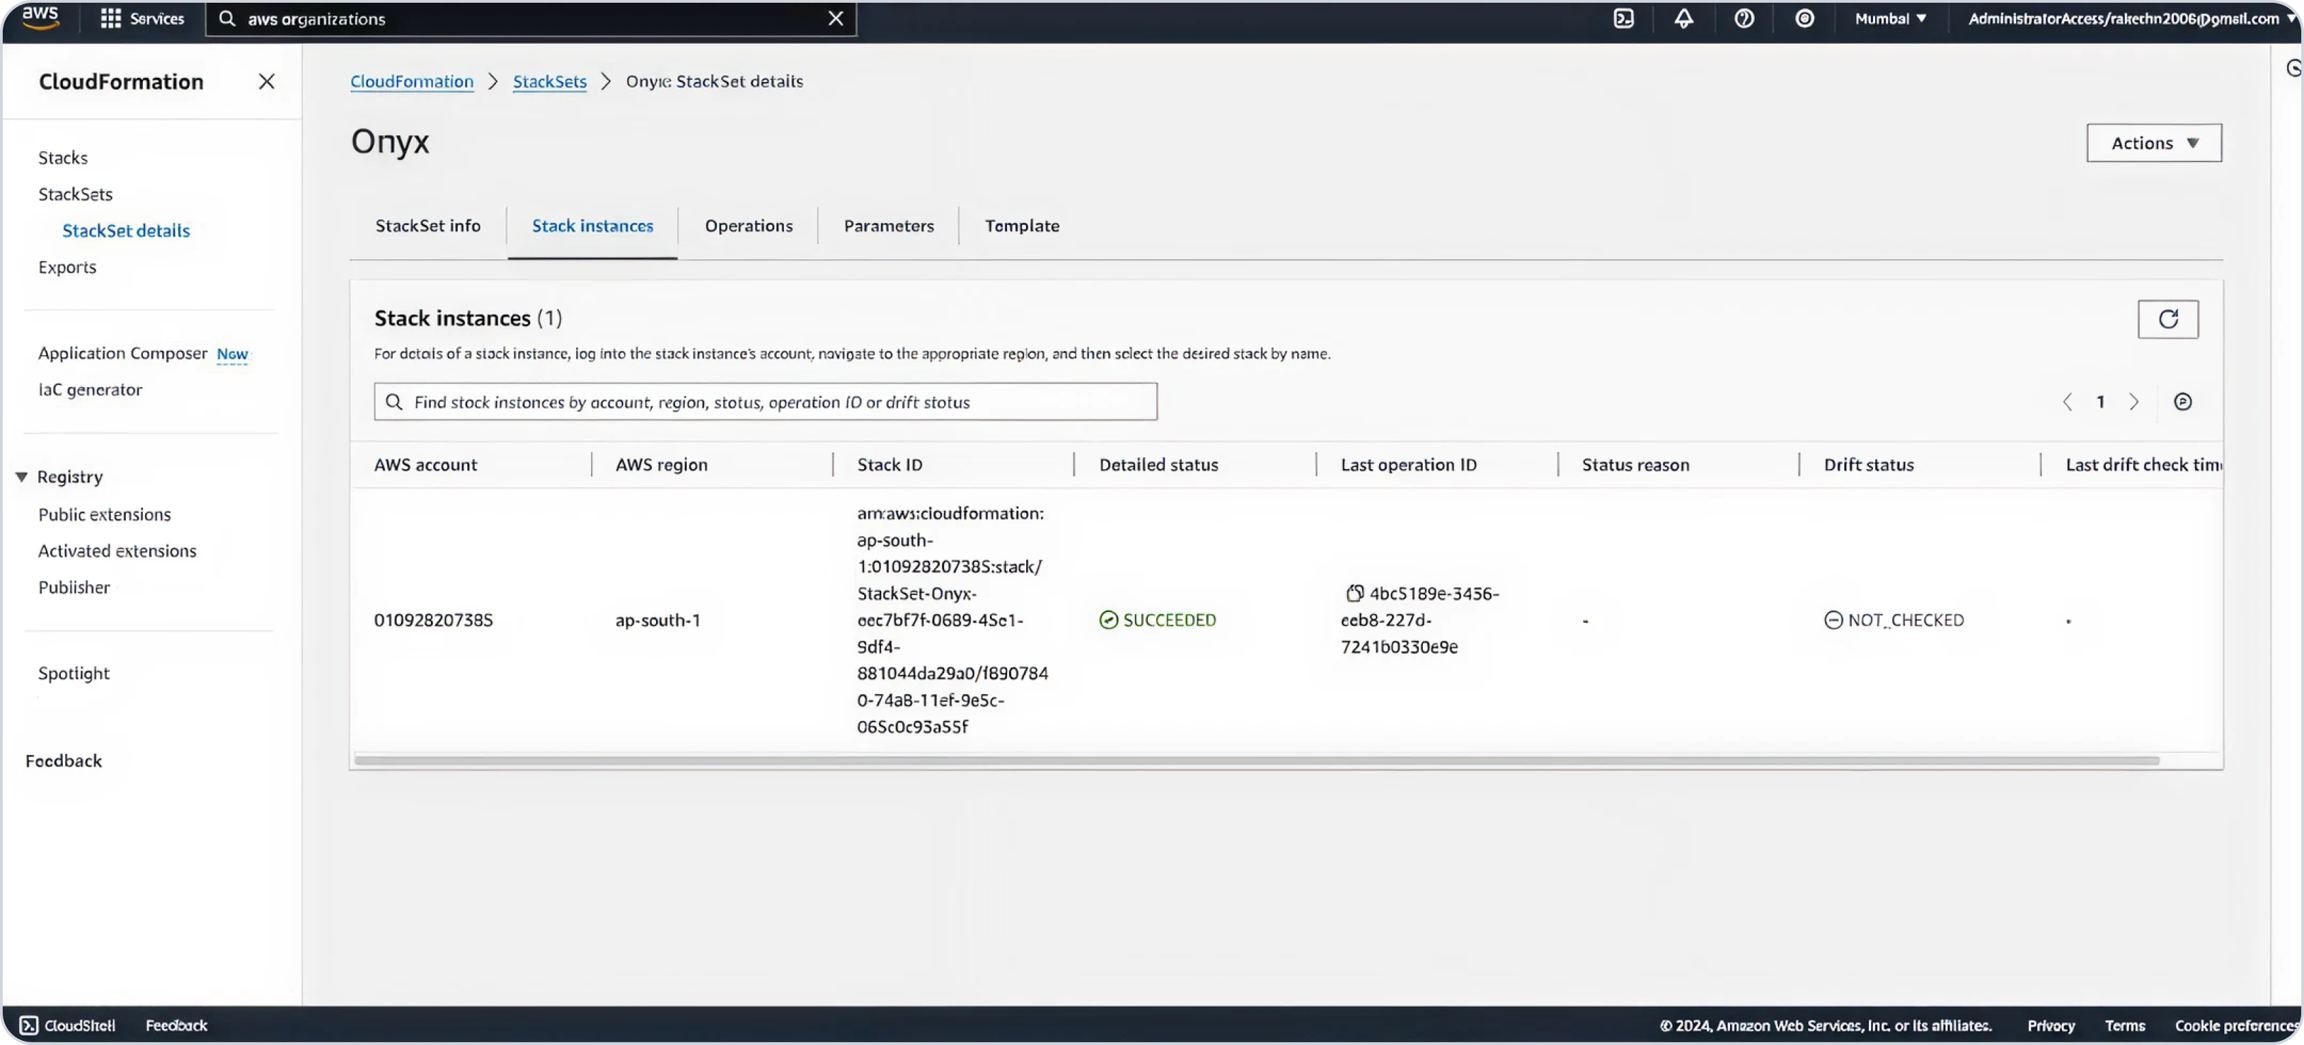
Allow deployment to complete.
Note
If you prefer connecting accounts individually instead of using a StackSet, you can deploy the Child Onboarding CFT as a CloudFormation stack in each account one by one.
Provide Account Details
Once you have deployed the Core Infrastructure and connected any Child Accounts, head back to the OneLens Scheduler Setup page.
Under Step 3 – Provide Account Details:
Click Enter.

Fill out the Account ID and Region for the account where you deployed the core infrastructure and Click on Save.

Click Finish to complete the setup.
After clicking Finish, your Scheduler will be fully operational. Next up, you learn about creating schedules in your OneLens account.
Last updated


